Webhook Trigger
The Webhook Trigger allows you to activate your AI agent when an HTTP request is received at a unique webhook URL. This enables your agent to respond to events from external systems, third-party services, or custom applications in real-time.
Overview
When a webhook event is received, your agent automatically processes the incoming data (body, query parameters, headers) and executes based on its configured instructions and tools. The webhook trigger supports both GET and POST HTTP methods, making it versatile for various integration scenarios.
Configure Webhook Trigger
Step 1: Add Webhook Trigger
- Go to DronaHQ → Agents → Triggers
- Click + Add Trigger
- Select Webhook from the available trigger types
Step 2: Basic Configuration
Name
- Enter a descriptive name for your webhook trigger (e.g., "Customer Support Webhook", "Payment Notification")
- This name helps you identify the trigger in your trigger list
Webhook URL
Each webhook trigger is assigned a unique URL endpoint. This URL is automatically generated and displayed in the configuration panel.
- Copy the webhook URL using the copy icon next to the URL
- Configure your external application or service to send HTTP requests to this URL
- The webhook URL supports both GET and POST methods
You will need to configure your application with this webhook URL to send events that will trigger your agent.
Step 3: Auto Populate Payload Data (Optional)
The "Auto populate payload data from a live webhook call" feature allows you to capture and visualize the structure of incoming webhook requests.
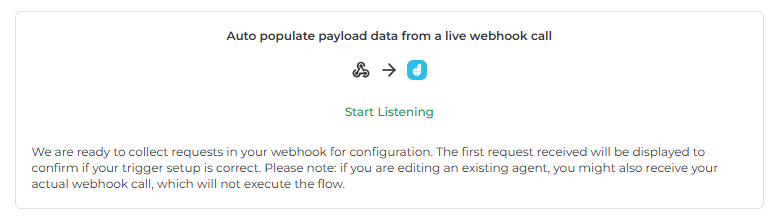
- Click Start Listening to begin capturing webhook requests
- Send a test request from your application to the webhook URL
- The first request received will be displayed to confirm your trigger setup is correct
If you are editing an existing agent, you might also receive your actual webhook call, which will not execute the flow during configuration.
This feature helps you:
- Understand the structure of incoming webhook data
- Verify that your webhook is receiving requests correctly
- Auto-populate the webhook input structure
Step 4: API Key (Authorization Token)
For secure webhook endpoints, you can generate an API key that must be included in webhook requests.
- Click Generate API Key to create a new authorization token
- Save your API key immediately - Once generated, you won't be able to see it again for security reasons
- You can regenerate a new API key at any time if needed
The agent will validate the API key before processing the request. Only requests with a valid API key will trigger your agent.
Using the API Key
Include the API key in your webhook requests using the api-key header:
Header Format:
api-key: <your-api-key>
Example cURL Request:
curl -X POST https://your-webhook-url \
  -H "api-key: your-generated-api-key-here" \
  -H "Content-Type: application/json" \
  -d '{"message": "Hello"}'
Make sure to save your API key somewhere safe. Once you generate it, you won't be able to see it again for security reasons. You can regenerate one at any time if needed.
Step 5: Configure Webhook Input
The webhook input is the data that will be passed to the agent. This section defines how incoming request data is structured and made available to your agent.
Raw Input Tab
Define the raw structure of your webhook payload:
{
  "body": {},
  "query": {},
  "headers": {}
}
- body: JSON payload from the request body (for POST requests)
- query: Query parameters from the URL (for GET requests)
- headers: HTTP headers from the request
Descriptive Input Tab
Provide a more descriptive, user-friendly representation of the webhook input structure.
- All header keys are normalized internally: hyphens (
-) become underscores (_), and uppercase letters become lowercase - Example:
Api-Key→api_key - The webhook expects headers in the standard HTTP format with hyphens (
-) - When accessing headers in your agent, use the normalized format (lowercase with underscores)
Example:
Incoming Header:
Content-Type: application/jsonAccess in Agent:
{{headers.content_type}}Incoming Header:
Api-Key: your-keyAccess in Agent:
{{headers.api_key}}
To maintain a continuous conversation with the agent, include a thread_id in the query parameters or request body. This allows the agent to maintain context across multiple webhook calls.
Example with thread_id:
{
  "body": {
    "message": "Hello",
    "thread_id": "a78053b2-4901-46c4-9190-7a56045939c3"
  },
  "query": {},
  "headers": {}
}
Step 6: Configure Message
The message section defines a message template for your agent, to pass in data from the webhook. This template formats the webhook data and presents it to your agent as context.
Write Tab
Create a message template that extracts and formats data from the webhook payload.
Template Syntax:
- Use double brackets to create template inputs:
{{...}} - Use
{{body.key}}to access values from the request body - Use
{{query.key}}to access query parameters - Use
{{headers.key}}to access header values (remember: use normalized format with underscores) - Use
{{$}}to include the full webhook document
Examples:
Extract specific fields:
User info: {{body.first_name}} {{body.last_name}}
Email: {{body.email}}
Order ID: {{body.order_id}}
Include the full document:
{{$}}
Or leave blank: Leave the message field blank to pass the entire webhook payload to your agent for processing.
Message Template Best Practices:
- Use specific field extraction (
{{body.field}}) when you want to format data for your agent - Use
{{$}}or leave blank when you want the agent to process the entire webhook payload - Combine static text with dynamic fields for better context:
"New order received: Order #{{body.order_id}} from {{body.customer_name}}"
Preview Tab
Preview how your message template will render with sample data.
Step 7: Configure Response
Define how your agent should respond to webhook requests. You have two main response types:
Response Types
1. Standard
- Returns a structured JSON response based on a JSON Schema
- Define the response structure using JSON Schema format
- The agent's output will be formatted according to this schema
- Best for: Synchronous responses with structured data
2. Stream (coming soon)
- Returns a streaming response for real-time data delivery
- Useful for long-running agent operations
- Requires a JSON Schema definition for the streamed response structure
- Best for: Real-time updates, progressive responses, or long-running tasks
No Response Option
None
- No response is sent back to the webhook caller
- Use this when you don't need to return data to the originating system
- Best for: Fire-and-forget scenarios where the agent processes data without responding
JSON Schema Guide
When configuring Standard or Stream response types, you need to define the structure of your webhook response using JSON Schema. Click on the JSON Schema Guide in the UI to access helpful resources and examples.
JSON Schema Version
Your response definition follows JSON Schema (Draft 2020-12).
Quick Start
Use the "Start with a Basic Schema" button in the UI to generate a template schema that you can customize for your needs.
Supported Features
The JSON Schema implementation supports:
- Basic types:
string,number,boolean,object,array - Nested objects: Define complex nested data structures
- Required fields: Specify which properties must be present
- Enums: Restrict values to a specific set of options
- AnyOf / OneOf / AllOf: Create flexible schemas with multiple options
- Pattern & length validation: Validate string formats and lengths
- Array rules:
minItems,uniqueItems, and other array constraints
Documentation Resources
For more information about JSON Schema:
- JSON Schema Spec - Official JSON Schema specification
- Beginner Tutorial - Learn JSON Schema step by step
- Understanding JSON Schema - Comprehensive guide to JSON Schema
Example JSON Schema
Here's a simple example of a JSON Schema for a text response:
{
  "$schema": "https://json-schema.org/draft/2020-12/schema",
  "title": "Text Response",
  "type": "object",
  "description": "A simple text response returned from your webhook.",
  "properties": {
    "type": {
      "const": "text",
      "description": "Indicates that this response contains plain text."
    },
    "text": {
      "type": "string",
      "description": "The text content shown to the end user."
    }
  },
  "required": ["type", "text"],
  "additionalProperties": false
}
More Complex Example
Here's a more comprehensive example with multiple fields:
{
  "$schema": "https://json-schema.org/draft/2020-12/schema",
  "title": "Webhook Response",
  "type": "object",
  "description": "Structured response from webhook-triggered agent.",
  "properties": {
    "status": {
      "type": "string",
      "enum": ["success", "error", "pending"],
      "description": "Response status"
    },
    "message": {
      "type": "string",
      "description": "Response message"
    },
    "data": {
      "type": "object",
      "description": "Response data",
      "properties": {
        "order_id": {
          "type": "string",
          "description": "Order identifier"
        },
        "amount": {
          "type": "number",
          "description": "Order amount"
        }
      }
    },
    "timestamp": {
      "type": "string",
      "format": "date-time",
      "description": "Response timestamp"
    }
  },
  "required": ["status", "message"],
  "additionalProperties": false
}
Step 8: Test and Save
- Click Test to verify your webhook configuration with sample data
- Review the test results to ensure data flows correctly
- Click Save to save your webhook trigger configuration
- Click Docs to view additional documentation and examples
Accessing Webhook Data in Your Agent
When your agent is triggered via webhook, it receives the webhook data as context. You can reference this data in your agent instructions and tool calls:
- Body data:
{{body.key}}or{{body.nested.key}} - Query parameters:
{{query.param}} - Headers:
{{headers.header_name}}(note: use underscores, not hyphens, and lowercase)
Header Access Format:
- Headers are normalized: hyphens become underscores, uppercase becomes lowercase
- Example:
Content-Typeheader → access as{{headers.content_type}} - Example:
Api-Keyheader → access as{{headers.api_key}}
Example Agent Instruction:
When a webhook is received, extract the user's email from {{body.email}} and
their order ID from {{body.order_id}}. Check the content type from {{headers.content_type}}.
Use the Gmail tool to send a confirmation email to the user about their order.
Use Cases
- Third-party Integrations: Connect with external services like payment processors, CRM systems, or monitoring tools
- Custom Application Events: Trigger agents from your own applications via API calls
- Real-time Notifications: Process alerts, notifications, or events as they occur
- Data Synchronization: Sync data between systems when events happen
- Workflow Automation: Start complex workflows based on external events
Best Practices
- Secure Your Webhook: Always use API keys for production webhooks
- Validate Input: Ensure your agent instructions handle missing or malformed webhook data
- Use Thread IDs: Include
thread_idin webhook payloads for conversational agents - Test Thoroughly: Use the "Start Listening" feature to test with real webhook calls
- Monitor Logs: Review agent execution logs to debug webhook-triggered executions
- Handle Errors: Configure error handling in your agent instructions for failed webhook processing