Database Editor UI
The Database Editor UI makes it easy to work with your stored data, which is organized like tables, fields, and records. You can create and manage tables without needing to write complicated SQL queries. Customize how your data looks, like setting if a field can be empty or must be unique. Whether you're starting from scratch or bringing in data from a CSV file, the Editor has tools to help you easily see and manage how your data is structured.
Create tables
You can choose to create a table from scratch or import existing data in CSV format.
To create a table from scratch, navigate to the table menu (represented by a hamburger icon in the top left corner) and click the + New button. Then, specify the field names, their data types, and attributes like nullable, unique, and default values to create the table schema.
Import CSV
The Import CSV option lets you either create a new table using the CSV data or add/append the CSV data to an existing database table.
To create a new table from the csv data, navigate to the table menu (represented by a hamburger icon in the top left corner), click the + New button, and then select Import From CSV option located at the top of the sidebar.
To import csv data within an exsiting table, open the table of your choice, and then click on the Import CSV button located at the top of the table view next to the + Row button.
Drop your CSV file or manually select the file using the browse file button.
The maximum upload size for a CSV file is 5MB. And make sure the data you want to import is in CSV format as XLSX format is not supported.
Importing CSV in new table
Set the table name as per your preference; by default, it takes the name of the uploaded CSV file. In the schema mapping section, you can see the CSV columns and their corresponding Database column names, which you can edit. Additionally, you can set the data type for each column, with the default being text.
When mapping a CSV column to a specific data type, if any value in that column cannot be converted, the system skips the type conversion process and sets the column data type to text.
Importing CSV in existing table
When a CSV is uploaded, the system automatically attempts to match the CSV columns with the existing table columns. You can select which CSV column should be mapped to its corresponding database column, and you also have the option to toggle off specific CSV columns to exclude them from the import process.
Make sure you import at least one csv column from the csv data, and multiple csv columns cannot be mapped to same database column.
Import settings
Column Heading - When toggled on, the column heading treats the first row as CSV columns header and the subsequent rows as data. When toggled off, it treats all rows as CSV data.
Quickly view table schema
Access the table list in the table menu, and click on the right arrow (chevron) icon before the table name to view the table schema. The schema view contains table columns and their corresponding data types.
Add or edit records
You can add a row by either clicking the + Row option or by directly typing in the last row and pressing 'Tab' or 'Enter' to create a new row. To modify any field value, simply click on the cell, edit its content, and upon focusing out from that field, the modified value will be automatically reflected to the database if it's a valid entry.
Create, edit and delete fields
To add fields to the table, simply click on the + Column option. Specify the name, data type, and configure advanced properties such as nullable, unique, and default values for the field type. Additionally, you can rename, modify the data type, or adjust properties of any field by clicking on the chevron icon located to the right of the field name. If any field is no longer needed, it can also be deleted.
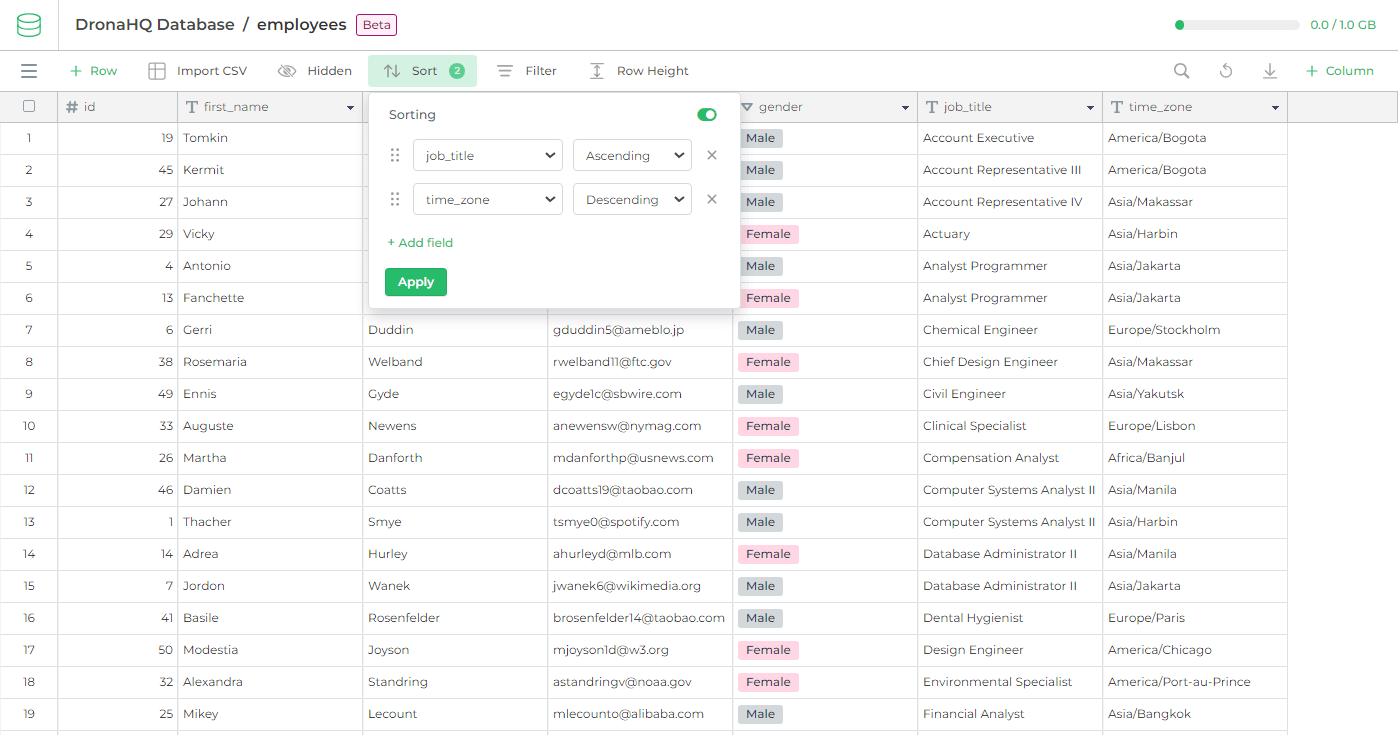
Sort records
You can sort records by multiple fields in ascending or descending order. Click the Sort button to choose fields and specify the sort order. Adjust the order of sorting fields by dragging them to the desired position. Click Apply to sort records. The Sort button remains active while sorting is applied and displays the number of sorting options in use. To disable sorting, either switch off the toggle at the top right corner of the Sort UI interface, or manually remove all sorting options and click Apply again.
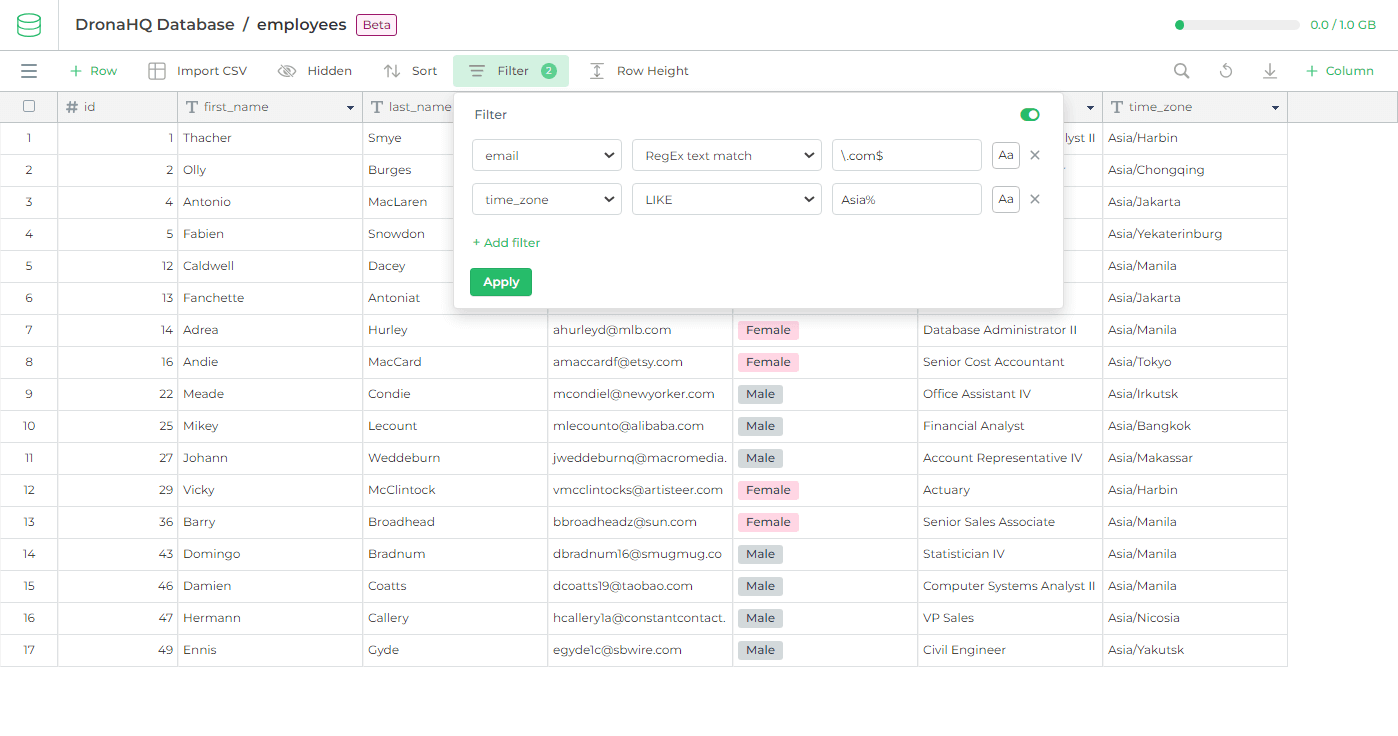
Filter records
You can filter records by defining filter conditions to display only those records that match the filtering criteria. Click the Filter button to select fields, choose a filter condition, and define the value for applying the filter. Click Apply to filter records. The Filter button stays active during filtering and shows the number of filtering conditions applied. To disable filtering, either switch off the toggle at the top right corner of the Filter UI interface or manually remove all filtering options and click Apply again.
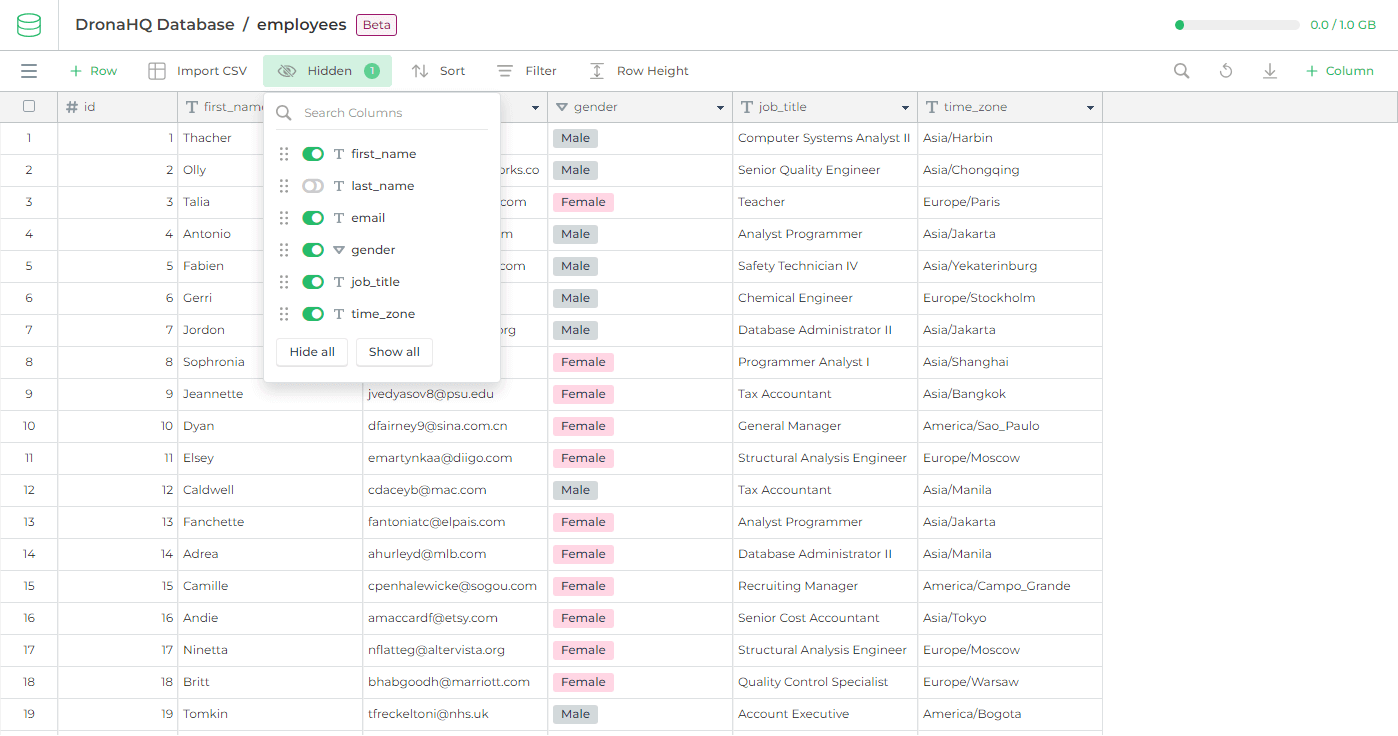
Customize view options for fields
You can control the visibility of fields in the table using the Hidden button. This allows you to hide fields you don't need in the table view and easily bring them back when necessary. You can also rearrange the order of fields by dragging them. The Hidden button remains active if any fields are hidden and displays the number of hidden fields.
The id field cannot be hidden from the table view, as it is used by the system to uniquely identify a record in the table.
Customize row height to work with extensive field values
The Row Height option allows you to adjust the row size, enabling comfortable viewing of extensive field values without the need of manual field resizing. By default, the row height is set to 'small,' but you can easily switch to 'medium,' 'large,' or 'extra large' options from the dropdown menu.
Paginate records
The system automatically adds pagination UI when there are more than 50 records in a table. Navigate between record pages using next, previous, first, and last buttons, or jump directly to a specific page by entering the page number in the input field. By default, 50 records are shown per page, but you can customize it to 100, 500, or 1000 records per page. On the right corner of the ui, you can see the range of records displayed against the total records in the table.