Facebook Messenger Trigger
The Facebook Messenger Trigger allows your AI agent to respond automatically when users send messages on Facebook Messenger.
It enables you to build conversational agents for customer support, FAQs, lead qualification, order tracking, and guided workflows—directly inside Facebook Messenger.
This trigger integrates with Meta's Messenger Platform API and works entirely through secure webhooks.
Overview
When a Facebook Messenger message is received:
- Meta sends the message event to your webhook
- The Facebook Messenger trigger activates
- Message context (sender, content, metadata) is created
- Your agent executes its instructions
- The agent can reply back to the same Messenger conversation
Each user's incoming message is handled independently, while still allowing you to maintain conversational continuity.

When Should I Use Facebook Messenger Trigger?
Use this trigger when:
- Users should interact with your agent via Facebook Messenger
- Conversations happen in real time
- Human-like responses are required
- You want to engage with your Facebook Page audience directly
Common use cases
- Customer support & helpdesk
- FAQ automation
- Lead qualification
- Order updates & tracking
- Appointment booking
- Conversational onboarding
- Social media engagement
- Community management
Configure Facebook Messenger Trigger
Step 1: Add Facebook Messenger Trigger
- Go to DronaHQ → Agents → Triggers
- Click + Add Trigger
- Select Facebook Messenger
Step 2: Basic Configuration
Name
- Provide a descriptive name
Examples:Customer Support – MessengerOrders Bot – MessengerLead Gen – Messenger
- Helps identify the trigger in logs and UI
- Required field
Webhook URL
Each Facebook Messenger trigger generates a unique webhook URL.
- Copy this URL from the configuration panel
- Go to Meta for Developers
- Paste it into Meta → My Apps → [Select Your App] → Use cases → Messenger from Meta → Messenger API Setup → Configure webhooks
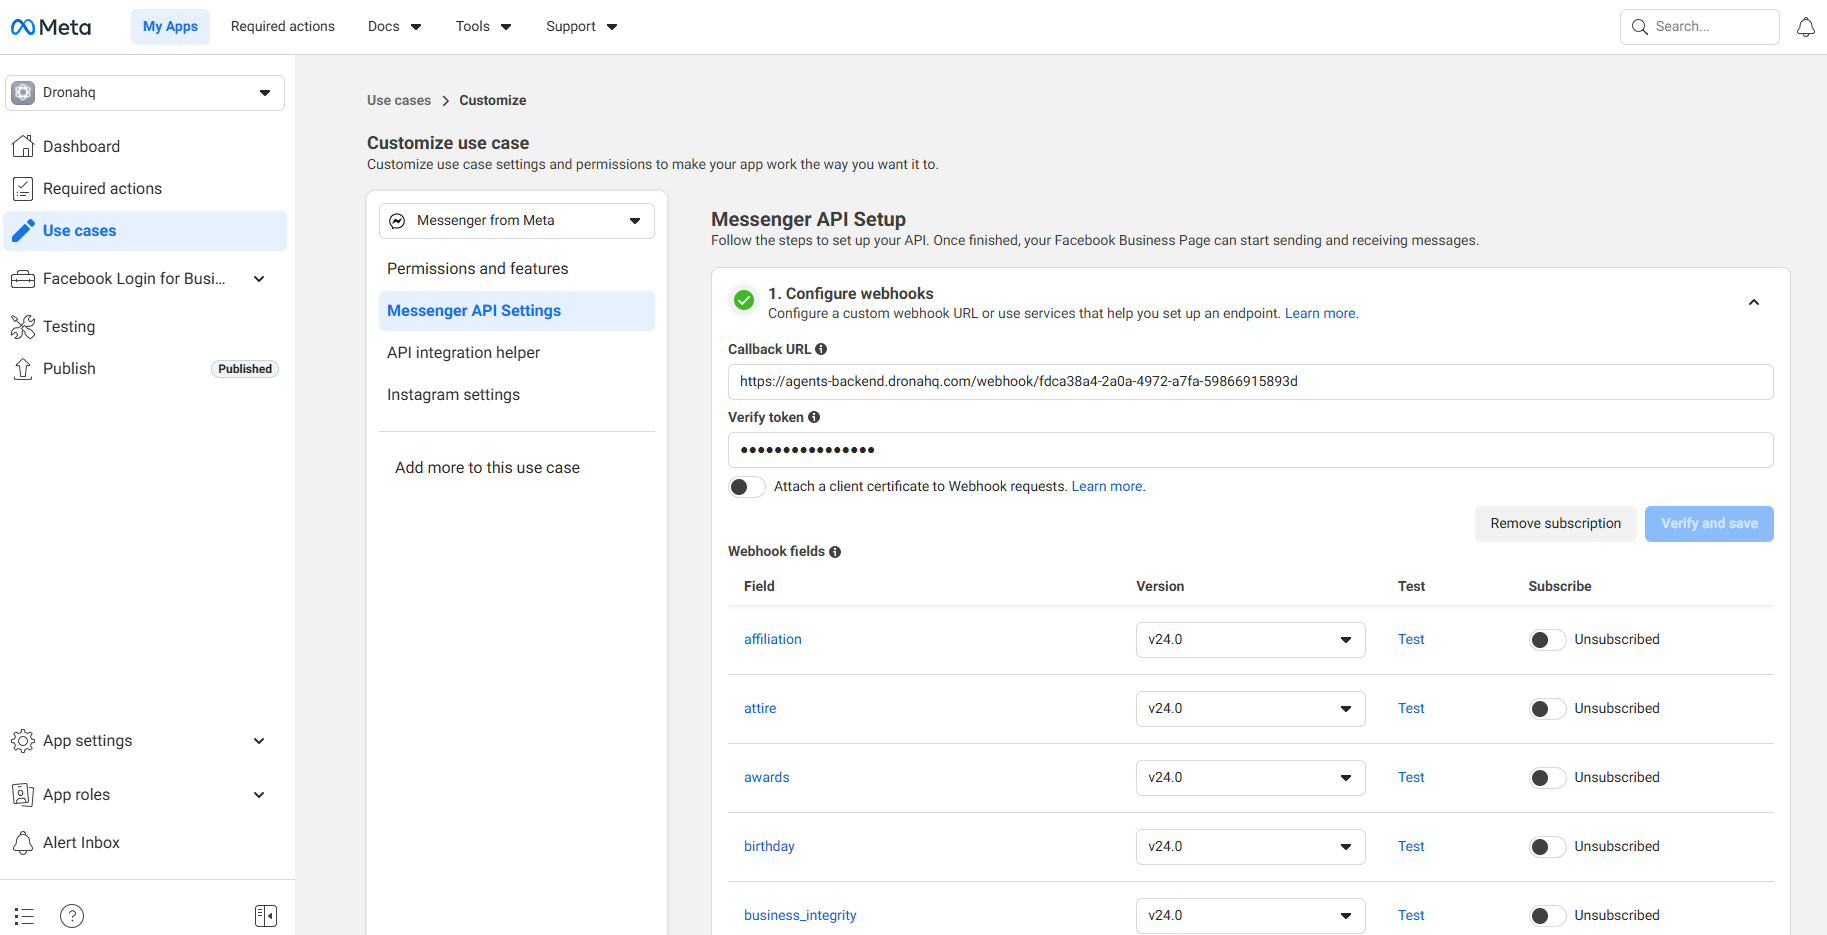
Facebook Messenger Webhook Configuration - This is where Meta sends incoming Messenger message events

Your agent will only receive Facebook Messenger messages after this webhook is configured and verified in Meta.
Verify Token
A verification token used once by Meta to confirm webhook ownership.
- Copy the Verify Token from the trigger
- Paste it into Meta → My Apps → [Select Your App] → Use cases → Messenger from Meta → Messenger API Setup → Configure webhooks → Verify Token
- Required during webhook verification
Verified Status
Shows whether Meta has successfully verified your webhook.
- Not Verified → Webhook not connected
- Verified → Ready to receive Facebook Messenger messages
- Click Check status to refresh
A timestamp is shown once verification is complete.
Meta App Secret (Optional)
Used to validate webhook signatures sent by Meta.
- Found in Meta → My Apps → Settings → Basic → App Secret
- Helps ensure requests truly come from Meta
- Toggle visibility using the eye icon
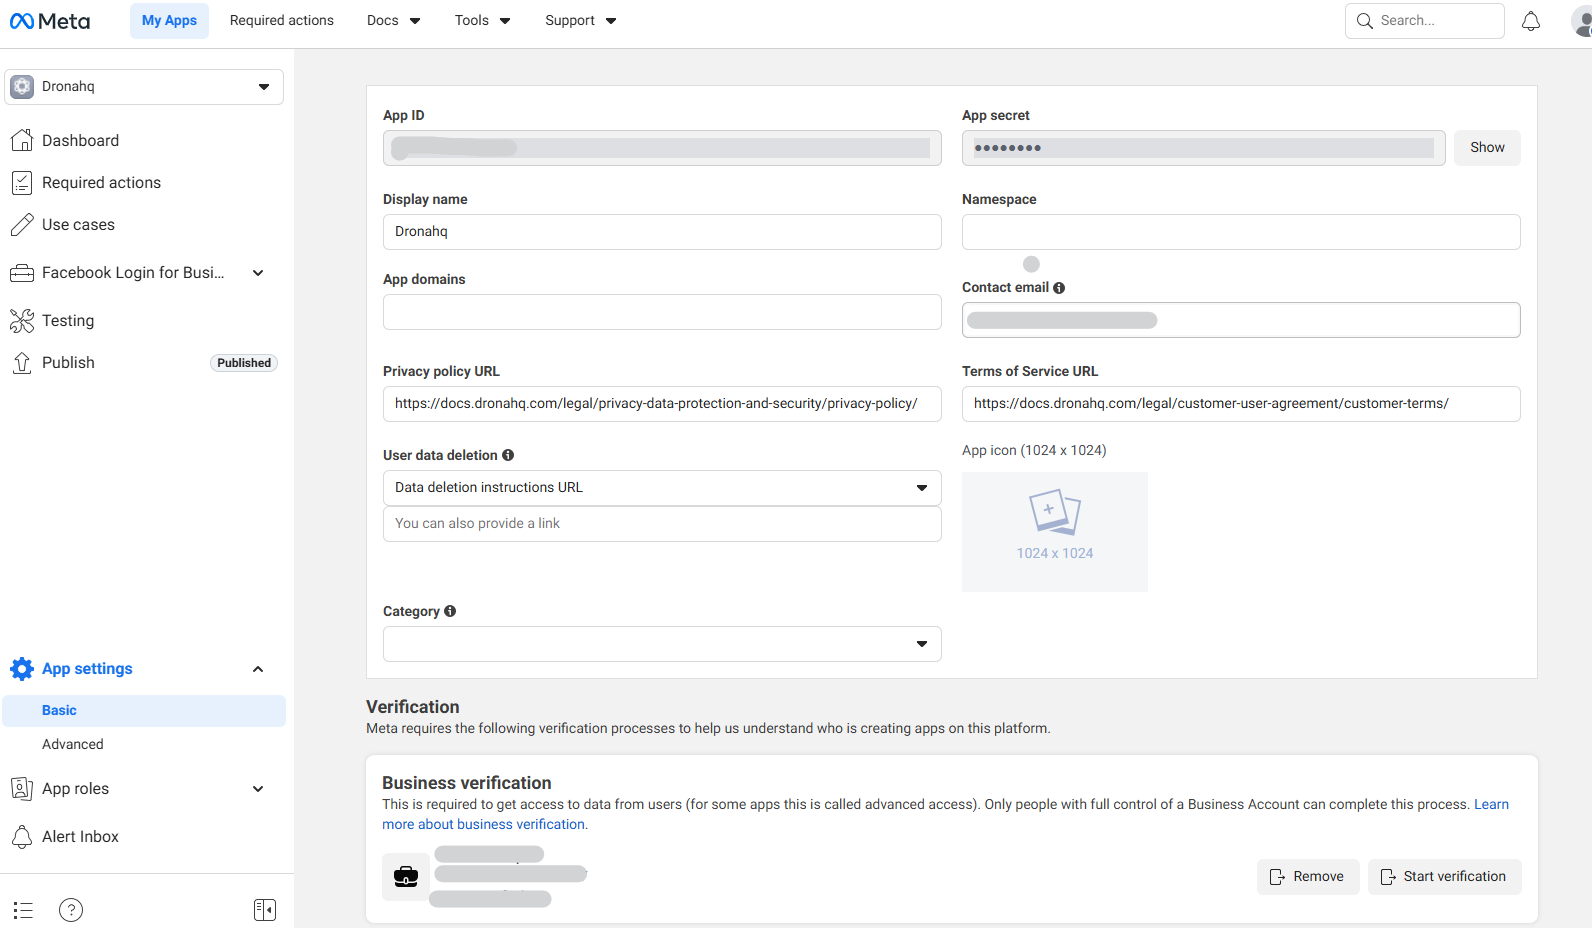
Highly recommended for production use to prevent spoofed webhook calls.
Step 3: Auto Populate Payload Data (Optional)
The Auto populate payload data from a live Facebook Messenger call feature helps you inspect real message payloads.
- Click Start Listening
- Send a message to your Facebook Page
- The first incoming payload is captured and displayed
This helps you:
- Understand Messenger payload structure
- Confirm webhook connectivity
- Auto-fill input schemas
While editing an existing agent, real messages may be captured but will not execute the agent during configuration.
Step 4: Webhook Input (Facebook Messenger Payload)
Facebook Messenger messages follow Meta's webhook structure.
Raw Input (Example)
{
  "object": "page",
  "entry": [
    {
      "id": "PAGE_ID",
      "time": 1504902988,
      "messaging": [
        {
          "sender": {
            "id": "USER_PSID"
          },
          "recipient": {
            "id": "PAGE_ID"
          },
          "timestamp": 1504902988,
          "message": {
            "mid": "mid.$cAAE1QiBYk6pr6s_1PdB5jvfmMwca",
            "text": "Hello"
          }
        }
      ]
    }
  ]
}
Important Fields
Sender
entry[0].messaging[0].sender.id→ Facebook user PSID (Page-Scoped ID)entry[0].id→ Facebook Page ID
Message
entry[0].messaging[0].message.mid→ Message ID (required for replies)entry[0].messaging[0].message.text→ Message contententry[0].messaging[0].message.attachments→ Media attachments (images, videos, files)entry[0].messaging[0].message.quick_reply→ Quick reply payloadentry[0].messaging[0].timestamp→ Time received
Metadata
entry[0].id→ Your Facebook Page IDobject→ Always "page" for Messenger messages
Step 5: Configure Message (Agent Context)
The Message section defines what context your agent receives.
Write Tab
Use templates to extract relevant data.
Template Rules
- Use
{{...}}for placeholders - Use dot notation for nested fields
- Array indices are supported
Recommended Template
New Facebook Messenger message received.

From: {{entry[0].messaging[0].sender.id}}
Page ID: {{entry[0].id}}

Message:
{{entry[0].messaging[0].message.text}}

Message ID:
{{entry[0].messaging[0].message.mid}}
Full Payload Option
{{$}}
Preview Tab
Shows exactly how your agent will receive the formatted message.
Use this to:
- Verify placeholders
- Confirm message text extraction
- Avoid runtime issues
Step 6: Save Configuration
- Ensure webhook is Verified
- Review message template preview
- Click Save
Once saved, incoming Facebook Messenger messages will trigger your agent.
Accessing Facebook Messenger Data in Agent Instructions
Common references:
Sender PSID
{{entry[0].messaging[0].sender.id}}Page ID
{{entry[0].id}}Message Text
{{entry[0].messaging[0].message.text}}Message ID
{{entry[0].messaging[0].message.mid}}Timestamp
{{entry[0].messaging[0].timestamp}}Quick Reply Payload
{{entry[0].messaging[0].message.quick_reply.payload}}
Example Agent Instruction
When a Facebook Messenger message is received:
- Read the user's message
- Use the Message ID to reply
- Respond politely and clearly
- Maintain conversational context
- Handle media attachments if present
- Support quick reply buttons when appropriate
Best Practices
- Verify webhook before production use
- Always store and reuse Message IDs
- Handle different message types (text, images, videos, files, quick replies)
- Keep responses short and conversational
- Test using real Facebook Messenger messages
- Secure your Meta App Secret
- Monitor webhook verification status
- Consider Messenger's 24-hour messaging window for customer conversations
- Use quick replies and structured messages for better UX
- Handle postbacks and button clicks appropriately
Facebook Messenger Webhook Verification (Meta)
- Copy Webhook URL and Verify Token
- Go to Meta for Developers → Webhooks
- Configure Messenger webhook
- Subscribe to
messagesevents - Verify and save
- Confirm status in DronaHQ
Next Steps
Publish your agent
Verify webhook in Meta
Send test messages on Facebook Messenger
Monitor agent tracing
Combine with:
- Webhook Trigger for integrations
- Scheduler Trigger for proactive messaging
- WhatsApp Trigger for multi-channel support
- Instagram Trigger for social media coverage