Configuring SSO with custom JWT
For configuring Configuring SSO, you will need your Custom Login info, you can then follow below steps for Add JWT based Custom Login in DronaHQ.
Go to Manage Users -> SSO Configuration -> Select JWT - Custom Login Option.
Enter form with below fields -
| Field | Description |
|---|---|
| Name | Provide Friendly Name of this SSO configuration |
| Login URL / SSO URL | Enter Login URL / SSO URL from your SAML SSO provider metadata file. |
| Restricted Domain | Enter domain name for which you want your users to login with for this SSO Configuration. eg - domain1.com. DronaHQ will automatically redirect to SSO Login url when we encounter any user’s sign in request with an email id belonging to the given restricted domain. |
| SignIn URL | Enter SignIn URL of your Custom SSO Login page. |
| Redirect URL | Enter Redirect URL that will set JWT token and call DronaHQ SDK for Sign In to DronaHQ Container. If this logic is setup in Sign In URL then use same Sign In URL as Redirect URL. For More details, refer Setting up JWT Custom Login page. |
| Enable JIT user provisioning | Just in time (JIT) user provisioning enables DronaHQ to provision user accounts when users sign in via SSO for the first time. This means you won't have to manually invite each user to DronaHQ first. |
- Enable JIT user provisioning toggle to automatically add new users provisioned by SSO into DronaHQ.
- You can have same SignIn URL and Redirect URL if both login and setting of JWT token is performed by same endpoint.
Steps
- Fill above form.
- Once, above form is filled, click on
Save to draftoption to save your SSO Configuration. - You will be able to view your recently saved SSO configuration in the list. You can click on
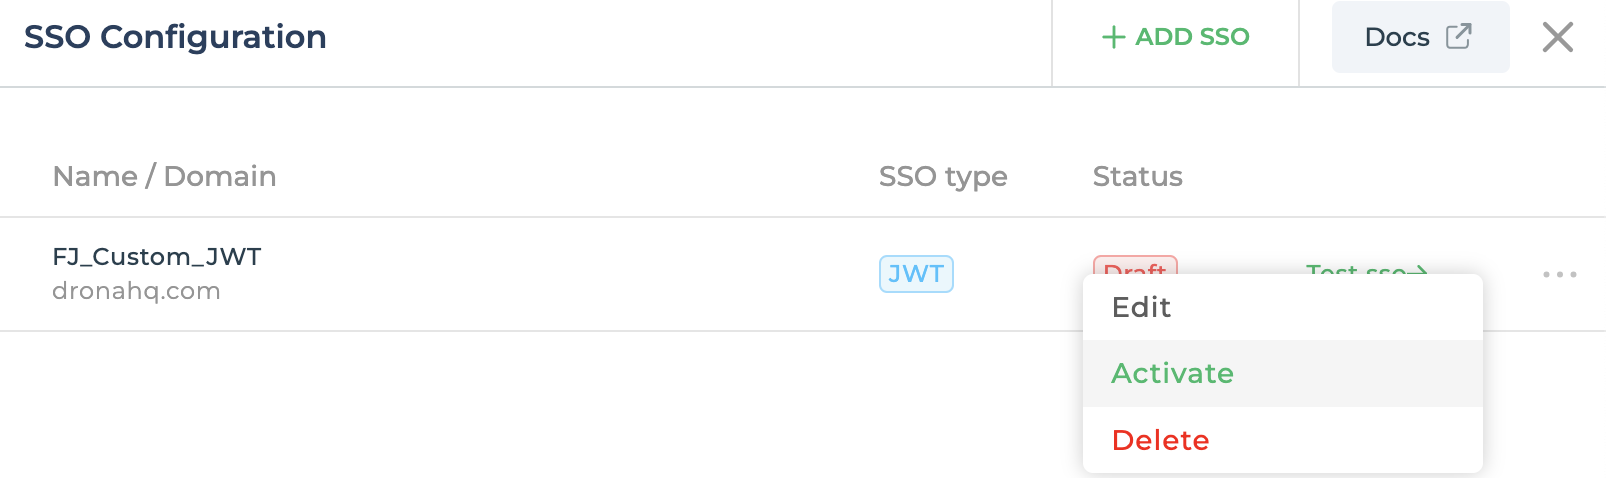
Test SSObutton and it will open SSO Login url in a popup. Once you login successfully and if everything is set up correctly, then finally you will see a success message at the bottom. - Now, that testing is successful, you can click on the
more optionfor above SSO configuration and click onActivateto make it live.
Once live, all your users belonging to above given domain will be redirected to your SSO login from both the End User Portal and Creator Portal.
You can have multiple SSO configuration at the same time but it should have different Restricted Domain.
Setting up Custom JWT Login Page
DronaHQ offers a flexible solution for implementing a custom login system, leveraging your existing backend APIs. Simply create your own login page and connect it to your REST API to enable seamless authorization of login information.
What you need
- A web login page (.html, .aspx, .php, etc)
- Javascript code to have AJAX request to your REST API & wait for its response
- A middleware REST API to authorize the login information in your system & set JWT token if the user is valid
- DronaHQ JS in your web login page
Sample Demo
For instance, let's consider the scenario where a user is required to enter their login ID and password on a login page. Once the user clicks on the login button, the login information is authenticated by consuming a REST API.
Step 1. Create Login Screen
Below is Sample Login UI.
Take a note of above Login URL that will be required to be added in DronaHQ JWT Custom Auth Configuration.
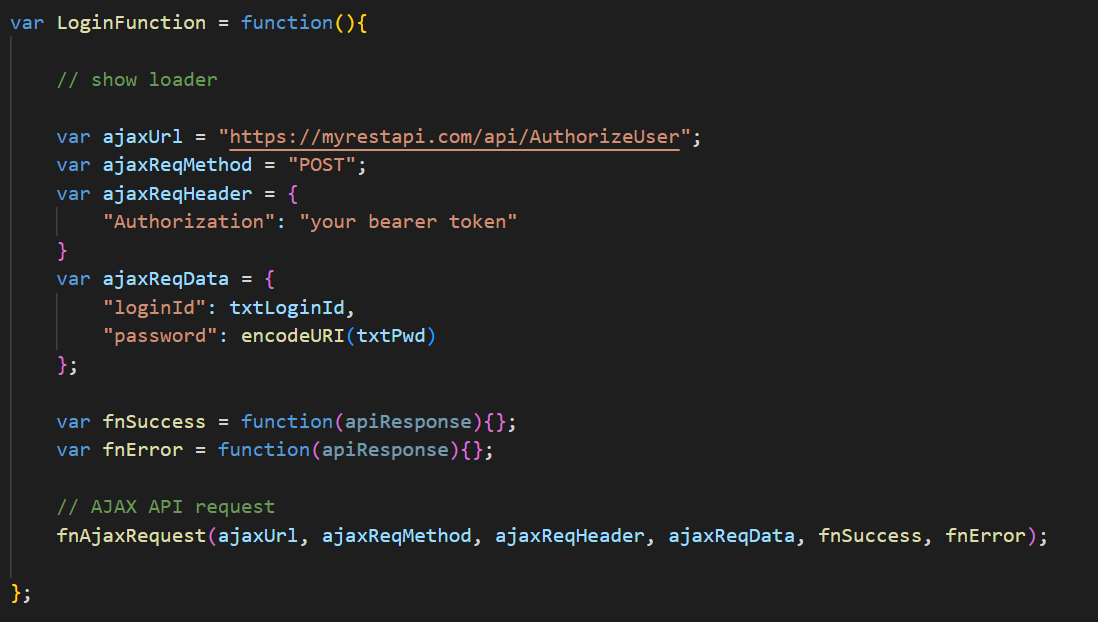
Step 2. Call your LoginUser Api
On click of a button, you may have below code implemented to consume the AuthorizeUser REST API.
Step 3. Backend Validate User and Generate JWT Token Response
On the Backend -
To validate the login ID and password, you can leverage RestSharp or database connectors to seamlessly communicate with your system. Upon successful validation, we can proceed to generate a JWT token to enable secure access to your system.
[Route("api/AuthorizeUser"), HttpPost]
public IHttpActionResult DoLoginWork(Payload payload)
{
        // step 1: validate bearer token, if any
        // step 2: fetch the necessary information from the payload
        // validate it with your systems


        // generate JWT token
        if (isValid)
                {
                        obj.status = 200;
                        obj.message = "valid user";


                        //JWT Token for Mobile
                        var jwtheaders = new Dictionary<string, object>()
                                {
                                        { "typ", "JWT" },
                                        { "alg", "SHA256" }
                                };
                        var payload = new Dictionary<string, object>()
                                {
                                        { "iss", DHQ_JWT_KEY },
                                        { "user_email", userEmail },
                                        { "user_name", userName },
                                        { "claims", obj }
                                };


                        byte[] key = Encoding.UTF8.GetBytes(DHQ_JWT_SECRET);
                        obj.token = Jose.JWT.Encode(payload, key, JwsAlgorithm.HS256, jwtheaders);


                }

        apiResponse = JsonConvert.SerializeObject(obj);
        return Ok(apiResponse);
}
To obtain the DHQ_JWT_KEY and DHQ_JWT_SECRET, in DronaHQ, Go to Manage Users -> SSO Configuration -> Select JWT - Custom Login Option and Locate DronaHQ SecretKey and DronaHQ SecretID respectively.
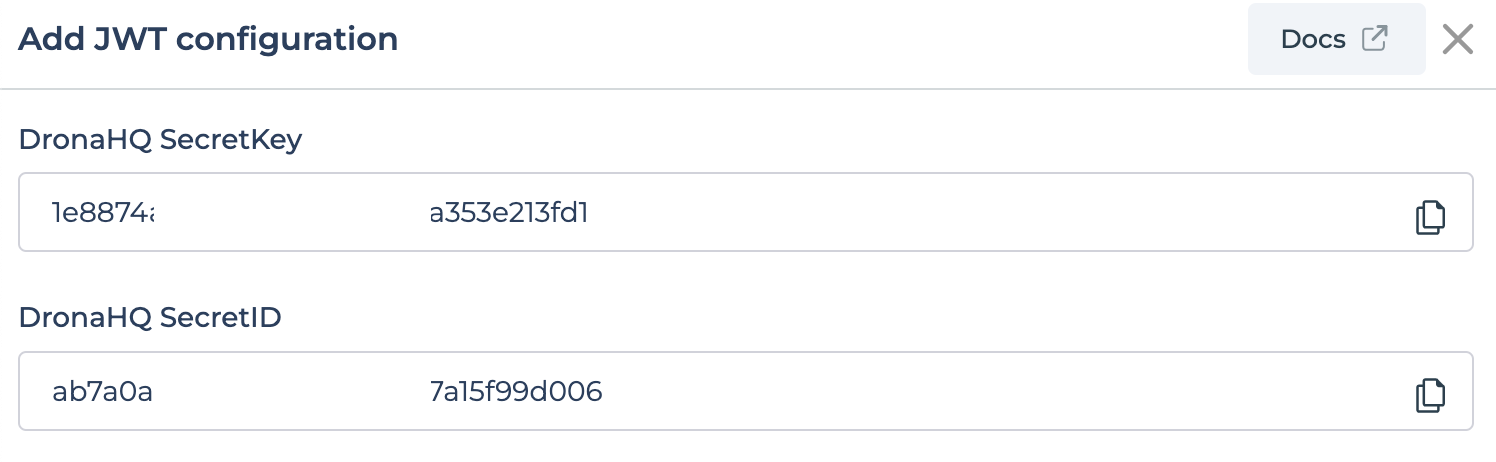
These keys will allow you to securely generate and validate JWT tokens for seamless authentication within your system.
Every time you open this New Configuration page, a new Secret Key and ID will be generated.
Step 4. Use DronaHQ.js SDK to Login User in DronaHQ Container App
Once you are now through with the API response, on the frontend side we will parse the response.
Prerequisite
- You must import dronahq.js in your Login HTML or if you are re-directing user to different URL then import it in that HTML page.
Latest DronaHQ JS SDK v7.3.3 is available at this link.
For future DronaHQ JS SDK releases for versions greater than v7.3.3 - refer this link
Take a note of above Redirect URL that will be required to be added in DronaHQ JWT Custom Auth Configuration. If this logic is added on same Login HTML then Redirect URL and SignIn URL will be same.
var fnSuccess = function(apiResponse){

        var jsonApiResponse = JSON.parse(apiResponse);
        if(jsonApiResponse.status == "202"){
            hideButtonLoader();
            swal("Error", jsonApiResponse.message, "warning");
        }
        else{
            var token = jsonApiResponse.token;
            if(DronaHQ.user){
                var userCookie = window.btoa(token);
                DronaHQ.user.setLoginDetails(fnSuccess, fnError, userCookie);
            }
            else{
                if (window.opener) {
                    pm({
                        target: window.opener,
                        type: 'provider_login',
                        data: { token: token }
                    });
                }
            }
        }
    }
    var fnError = function(apiResponse){
        hideButtonLoader();
        swal("Error", "Invalid Login", "error");
    }
In the above code, On success we are calling DronaHQ.user.setLoginDetails(fnSuccess, fnError, userCookie); which is a DronaHQ.js sdk method and userCookie is the JWT Token sent by your backend server. This will log user into the DronaHQ Container app.
For configuring this Custom Auth Login using JWT in DronaHQ, you can refer to this