Create and Download Excel from JSON data
In DronahQ we can create an Excel file of xlsx format and download the same from the JSON data. This JSON data can be obtained through different means such as connecting Databases, APIs, sheets, and more.
To understand this, we will perform three use cases, where we will get the data in JSON format and create an Excel file from it, and then download it with a single click.
- Download multiple rows from the table.
- Download directly from the database using the data store.
- Download directly from the database.
Knowledge of JavaScript is a plus. This will help to better understand creating objects and working with JavaScript libraries.
Importing Library
Fir this we will utilize the SheetJs library, a powerful JavaScript tool tailored for Excel operations. With SheetJs, we can generate Excel workbooks and convert JSON data into downloadable xlsx files.
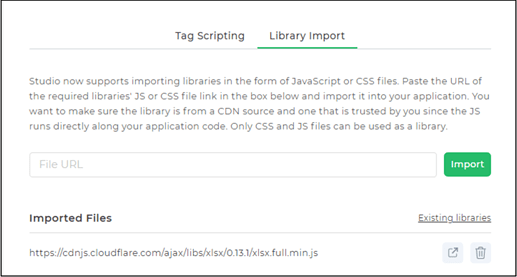
To integrate this library into our workspace, follow these steps:
- Navigate to
Settings > Custom Scriptwithin the studio environment. - Choose
Library Importand paste the following file URL: https://cdnjs.cloudflare.com/ajax/libs/xlsx/0.13.1/xlsx.full.min.js, then proceed with the import. - Once imported, save the script, and it will be readily accessible within the same window.
To know more about importing JavaScript Libraries you can read our dedicated article.
Download multiple selected rows from the table
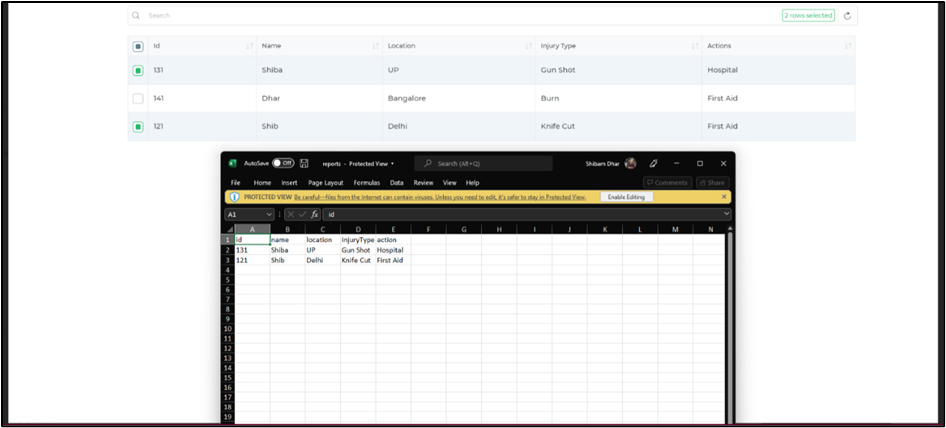
First, we will get the data and then display it on our app in a table grid view. Then, will download multiple selected rows from the table in xlsx format.
- Make sure to make changes to the properties of the Table Grid Control. Under display check
Yes(with multi-select)of Checkbox. - Bind data to Table Grid Control.
- Now, add a button which will be used to download the selected data from the table grid in xlsx format.
- Configure the action flow for the button controls' event of
button_click. - We need only
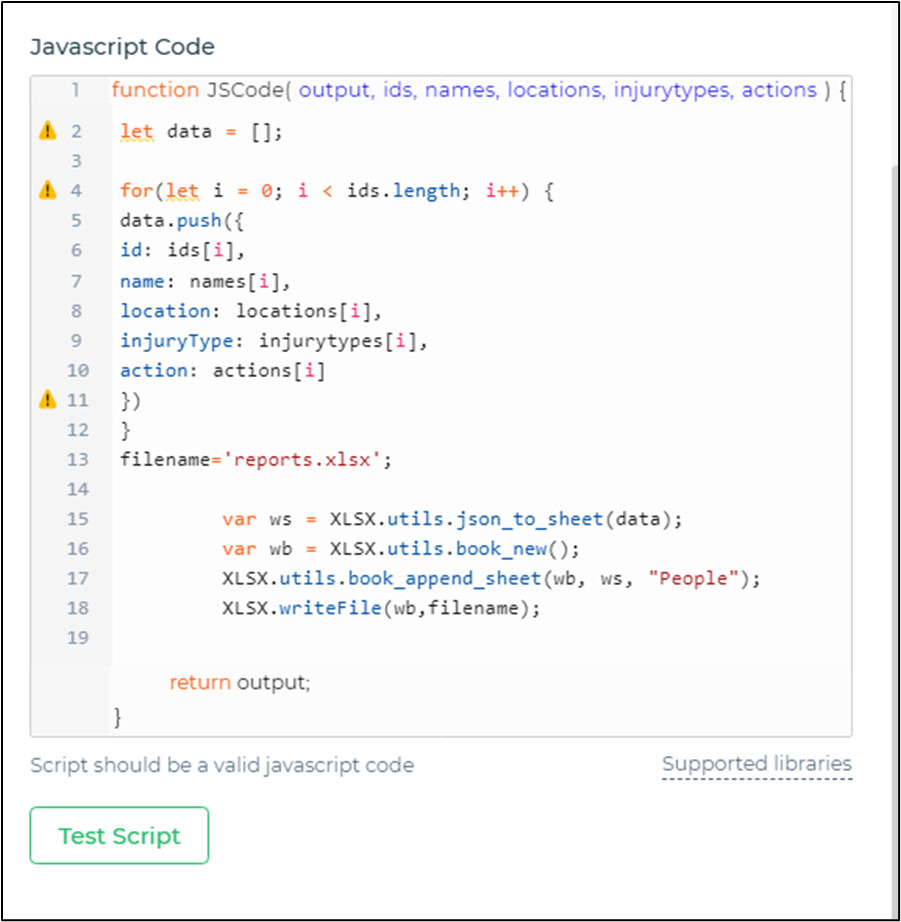
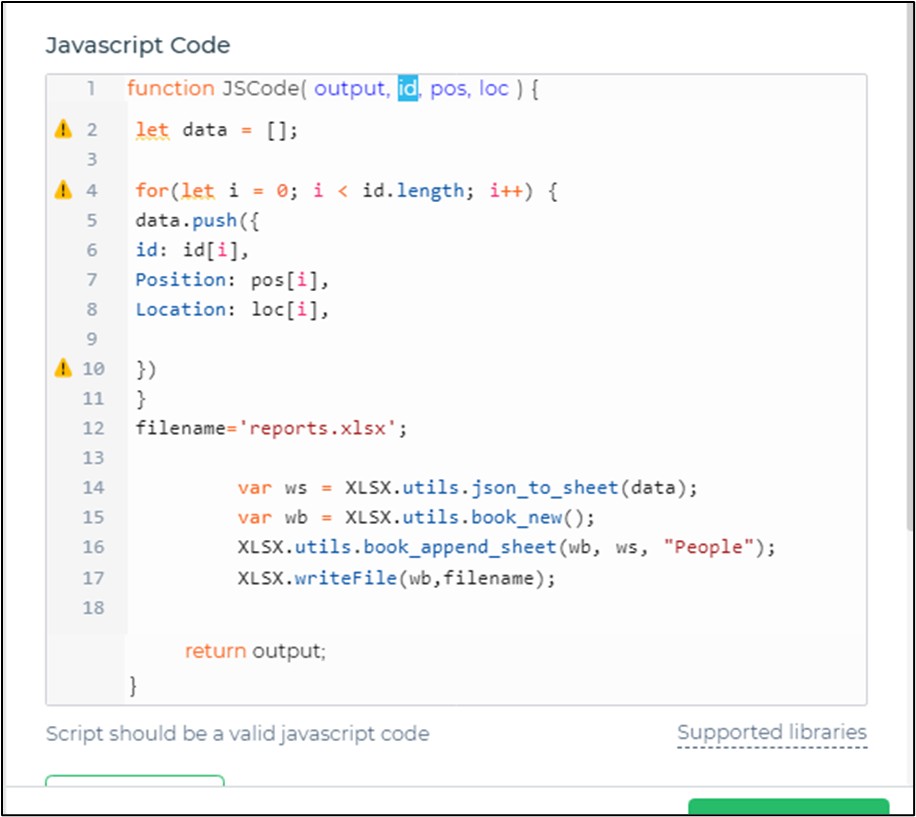
JS Codeaction block in the action flow. Add input parameters. These input parameters will be used to get the data from the selected row of the table and provide it with a variable name that can be accessed in our JavaScript code editor. - In the JavaScript code editor write a code using our imported SheetJs – xlsx min.js to convert JSON into xlsx worksheet and download it.
Code
    let data = [];
    for(let i = 0; i < ids.length; i++) {
      data.push({
      id: ids[i],
      name: names[i],
      location: locations[i],
      injuryType: injurytypes[i],
      action: actions[i]
    })  }
    filename='reports.xlsx';
    var ws = XLSX.utils.json_to_sheet(data);
    var wb = XLSX.utils.book_new();
    XLSX.utils.book_append_sheet(wb, ws, "People");
    XLSX.writeFile(wb,filename);
Code explanation
- Initialization: Start with an empty object, "data," to store variables like ids, names, etc.
- Iteration: Loop through each set of arrays to handle multiple selected rows.
- File Naming: Define a "filename" variable for the name and format of the exported file (e.g., "report.xlsx").
- Worksheet Creation: Utilize "json_to_sheet(data)" to create a worksheet object, organizing data from the table.
- Workbook Setup: Use "book_new()" to create an empty workbook; "book_append_sheet(wb, ws, “People”)" to add a worksheet.
- File Writing: Finally, "writeFile(wb, filename)" packages the data and saves the file, ensuring a smooth download.
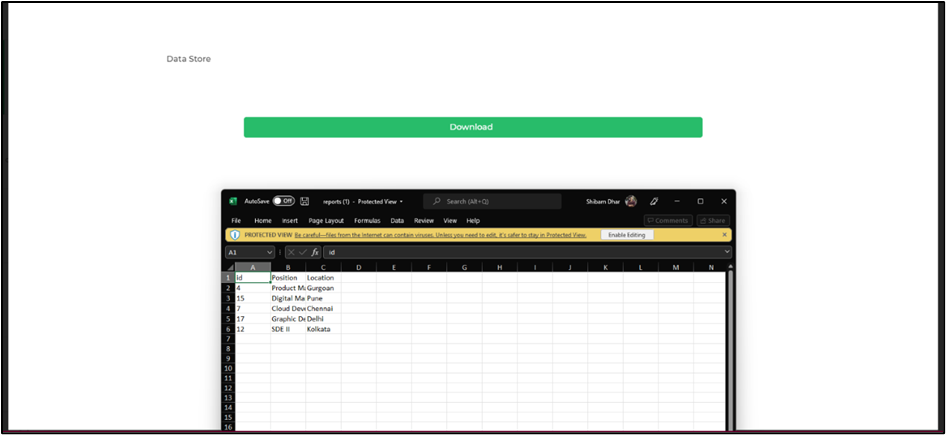
- Test the script, a download pop will occur on the screen. It means it is working. Click on continue and finish.
Download directly from the database using the data store
In this use case, we will use Data Store to store the data from the connector and then a button that will download the whole data directly after converting it to xlsx file.
In a way it is quite similar to the previous method. In this scenario, instead of using a Table Grid we will now use the Data Store control and a button to trigger the action.
Bind the data to Data Store control.
Create an action flow, to the button control.
Add JS Code action block and provide required JS code after selecting the input parameter as the Data Store value.
JS Code Test the script, a download pop will occur on the screen. It means it is working. Click on continue and finish.
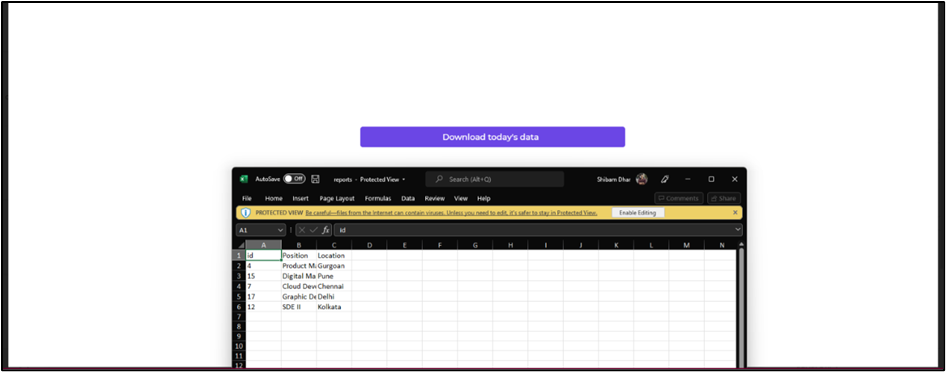
Download directly from the database
Now, let's see how we can download the data from the database directly without using any components such as table grid or data store. We will simply put up a button that will download all the details with a click.
This method is also similar to the previous ones. Instead of putting up a component to store or view the data. We can directly trigger a call to the data in an action flow and use JS code block to download the data.
- Start with adding a button.
- Create an action flow, to the button control.
- Add a server-side action of whichever database connector you want to use to call the data. Select or write the query to get the data.
- After selecting connector, and query, save the output in a variable, so that it can be used for referencing the data later on.
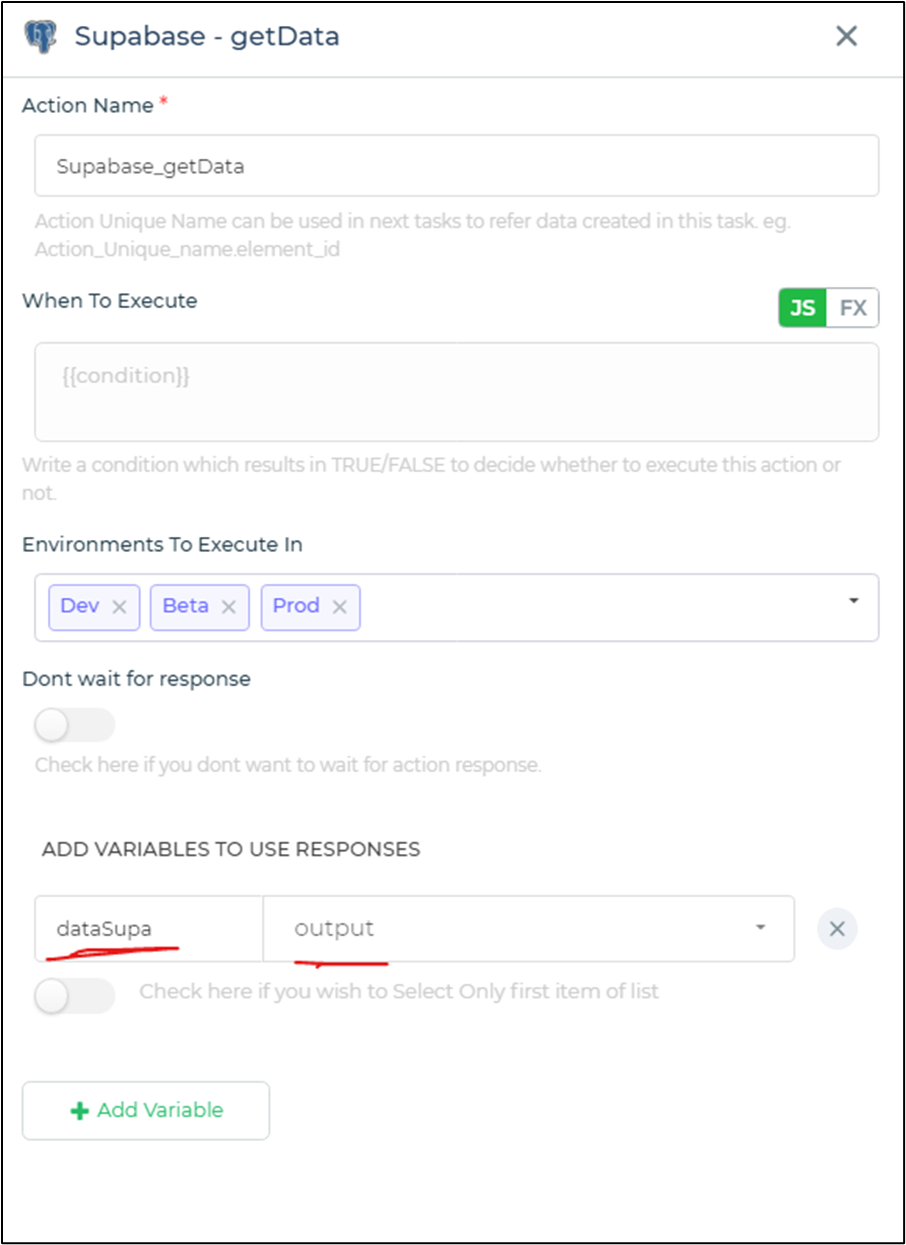
Adding Variable - Add a JS code block and add the output of the query as input parameters of this JS code block.
- Write code to download data.
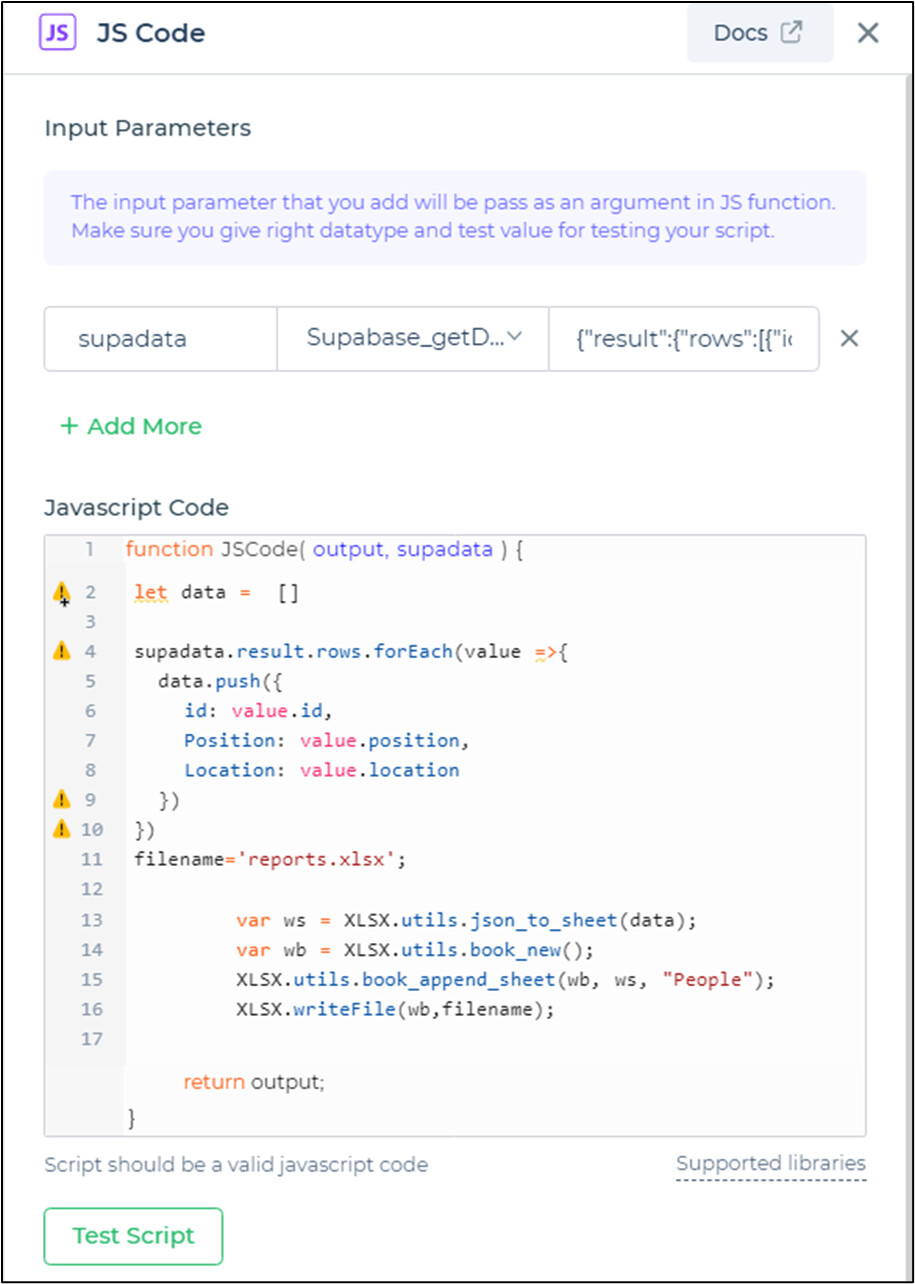
JS Code - Test the script, a download pop will occur on the screen. It means it is working. Click on continue and finish.
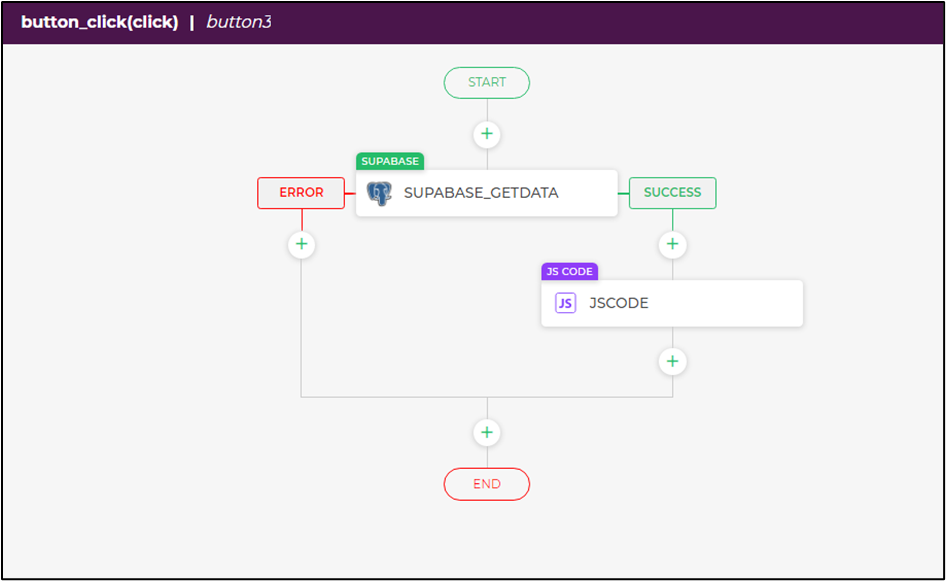
Action flow