Quickstart
Learn how to create and launch a personalized outbound campaign in DronaHQ agentic platform for post-service feedback and follow-up calls. This guide covers campaign setup, recipient management, scheduling, and launch.
Everything on this page is also available programmatically — see the Campaign API to create campaigns from your CRM or scheduler, add contacts as leads arrive, and pause, resume, or stop a run from your own systems.
Prerequisites
Before you begin, ensure you have:
- A DronaHQ account with access to the agentic platform.
- A phone number added to your organization (Phone Number dropdown → Add number if none exist).
- An existing voice Agent configured and ready to handle calls. Note that only published agents and published changes to the voice agent will be reflected during calls.
- Recipient information ready as a CSV file (up to 5 MB).
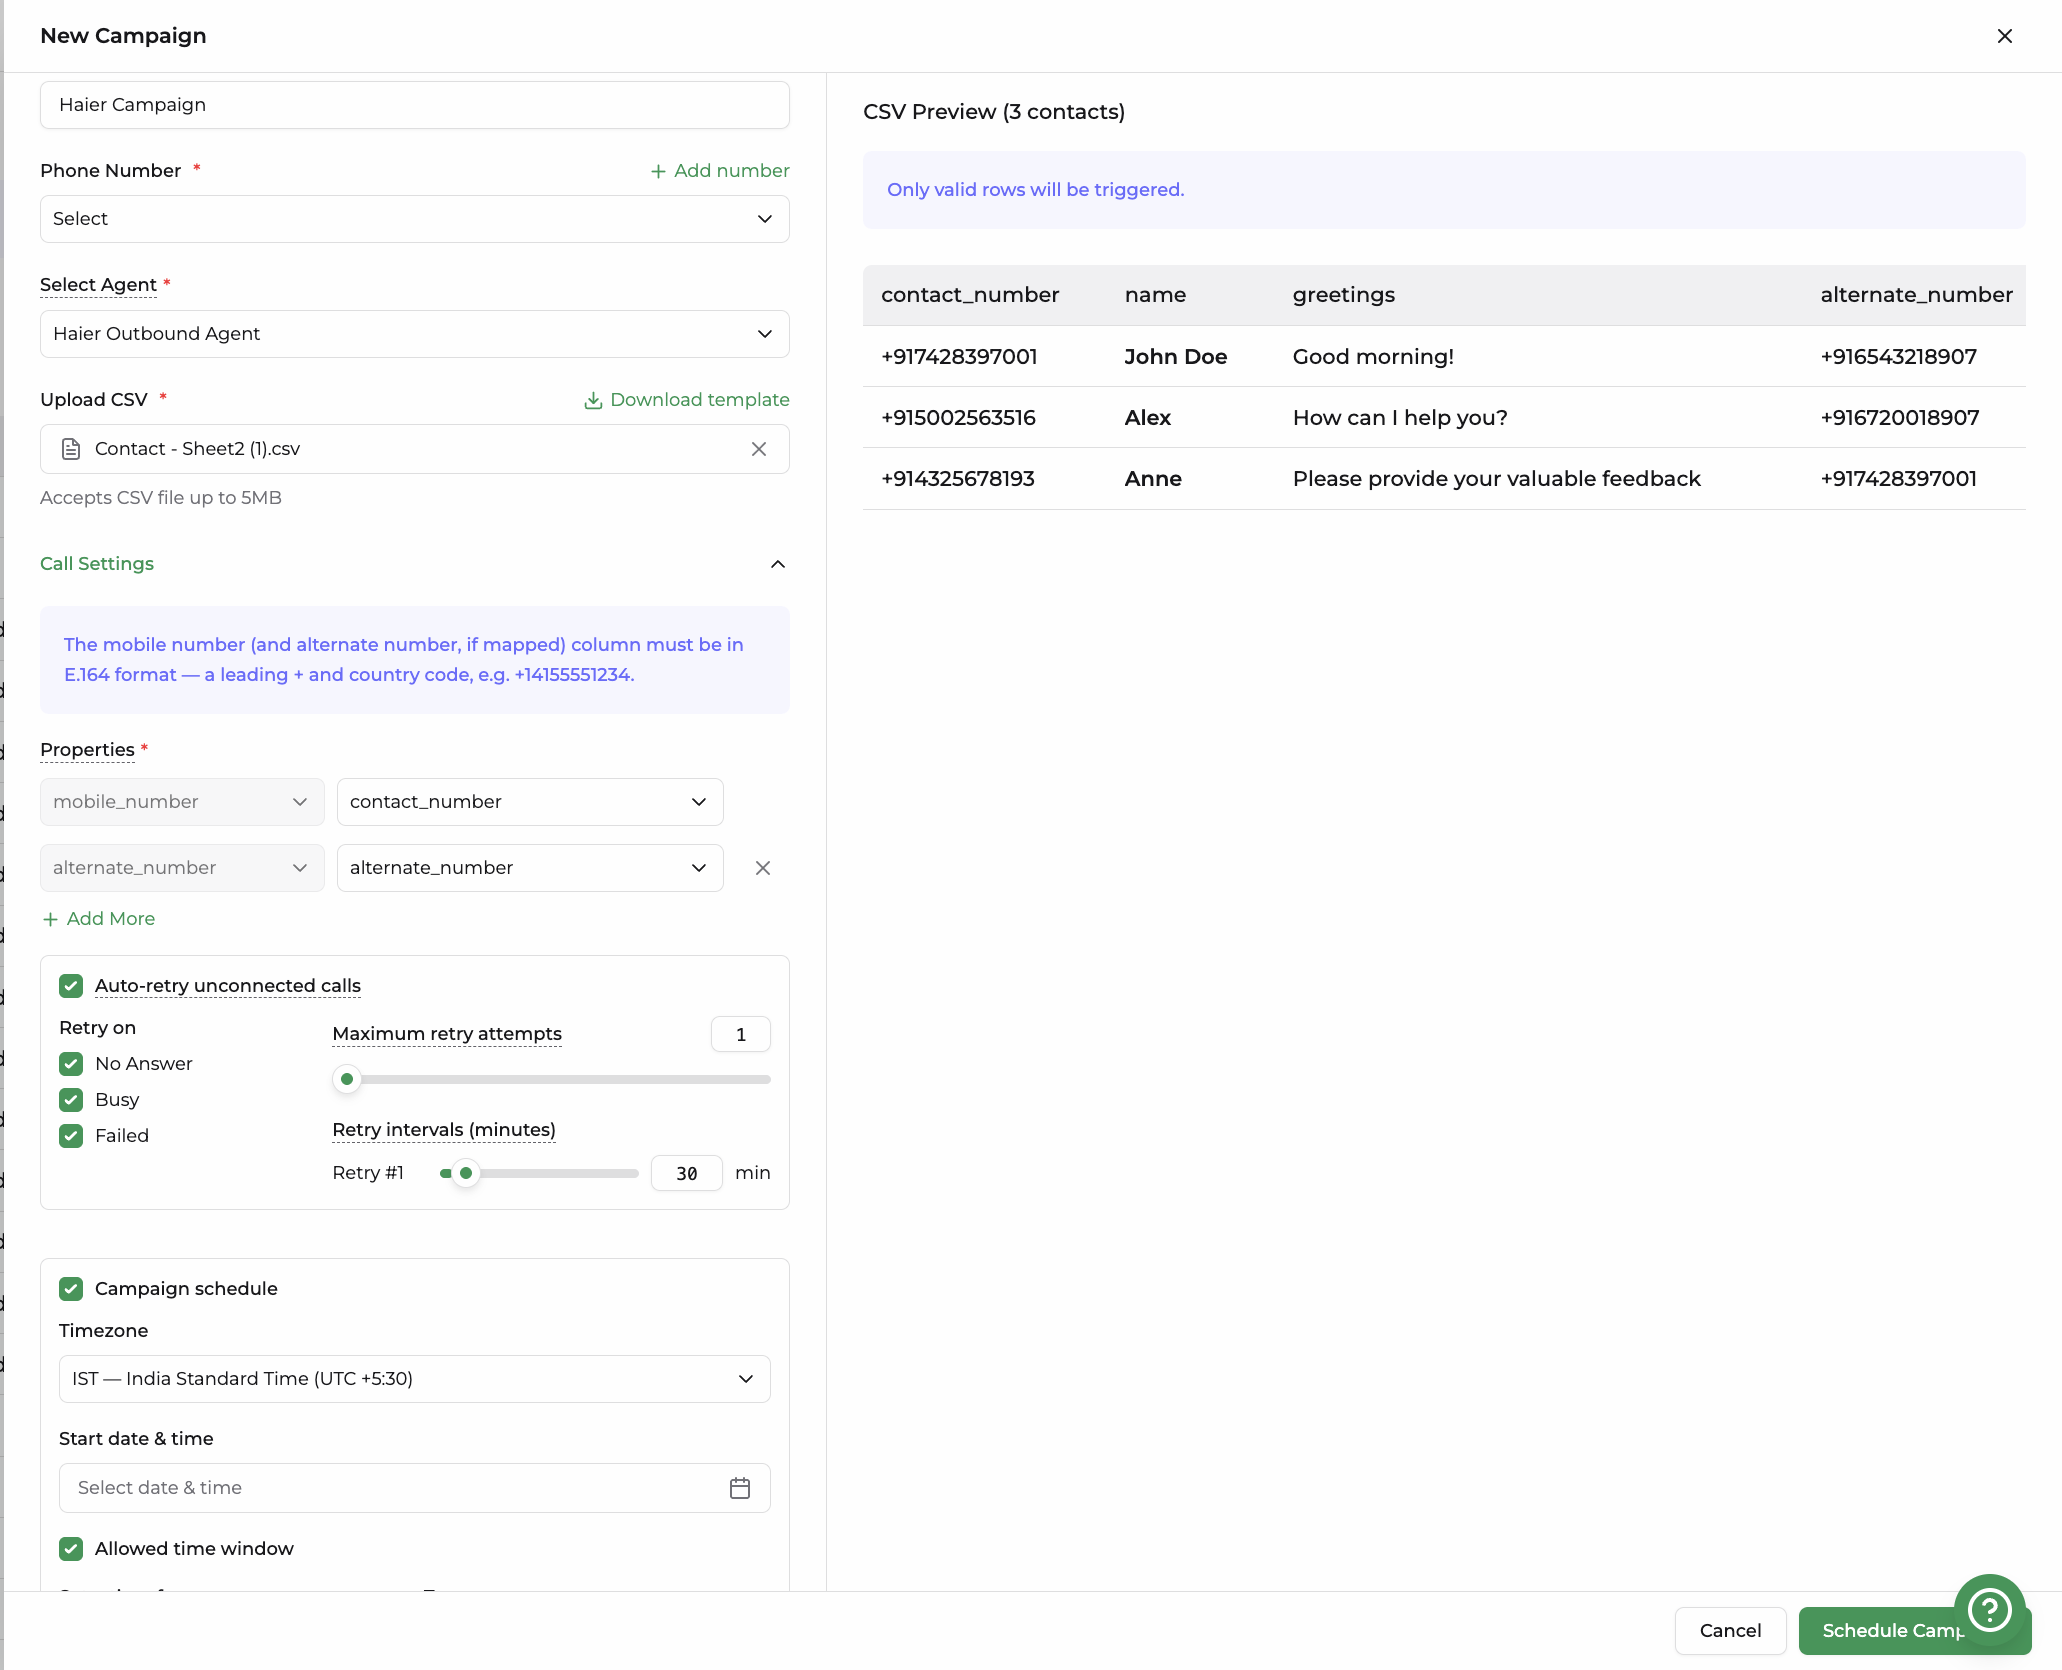
1. Create a Campaign
Open New Campaign
Navigate to Campaigns and click New Campaign to open the campaign setup panel.
Enter campaign details
Provide the following information:
- Campaign name*: Give the campaign a descriptive name (e.g., "DHQ Campaign").
- Phone Number*: Select the number the calls will be placed from, or click + Add number to register a new one.
- Select Agent*: Choose the voice agent that will conduct the calls.
Upload your contact list
- Click Upload CSV and select your file
- Use Download template to get a correctly formatted starter CSV if you don't have one.
- Once uploaded, a CSV Preview panel appears on the right showing the parsed contacts (e.g.,
contact_number,name,another_var) along with a row count. - Only valid rows are triggered—rows with malformed data are skipped automatically.
While adding phone numbers in the CSV, mobile number column must be in E.164 format, with a leading '+ and country code. For example, prefix Indian phone numbers with '+91 (e.g., '+919876543210).
2. Configure Call Settings
Map properties
Under Properties*, map each variable your agent expects (e.g., mobile_number) to the corresponding Select CSV column.
Click + Add More to map additional columns—for example, mapping a greeting column so the agent can personalize each call.
Set up auto-retry
Enable Auto-retry unconnected calls to automatically redial contacts who weren't reached.
Configure the following options:
- Retry on: Choose the outcomes that should trigger a retry, such as No Answer or Busy.
- Maximum retry attempts: Set how many times a contact should be redialed.
- Retry intervals (minutes): Define the wait time before each retry attempt (e.g., Retry #1 after N minutes).
3. Schedule the Campaign
Configure when the campaign should run:
- Timezone: Select the appropriate timezone (e.g., IST: India Standard Time (UTC +5:30)).
- Start date & time: Pick when the campaign should begin.
- Calling window: Set the daily From and To times during which calls are allowed to go out (e.g., 08:00 AM to 08:00 PM).
If scheduling is left disabled, the campaign launches immediately after creation instead of waiting for a start time.
4. Launch the Campaign
- Review the campaign name, phone number, agent, contact count, and settings.
- Click Schedule Campaign to confirm.
If a start date and time were set, the campaign queues and begins dialing automatically at that time within the configured calling window. Otherwise, calling starts immediately.
Adding contacts later
You don't have to finalize the list before launching. Contacts can be added to a campaign that already exists — including one that has already finished — from the campaign's detail page or through the API.
What happens next depends on where the campaign is:
- Still dialing its original list — the campaign is paused so the list can be extended safely, and stays paused until you resume it.
- Between retry attempts — nothing is dialing, so the new contacts start right away.
- Scheduled, or already finished — the contacts are only staged. A scheduled campaign picks them up when it fires; a finished one dials nothing until you explicitly launch them.
Duplicates are detected against the contacts already in the campaign and withheld, so re-uploading an overlapping list will not call anyone twice.
What's Next
- Campaign Overview — read results, recordings, transcripts, and per-call costs
- Campaign API — do all of this programmatically