SIP Trunking with Plivo
Connect a Plivo Zentrunk (Plivo's SIP trunking product) to DronaHQ so your voice agent can place outbound calls through it. Use this guide when you already have a SIP trunk on Plivo and want your agent to share it with the rest of your telephony stack.
When to Use This
Use this flow when:
- You already operate a Plivo Zentrunk (outbound SIP trunk)
- You want your voice agent to share an existing trunk with other systems
- You want to keep your existing Plivo rates / contract for these calls
If you only want a quick Plivo number with no trunk involvement, use the Plivo Phone Number flow instead.
Prerequisites
- An active Plivo account at cx.plivo.com
- At least one phone number purchased in Plivo
- Access to the Plivo Console (admin or operator role)
Configure the Plivo Side
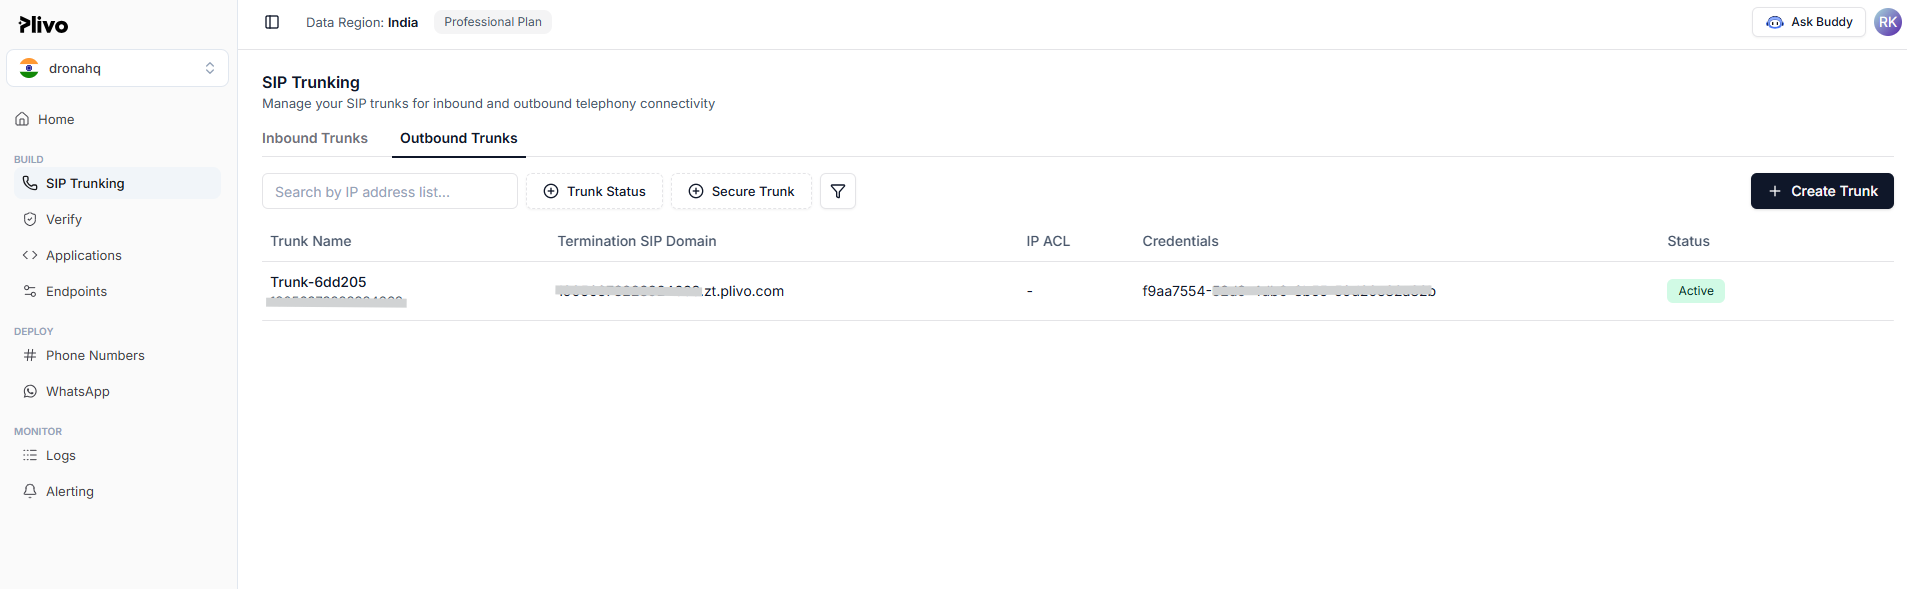
Step 1: Create an outbound trunk in Plivo
- Sign in to the Plivo Console.
- Go to SIP Trunking → Outbound Trunks.
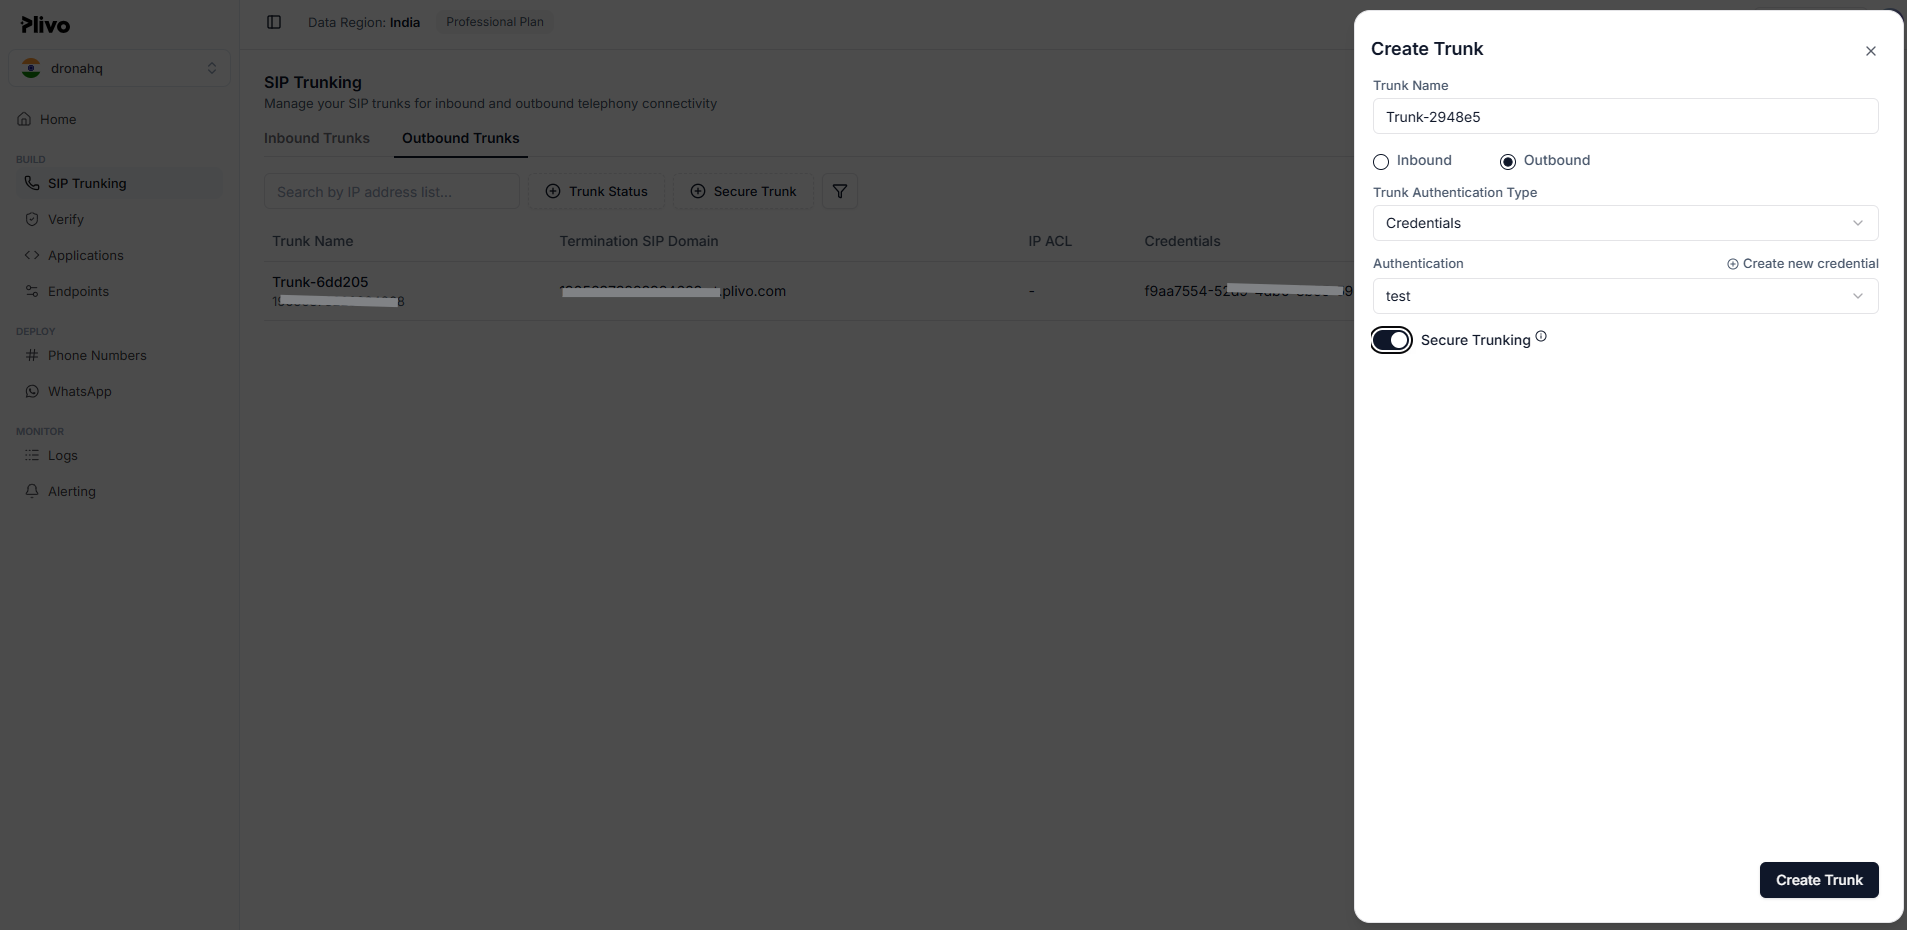
- Click Create Trunk and give it a descriptive name (for example,
dronahq-voice-trunk). - Under Trunk Authentication → Credential, click Create new credential.
- Enter a credential name, a username, and a strong password. Save the credential.
- Back on the trunk form, set Authentication to the credential you just created.
- Enable Secure Trunking if you want TLS-encrypted signalling (recommended for production).
- Click Create Trunk.
- Copy the Termination SIP Domain — this is the SIP Gateway Host you'll paste into DronaHQ.
The username and password you set here are what DronaHQ will use to authenticate outbound calls. Pick a strong password — anyone with these credentials can place calls on your Plivo account.
Step 2: Bind the phone number to the trunk
- In the Plivo Console, go to Phone Numbers → Purchased Numbers.
- Click the phone number you want to route through the trunk.
- Set Application Type to SIP Trunk.
- Under Trunk, select the outbound trunk you created in Step 1.
- Click Save changes.
Step 3: Decide on transport
| Transport | Port | Recommended for |
|---|---|---|
| UDP | 5060 | Development, lab testing |
| TLS | 5061 | Production — required when Secure Trunking is enabled |
For production traffic, leave Secure Trunking enabled on the Plivo trunk and use TLS + port 5061 when adding the trunk to DronaHQ.
Configure the DronaHQ Side
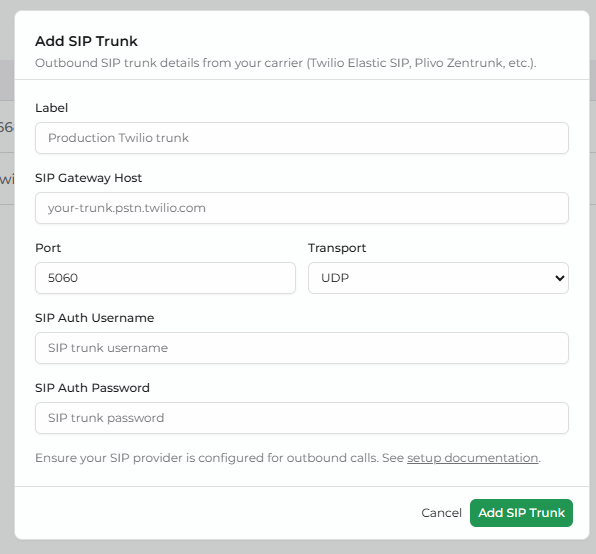
Step 4: Add the SIP trunk in DronaHQ
- Go to DronaHQ → Voice Agent → SIP Trunks.
- Click Add SIP Trunk.
- Fill in the form using the values you gathered from Plivo:
Label
- A friendly name for the trunk in DronaHQ.
- Examples:
Production Plivo trunk,APAC Outbound Trunk.
SIP Gateway Host
- The Termination SIP Domain copied from the Plivo trunk.
- Required field.
Port
5060for UDP/TCP, or5061for TLS (Secure Trunking).- Automatically updates to
5061when you pick TLS.
Transport
- UDP, TCP, or TLS.
- Pick TLS if Secure Trunking is enabled on the Plivo trunk.
SIP Auth Username
- The username of the Plivo credential you created in Step 1.
- Required field.
SIP Auth Password
- The password of the Plivo credential.
- Encrypted before it is saved and never displayed again.
- Required field.
Click Add SIP Trunk.
Step 5: Add a phone number that uses this trunk
- Go to DronaHQ → Voice Agent → Phone Numbers.
- Click Add Phone Number.
- Select SIP Trunking from the provider list.
- Enter the phone number in E.164 format (e.g.,
+14155551234) — this must already be bound to the Plivo trunk (Step 2). - Pick the trunk you added in Step 4 from the SIP Trunk dropdown.
- Click Add BYO SIP Number.
The number now appears in the Phone Numbers list, routed through your Plivo trunk.
Step 6: Attach the number to a voice agent and place a test call
- Open the voice agent you want this trunk number to call from.
- In the right-side panel, expand Call Configuration → Outbound Settings.
- From the Outbound Phone Number dropdown, select the trunk number you added in Step 5.
- In the destination field next to it, enter your own mobile number in E.164 format (e.g.,
+14155551234). - Click Call and pick up — you should hear the agent speak.
The call should appear in the Plivo trunk's call logs.
Troubleshooting
| Problem | Likely cause | Fix |
|---|---|---|
Plivo returns 401 Unauthorized | Wrong digest username or password | Re-check the credential in Plivo; re-enter the password in DronaHQ |
| Calls fail immediately with TLS | Secure Trunking off, or wrong port | Enable Secure Trunking in Plivo and set port 5061 in DronaHQ |
| Phone number rejected on Add Phone Number | The number's Application Type is not set to SIP Trunk, or it points to a different trunk | Open the number in the Plivo Console, set Application Type to SIP Trunk and pick the correct trunk |
| Calls connect but no audio | Codec mismatch / NAT traversal issue | Confirm your Plivo trunk allows G.711 codecs; check Logs → Zentrunk for SIP traces |
| Cannot debug from DronaHQ side | Need to see SIP message details | Use Plivo's logs at cx.plivo.com/logs/zentrunk for call-level diagnostics |
Best Practices
- Use a separate Plivo trunk per environment (dev, staging, production).
- Rotate the trunk credential if a password is ever exposed — update it in both Plivo and DronaHQ.
- Keep Secure Trunking enabled for production traffic.
- Set call-rate alerts in Plivo to catch unusual traffic spikes early.
- Keep the Plivo trunk's Termination SIP Domain stable — changing it requires updating DronaHQ's SIP Gateway Host.
What's Next
- SIP Trunking with Twilio — same flow for Twilio Elastic SIP
- Plivo Phone Number — non-trunk Plivo import flow
- SIP Trunking — Introduction — back to the SIP overview