Webhook
Automation allows you to automate repetitive tasks, saving time and effort. With the Webhook Automation feature on DronaHQ, you can achieve even greater efficiency and productivity. The Webhook Automation is divided into two main parts: Trigger and Tasks.
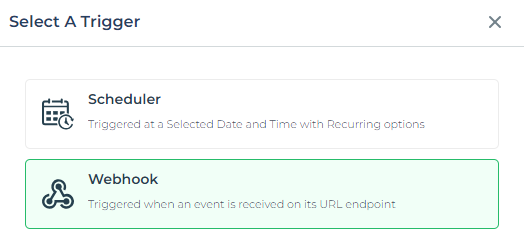
Select A Trigger – Webhook
The Webhook trigger is activated when an event is received on its URL endpoint. You can automate workflows to start whenever a webhook event occurs, such as a service monitoring alert or when a payment is received. The workflow can utilize JSON payload data from events as references to other blocks' data. If needed, you can also set up a workflow to reply to webhook events by sending information back to the webhook origin using the Response block.
Each webhook automation workflow is assigned a unique webhook URL. In the DronaHQ, the Webhook trigger URL supports both the GET and POST methods.
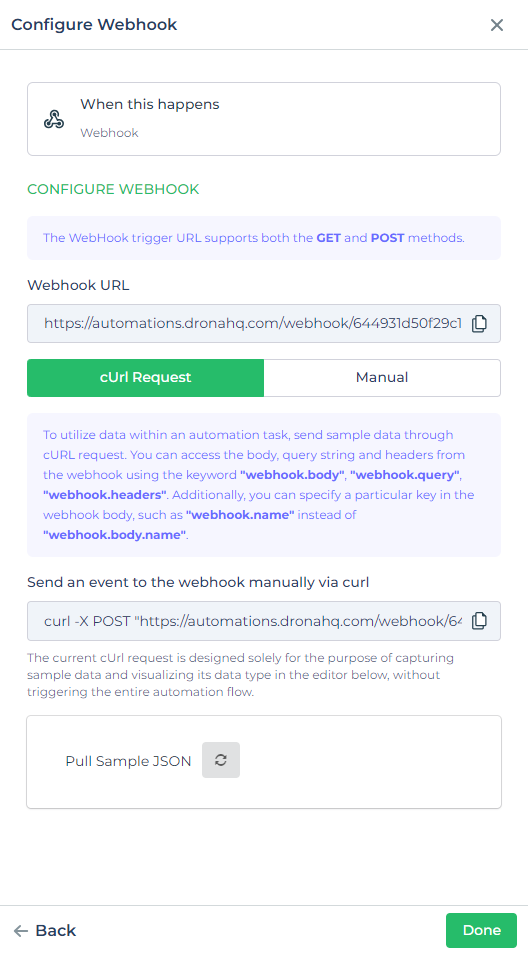
Copy the endpoint URL and use it as the webhook event destination that will trigger webhook events.
Webhook URL – cURL Request
To utilize data within an automation task, you can send sample data through a cURL request. You can access the body, query string, and headers from the webhook using keywords like webhook.body, webhook.query, webhook.headers. Additionally, you can specify a particular key in the webhook body, such as webhook.name instead of webhook.body.name.
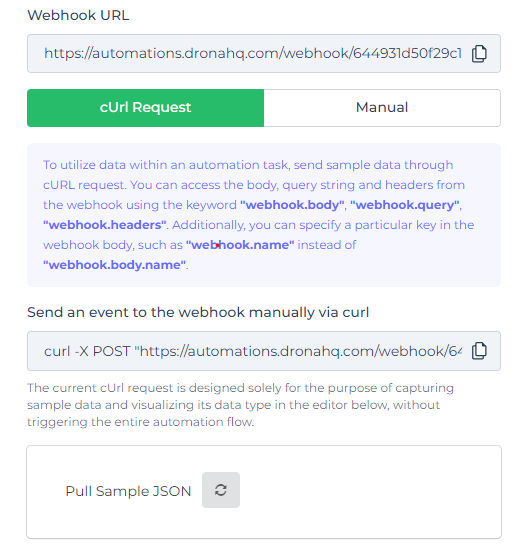
Send an event to the webhook manually via curl: The current cURL request is designed solely for capturing sample data and visualizing its data type in the editor below, without triggering the entire automation flow.
Webhook URL – Manual
To utilize data within an automation task, you can enter sample data in the JSON editor below. You can access the body, query string, and headers from the webhook using keywords like webhook.body, webhook.query, webhook.headers. Additionally, you can specify a particular key in the webhook body, such as webhook.name instead of webhook.body.name.
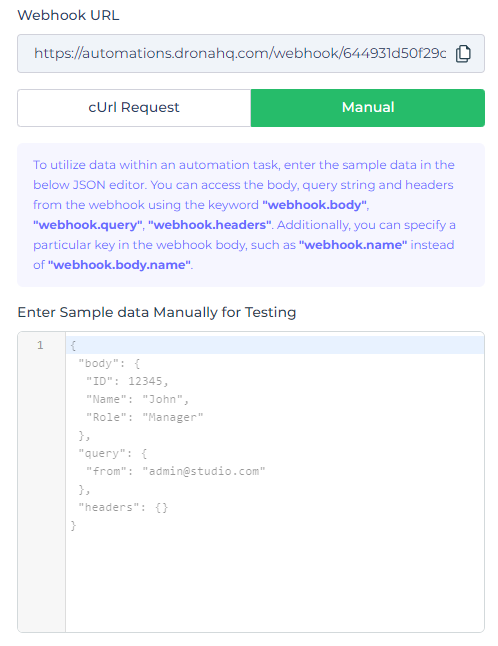
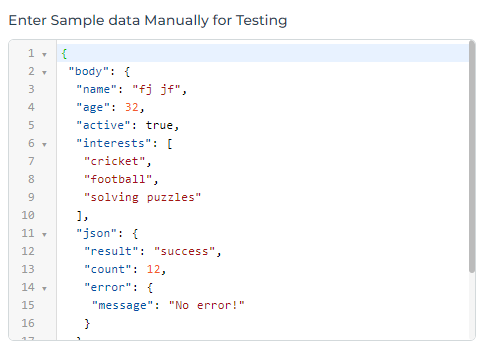
Enter Sample data Manually for Testing
You can optionally provide sample data input used as a sample event payload for testing when running the automation from within the automation editor.
Click Done to save the configuration.

Select a Task or Connector
Once the trigger is set up, you need to specify the tasks. Here, you can choose the App and the workflow that will be the action events.
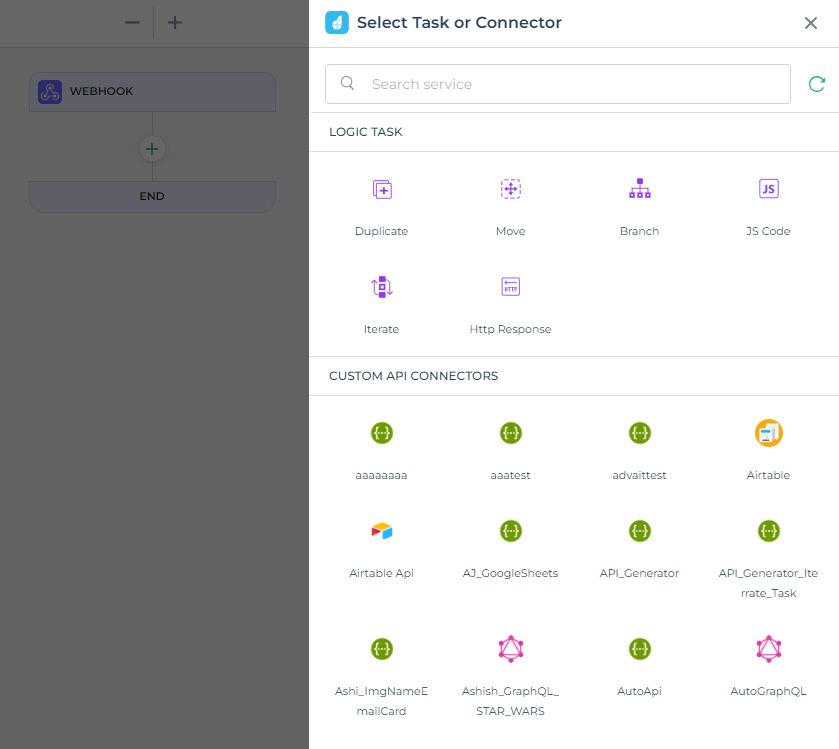
You can select tasks from the available list of Logic tasks and Custom API connections.
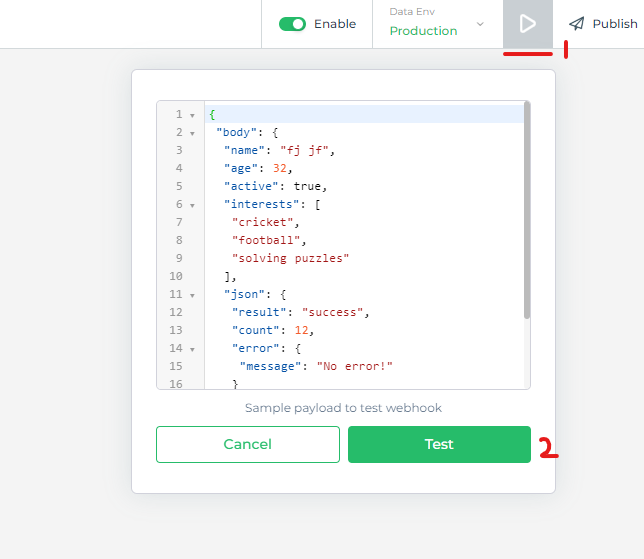
Automation Preview:
Click on the preview button to run the automation.
The webhook will require a payload as an example data at the time of running the workflow in preview to test the webhook.
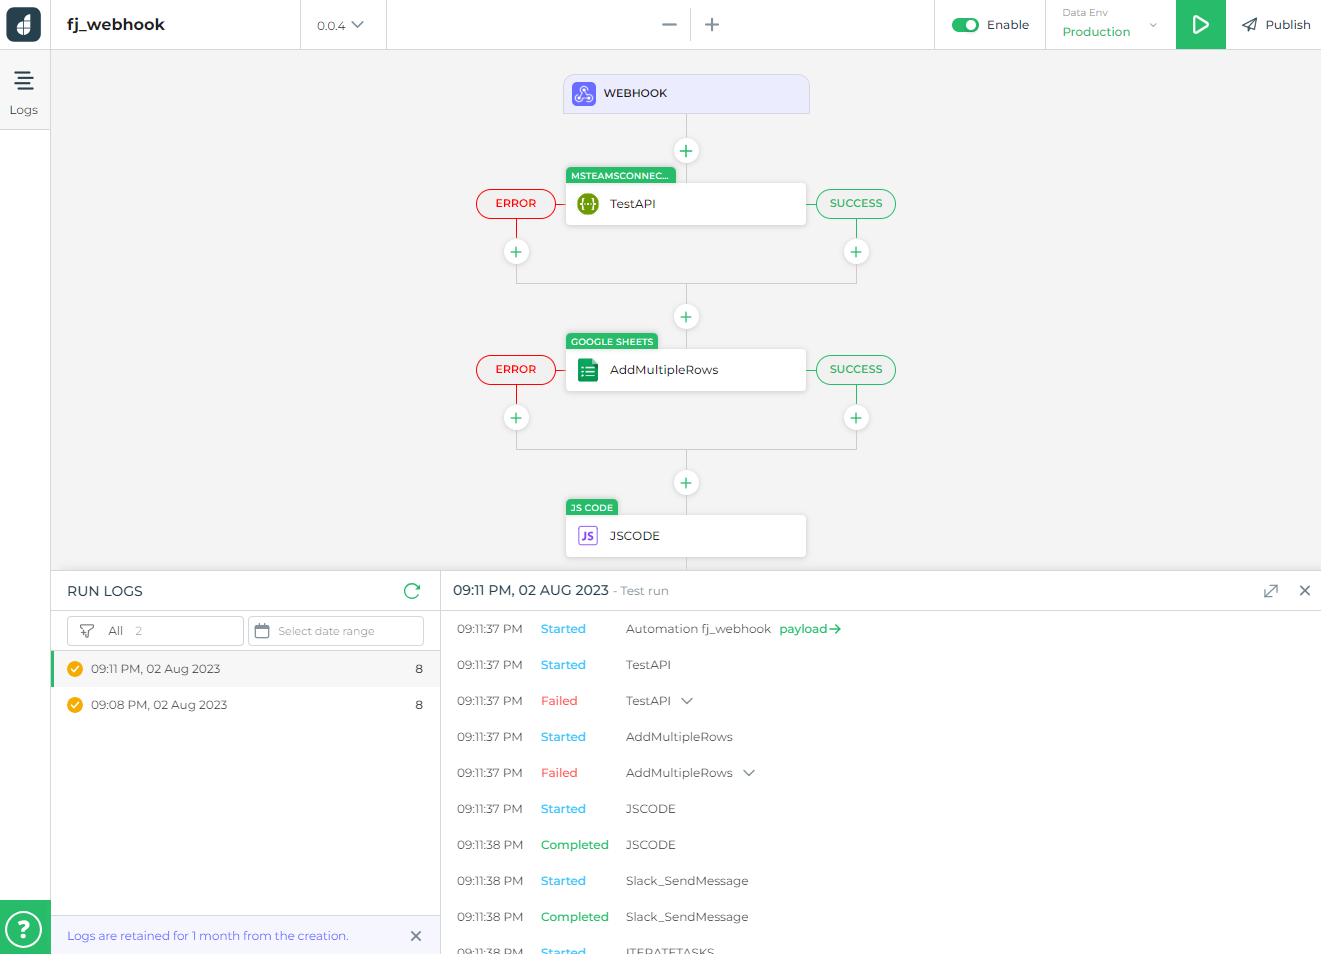
Test and Publish
Once you have configured your automation flow, simply click the Preview/Play button at the top to execute the automation and thoroughly evaluate its functionality.
For comprehensive information regarding the testing process, kindly refer here.
Upon successful testing, you may proceed with the publishing of the automation, thereby making it live and automatically operational in accordance with the defined triggers.
For further insights on the publishing procedure, please access here.
By leveraging the Webhook Automation in DronaHQ, you can seamlessly integrate external services and automate workflows based on incoming events, empowering your applications with real-time data and actions. This versatile feature opens up endless possibilities for process automation and data exchange between different systems.