Git Sync (Deprecated)
Git Sync feature with Single Git Repo for each App has been deprecated. It is recommended to use Git Sync Global feature.
Git Sync enables you to effectively manage version control for your apps on DronaHQ by linking them to a Git hosting provider, like GitHub, GitLab, Bitbucket, and others. This integration simplifies the process of monitoring changes, facilitating rollbacks, and promoting collaborative work via git branches. Moreover, it allows for seamless connectivity to any app, whether it resides within the same account or another, enabling users to effortlessly transition between diverse environments.
For Git sync to work the user needs Git hosting service which supports SSH protocols and currently it is available on self-hosted and not available on the cloud.
Prerequisite
To connect your apps on DronaHQ with Git, you must have a GitHub account, or any other version control accounts such as GitLab, Bitbucket, etc., and must have basic knowledge of git operations.
Setting up Git Repository
Begin by creating a Git repository on your preferred Git service account.
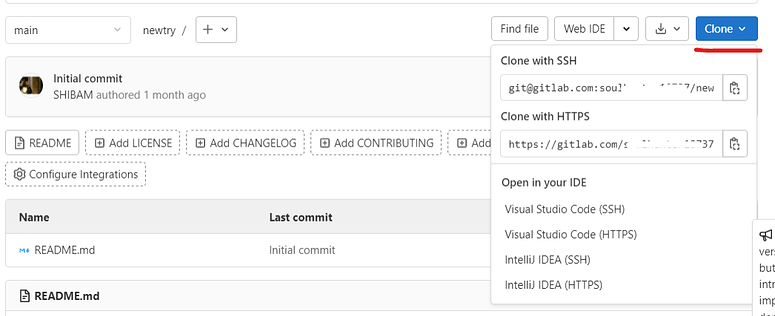
In the repository, locate and copy the
SSH URLprovided. This URL is essential for connecting your app in the DronaHQ to the Git repository.- GitHub SSH URL -

GitHub SSH URL - GitLab SSH URL -
GitLab SSH URL - Bitbucket SSH URL -
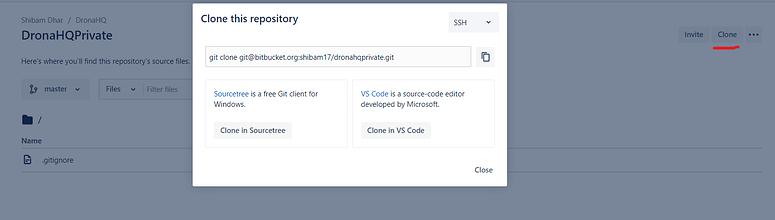
Bitbucket SSH URL Log in to your DronaHQ account and create an app or open an existing one.
Navigate to
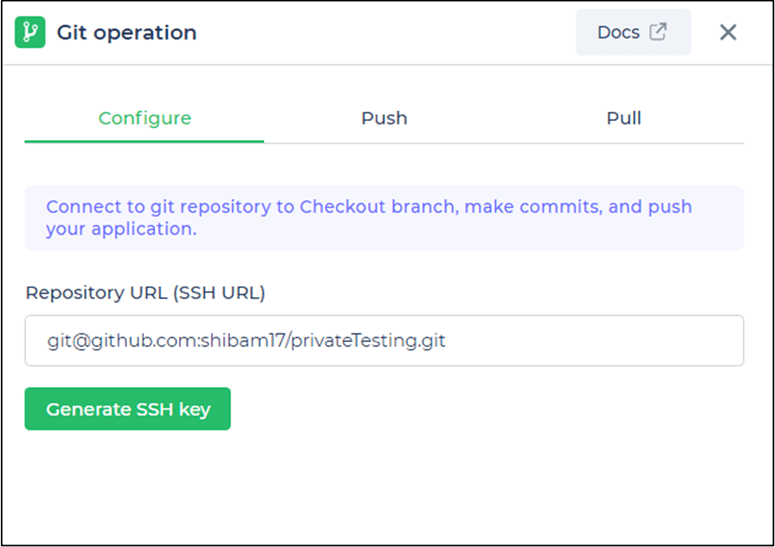
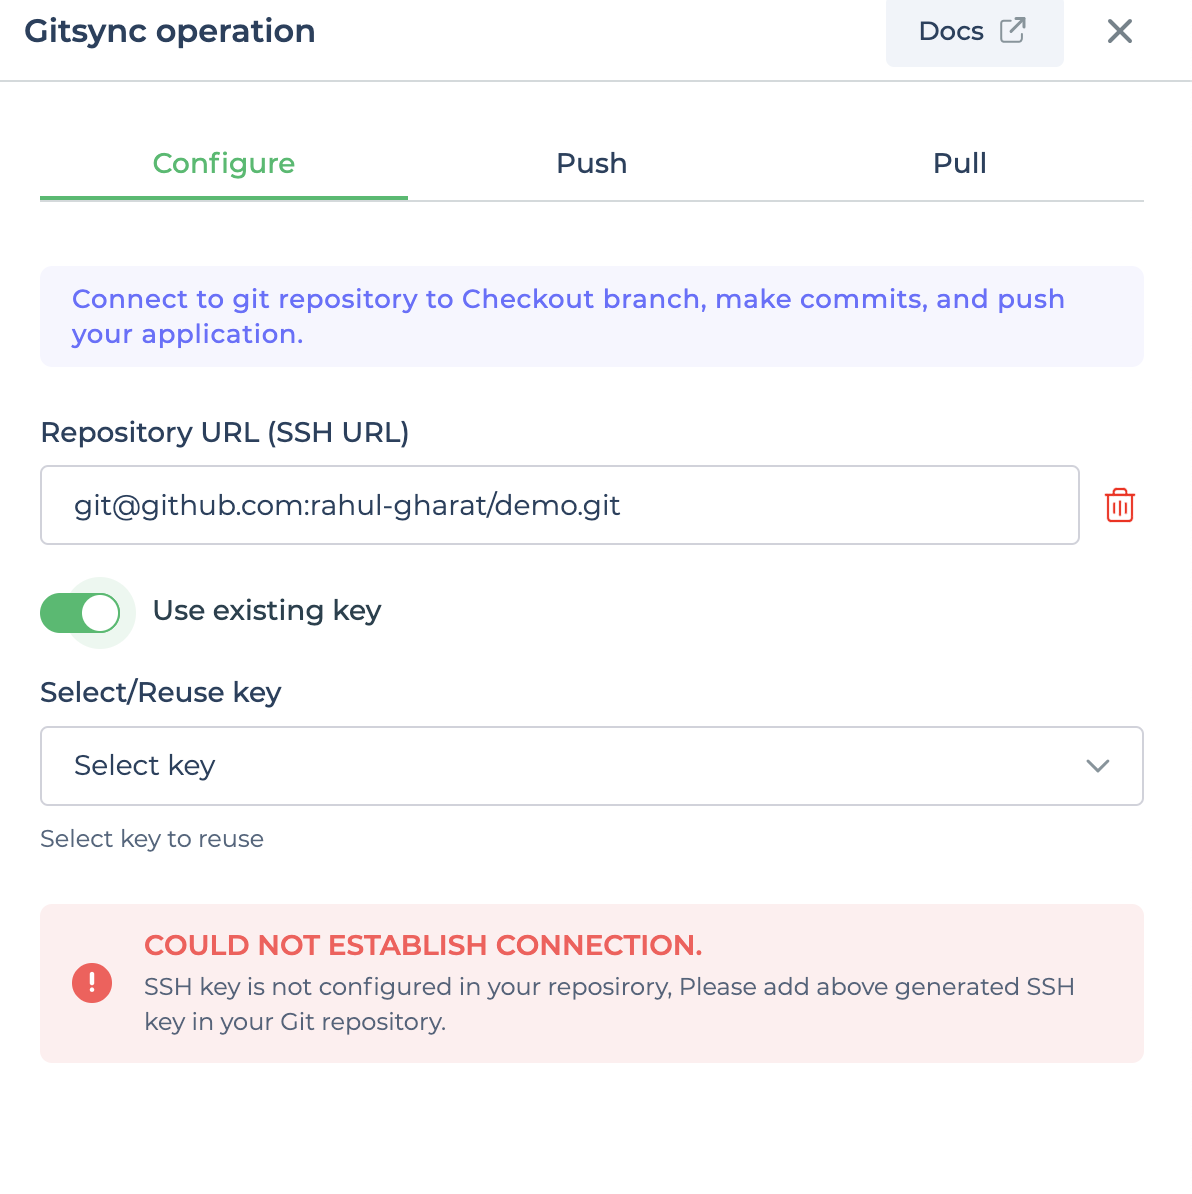
Publish > Git Operation.In the
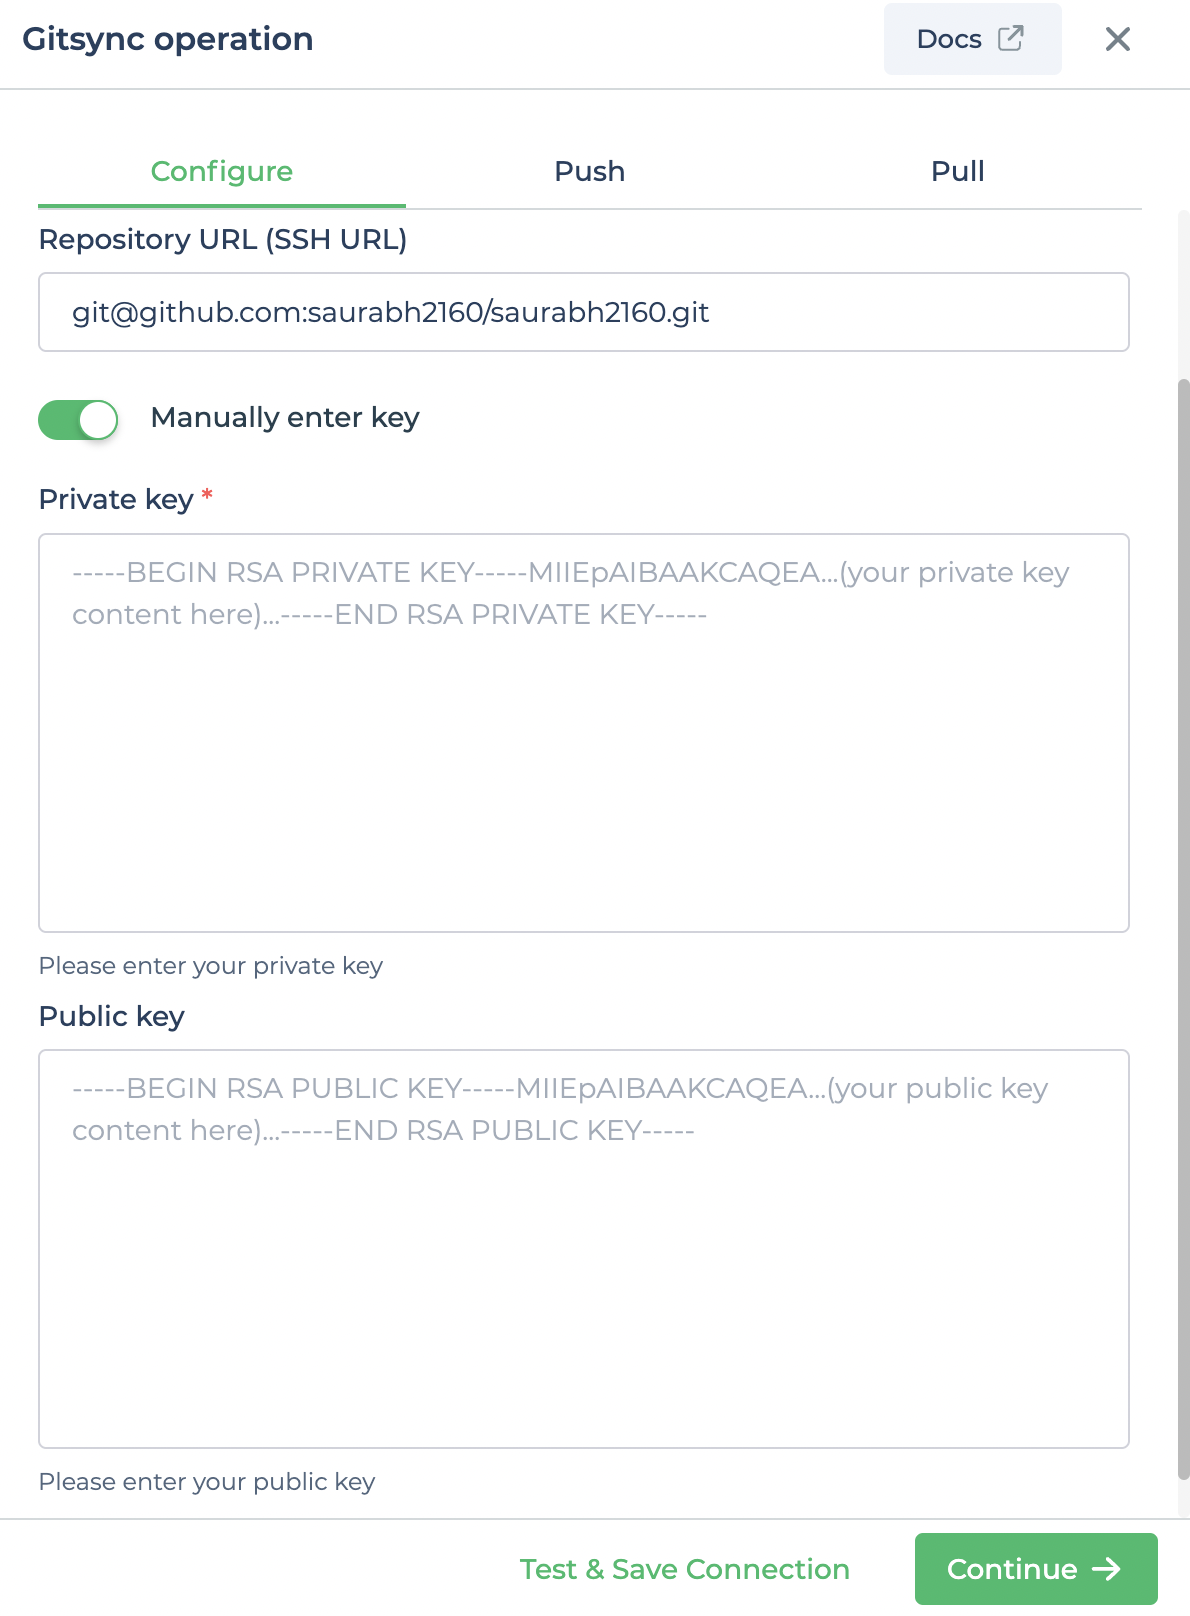
Configurewindow, paste the SSH URL and clickGenerate keyto create anSSH key.
You can toggle-on the Use Existing Key, this will allow you to select from existing keys. After toggling it on, you'll have a dropdown menu to select from existing keys stored on your system. This is particularly useful if you already have SSH keys generated and want to use one of them for this configuration. Select the appropriate key from the dropdown menu, and it will be used for authentication purposes when interacting with the specified SSH URL.
Alternatively, toggle-on Manually enter key to manually generate and use SSH key pairs.
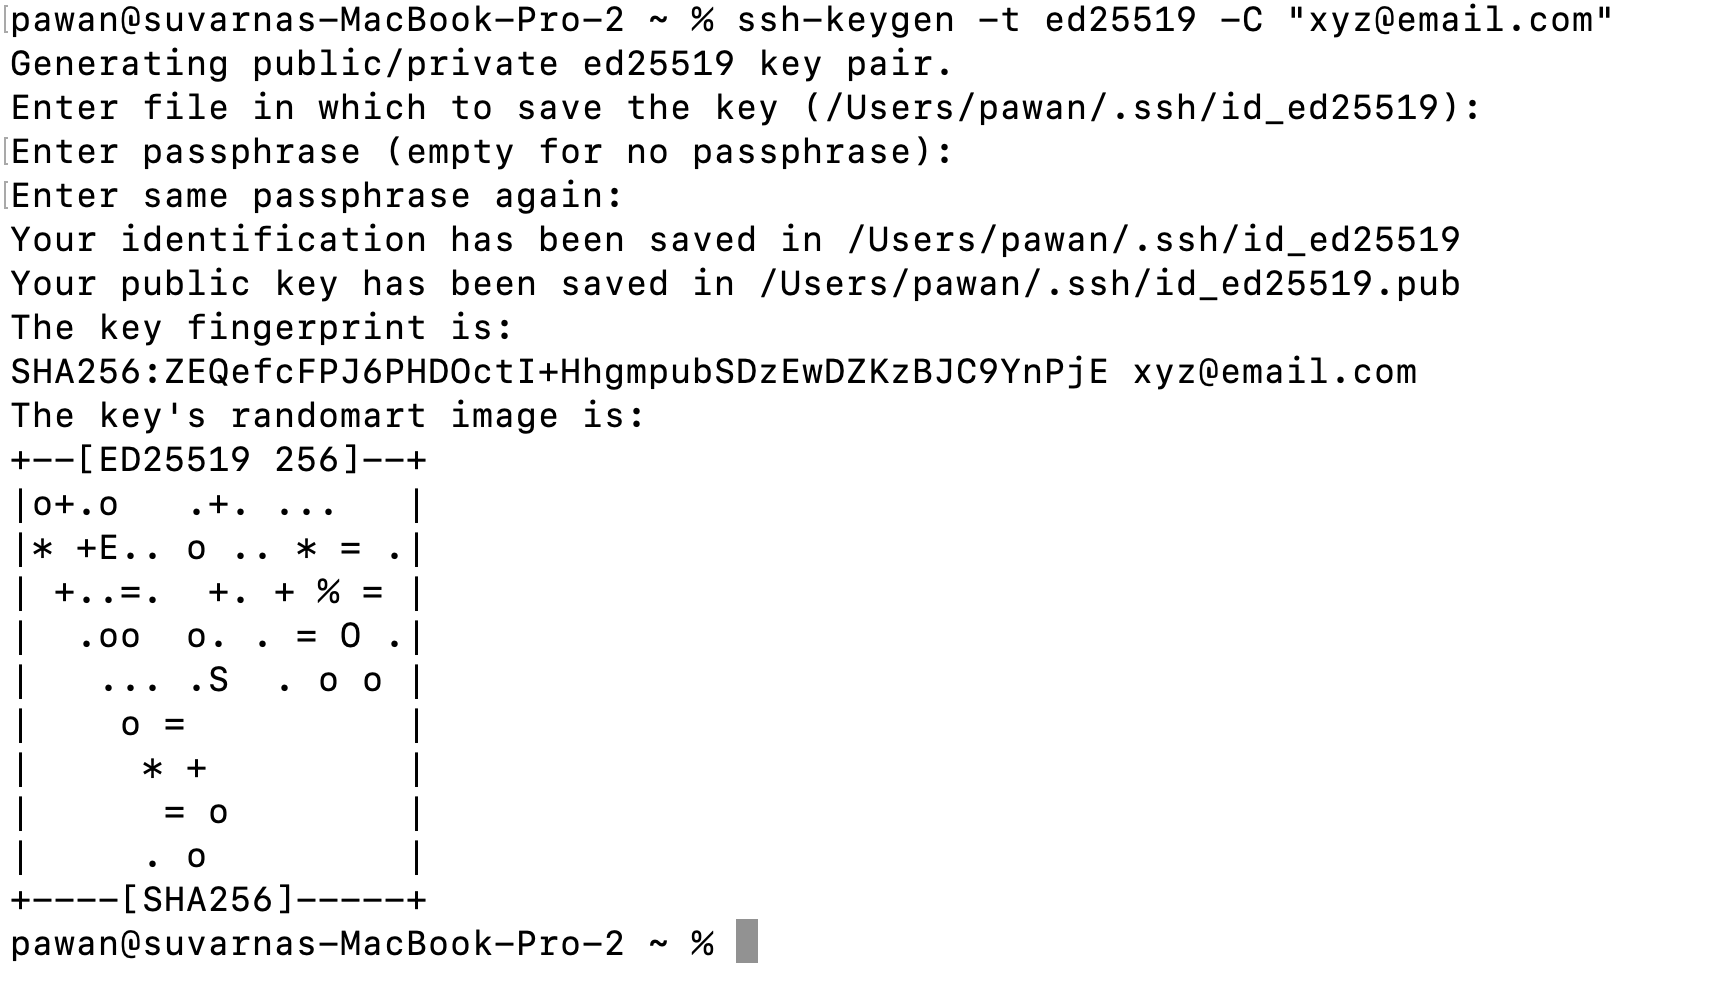
To generate a key pair, run the command ssh-keygen -t ed25519 -C "xyz@email.com".
Copy and enter the private key (mandatory) and public key (optional) in the shown fields.
The SSH key, which serves as an authentication mechanism, will be generated on the screen. Be sure to copy the SSH key.
Add the SSH key to your Git repository following the steps outlined in the Adding SSH Keys to Git Service Accounts guide. Afterward, return to the app in the DronaHQ and click
Test & Save Connection.
Your connection is now successfully established and ready to leverage other features.
Adding SSH Keys to Git Service Accounts
Adding SSH Key in GitHub
- To add this SSH key to your GitHub account, navigate to
GitHub > Settings > SSH and GPG Keys > New SSH key.
- Provide the required details, including a Title, and paste the SSH key copied from the app in DronaHQ. Click
Add SSH key. Confirmation and a password prompt may follow.
The default branch for the connection is Master for GitHub.
Adding SSH Key in GitLab
- To add this SSH key to your GitLab account, go to
GitLab > User Settings > SSH Keys.
- Provide the necessary details, such as Title and Expiry date, and paste the SSH key copied from the app in DronaHQ. Click
Add key.
Adding SSH Key in Bitbucket
- To add this SSH key to your Bitbucket account, visit
Bitbucket > Settings > SSH Keys (under security) > Add key. Note that you need to add the key at the account level, not the repository level.
- Provide the necessary details, including the Label, and paste the SSH key copied from the app in DronaHQ. Click
Add key.
Using Git in Action
Working with Git in the DronaHQ is similar to using Git itself. After connecting to the Git repository, you can commit changes and push them to the remote branch. You can also pull changes from the repository. Two additional tabs, Push and Pull, enable these operations.
Push to the Repository
In this window, users can make changes and commit to the branch of the repository. It will prompt for the branch to which you want to commit, along with a commit message.
Your app will be saved in the DHQ_Microapp.json file in your repository's root directory. If this file doesn't exist in the repository, it will be auto-created or overwritten with subsequent updates. Please refrain from making changes to this file.
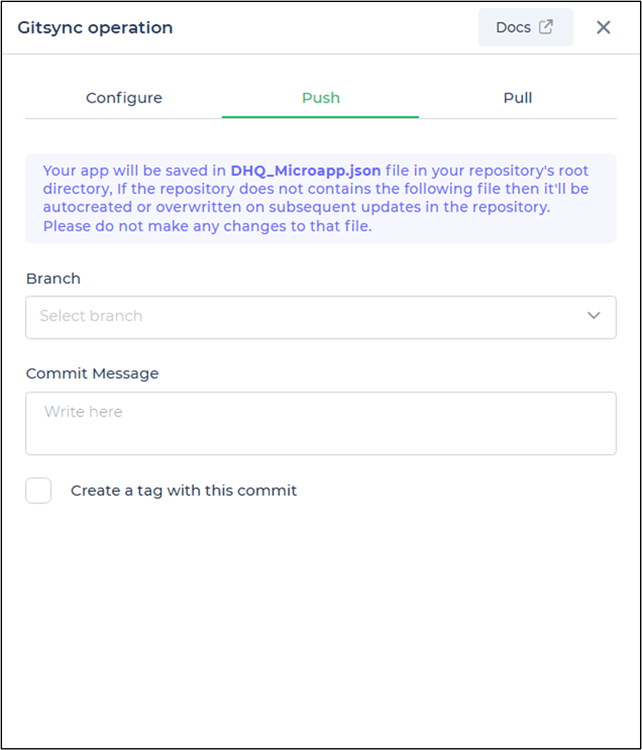
This feature is beneficial when you are further developing your app and want to keep it in sync with the connected repository.
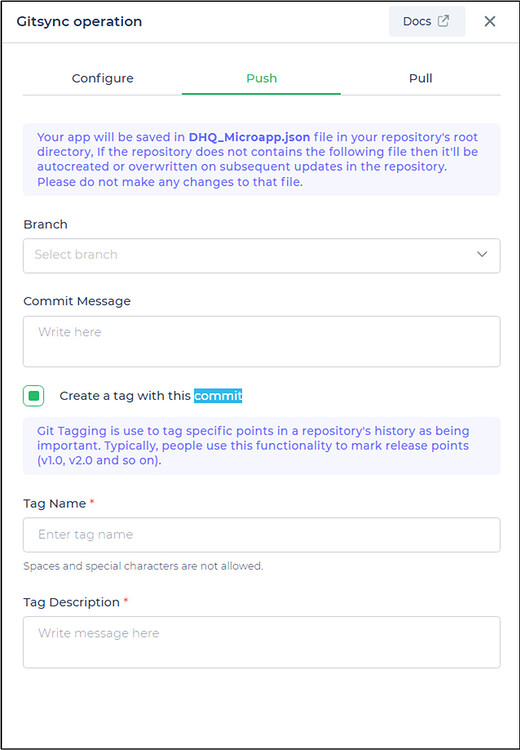
Git Tag - Create a Tag with the Commit
Git Tagging is used to mark specific points in a repository's history as significant, such as release points (v1.0, v2.0, etc.). You can provide a tag for your commit along with tag descriptions for future reference.
Afterwards, click Commit & Push.
When you commit and push changes, they are published for app viewers. Keep in mind that changes in one branch do not affect changes in other branches. For example, if you are working on the main branch m1 and deploy changes from m1, it will not impact changes in the master branch.
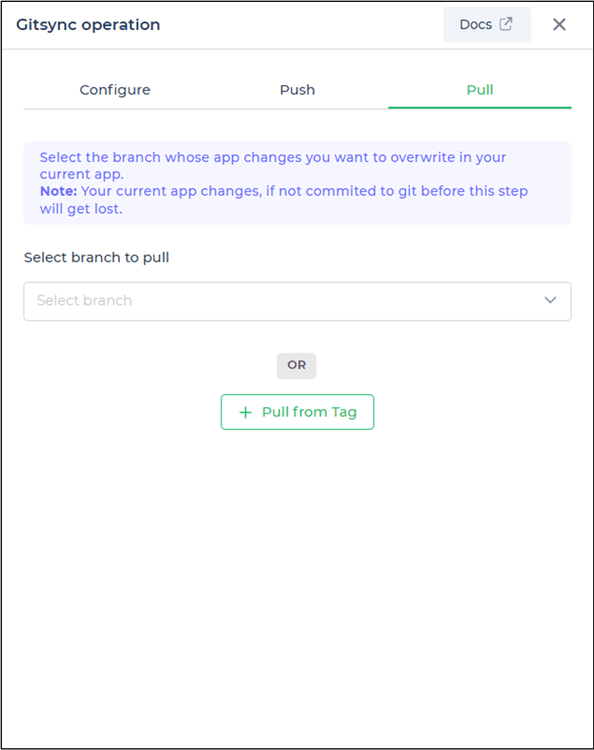
Pull from the Repository
If your local branch is not synchronized with the remote branch of the Git repository, you can pull the latest changes by clicking the pull button at the bottom left corner. Select the branch whose app changes you want to overwrite in your current app.
If your current app changes are not committed to Git before this step, they will be lost.
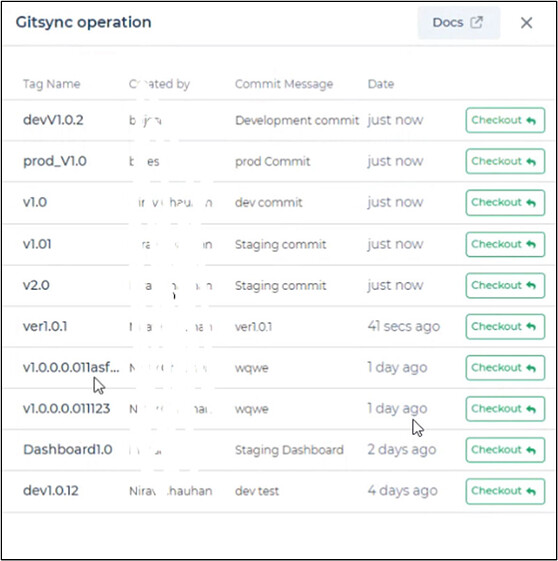
Git Tag - Pull from Tag
While pulling from a branch, you can also select a specific Git tag. This allows you to continue your project from the commit of the chosen tag without affecting your ongoing development. Simply click Pull from Tag and then checkout the relevant Git tag.
When pulling files from the repository, ensure that the same connectors and APIs with the same name are present in the account. This works similarly to the functionality when importing files; you can refer here