Configure Custom domain & Subdomain
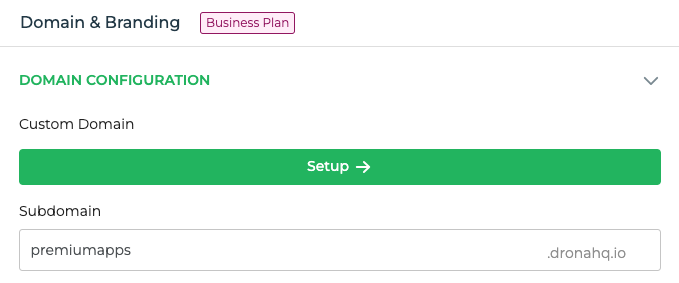
DronaHQ provides you with an option of configuring a custom domain or subdomain in your DronaHQ cloud edition by navigating to Account Settings -> Domain & Branding post which your end users will be able to login to the end-user portal on the URL which is set up.
Custom domain is only available on Business plan of DronaHQ cloud edition whereas subdomain can be set up in all plans.
Also since the self-hosted instance is deployed at your own end, it doesn't require any specific plans and the process to set up a custom domain on DronaHQ self-hosted instance is specific in the self-hosted documentation.
You you need to have admin or owner level privileges to access or modify these configurations.

Setting up Subdomain
For DronaHQ cloud edition, you can simply type the subdomain of your choice which will be checked for its uniqueness and once its unique, you can go ahead and save the configurations. Your end-user portal will be accessible on your_subdomain.dronahq.io
Prerequisites for Custom Domain
Before you get started, make sure you:
- Have
admin/ownerlevel access to your DronaHQ account - Own the domain name you want to connect to your site or buy a domain from a DNS provider of your choice
- Have access to update the DNS records with your domain registrar or DNS provider
- Reset your DNS settings if you have previously linked your domain elsewhere to eliminate troubleshooting at the later stage
DronaHQ does not have any top-level domain (TLD) restrictions as long as the domain is visible in public DNS, you can connect the domain to domain nameservers (NS records), and you can create A and CNAME records.
DNS changes may take up to 48 hours for the DNS cache to expire, although this typically occurs within a few hours.
Setting up Custom domain
You need to follow the following steps to set up your custom domain:
- Navigate to
Account Settings -> Domain & Branding - Click on
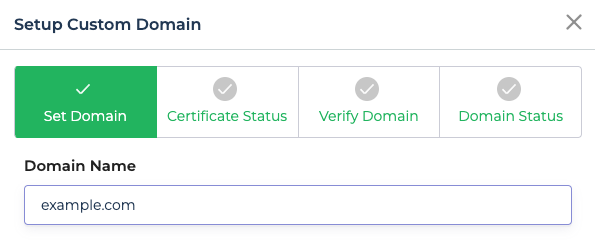
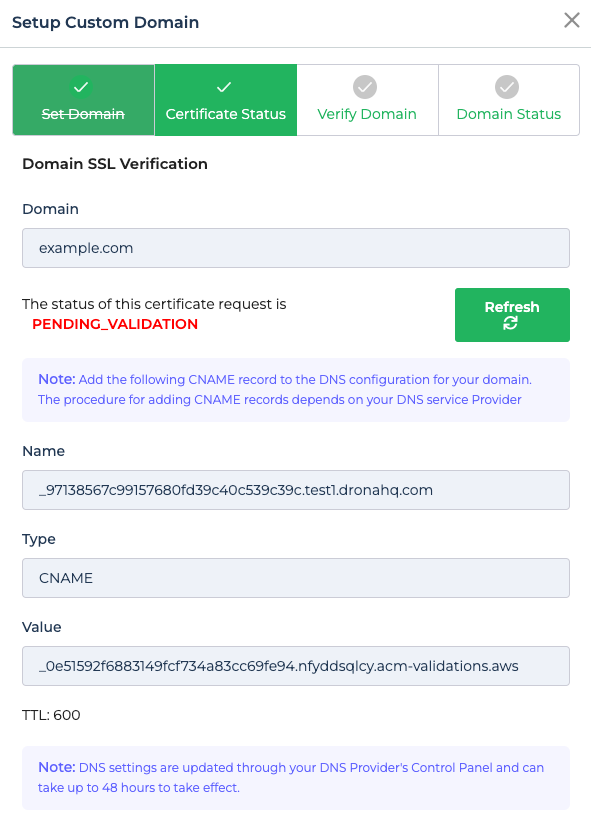
Set up custom domain Step1: Enter your root domain (e.g: yourdomain.com), this will add both the root domain (e.g., yourdomain.com) and the www subdomain (e.g: www.yourdomain.com) at our endStep 2: You need to validate SSL certificate by creating a CNAME record with the host as thenamefield and value as thevaluefield.- Once the SSL is issued and verified you can move to the next step of domain verification
Step 3: You need to verify the domain by creating a CNAME record with host as @ and value as the fieldgenerated domain name- In case you want to set up a subdomain, you will have to create a CNAME record with host as
your subdomainand value as the fieldgenerated domain name - Every DNS provider has their own process for updating DNS records. We recommend that you read the help documentation of your DNS provider, and contact their support for help
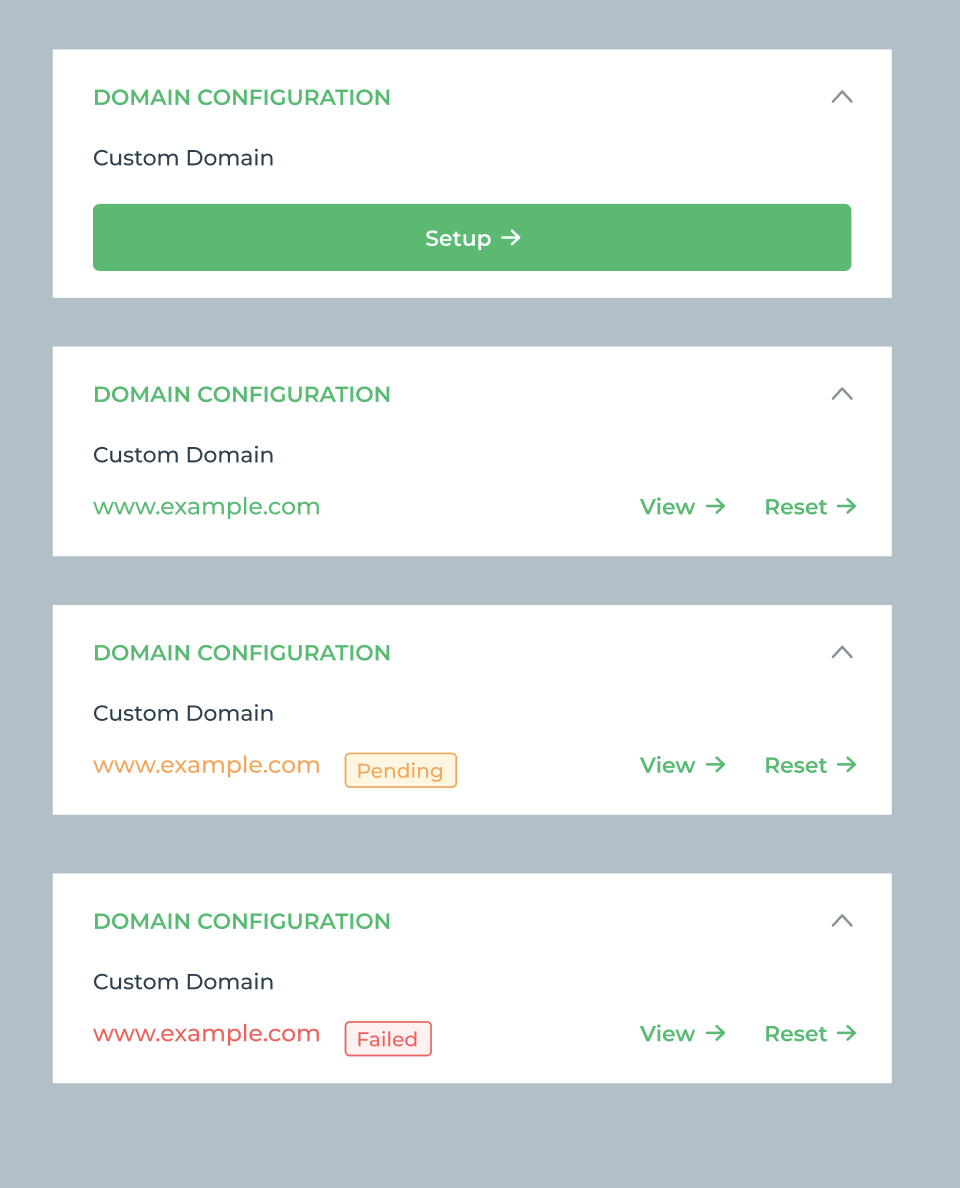
Step 4: You will be able to see the status of your custom domain here. There are 3 statuses namely:pendingin progressanddeployed


For domains with special characters (e.g., ä, ê, ó) in Punycode format. You can use a tool like Verisign to convert your domain to Punycode, though keep in mind that it might not always work.
DronaHQ doesn't support non SSL domains to be linked while setting up custom domain as it can be a potential security threat.
Verifying the custom domain
- Navigate to
Account Settings -> Domain & Brandingand you would be able to spot the different statuses of your custom domain - Alternatively you can visit your custom domain that you linked and check if you are able to see the login screen of
end-user portal. - DNS changes can take up to 48 hours for the DNS cache to expire, although this typically occurs within a few hours. If your site verification doesn’t work right away, you can come back later to check the status again.
- If everything is live and you are still experiencing issues on domain verification after 2 days, contact our support from inside the
DronaHQ creator portal.

All your public links, embed links and the end user portal will start automatically pointing to your custom domain once set up.