Overview
DronaHQ MCP connects the DronaHQ app platform to your AI coding agent like Claude Code, Codex, Cursor, Windsurf, VS Code, or any other MCP-compatible client, over the Model Context Protocol. Instead of your agent only producing frontend code, it gets a production backend it can actually deploy to, authentication, role-based access control (RBAC), a secrets vault, database and API connections, environments, hosting, and audit logging. There's no server to stand up, no CI/CD pipeline to configure, no SSL certificate to manage, and no middleware to write.
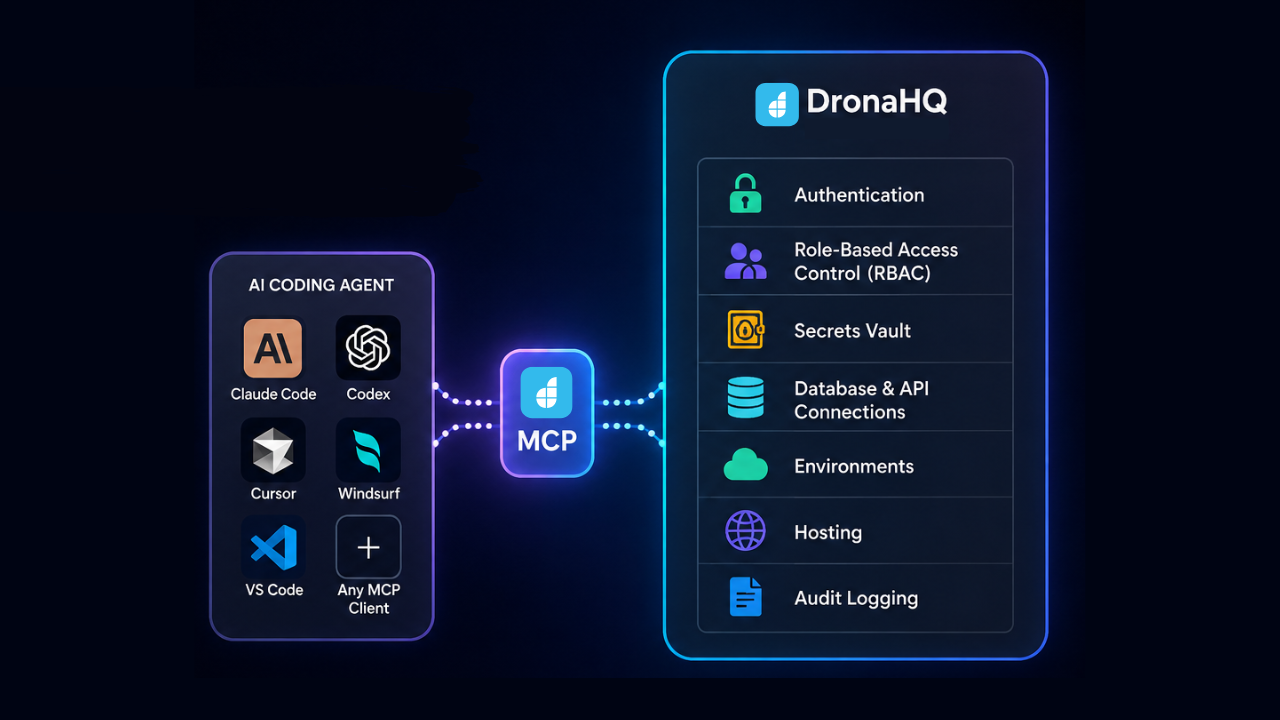
Why use DronaHQ MCP
The problem it solves: A coding agent can generate a working admin panel or internal tool in minutes, but shipping it is where the time actually goes : deciding where it runs, who is allowed to access it, where database credentials are stored, how it reaches services behind a VPN, what a rollback looks like, and who signs off on the release. Multiply that by every internal tool your team needs, and it adds up to a significant ongoing cost.
What you get by prompting through DronaHQ MCP
- RBAC built into the generated frontend: Permissions are part of the app from the start, not added afterward
- A secrets vault: Credentials never end up in your repo or your prompts
- Secured data access: Databases, gRPC, REST APIs, internal microservices, and SSH tunneling are supported
- No backend to write: For CRUD apps, admin panels, and internal tooling there's nothing to stand up
- No infrastructure to manage: No server, deployment pipeline, certificate, or DevOps ticket
- SSO, auth, and granular permissions: Already available out of the box
- Version history and audit logs: Every change is attributed
Fit & Characteristics
- When DronaHQ MCP is the right fit: CRUD apps, internal tooling, dashboards, and field-force apps : internal apps, admin panels, dashboards, workflows, and automations for teams that need something live quickly.
- When to bring your own backend instead: Workloads with heavy proprietary logic or a genuine public-facing API surface, agentic workflows, voice agents, data/RAG agents, and agentic software delivery for teams putting AI into production.
- Deployment characteristics: Self-hosted or VPC deployment, RBAC and audit logging by default, your code stays within your own environment, and it fits into your existing review process rather than replacing it.
How it works
Step 1 : Open DronaHQ Studio
Start DronaHQ Studio locally (e.g. http://localhost:24314/apps).
On the home screen you will see two build paths:
- Build in Studio: Chat inside the browser
- Connect via MCP: Link Cursor, Windsurf, VS Code, Claude Code, or another client to this workspace
Choose Connect via MCP for external AI clients.
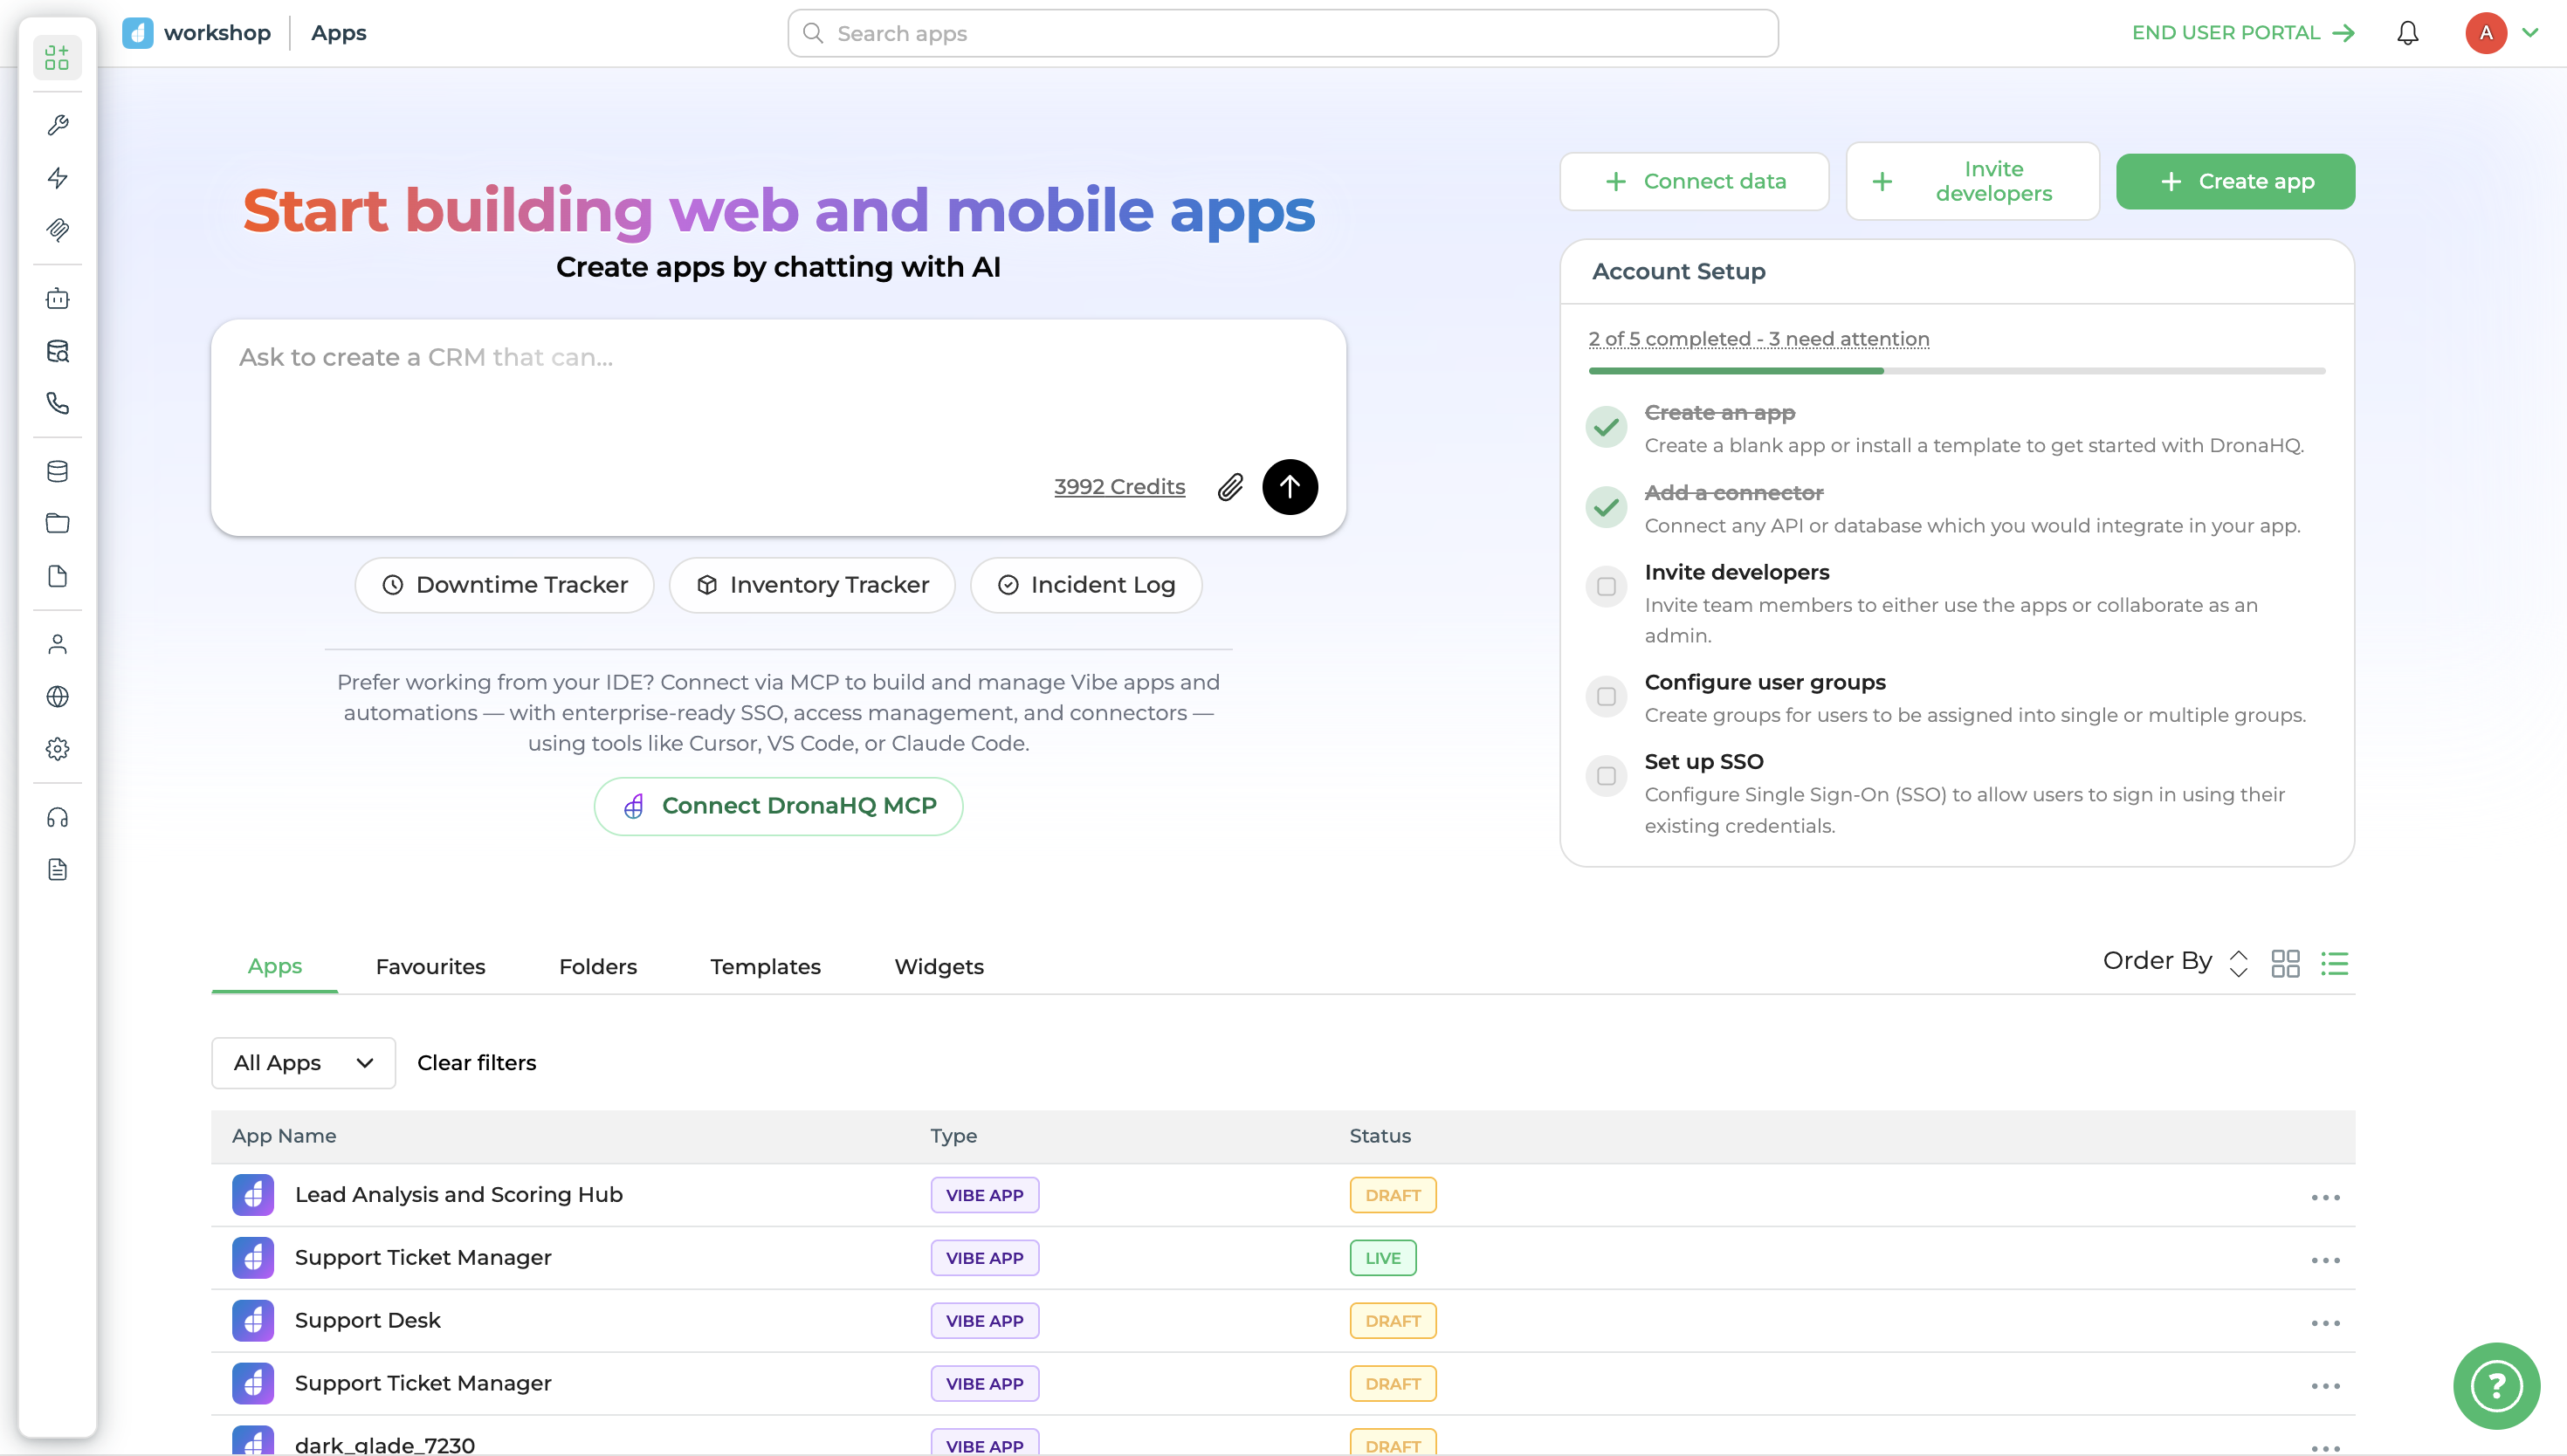
Step 2 : Get MCP credentials
- Click Connect Vibe MCP on the home screen.
- In the drawer, pick or create an MCP server (e.g.
Vibe App MCP). - Select your client tab: Cursor, Windsurf, VS Code, Claude Code, or Manual.
- Copy the generated command or config snippet. It includes:
- Your Studio MCP endpoint URL (e.g.
http://localhost:24314/api/vibe/mcp/...) - An
Authorization: Bearertoken
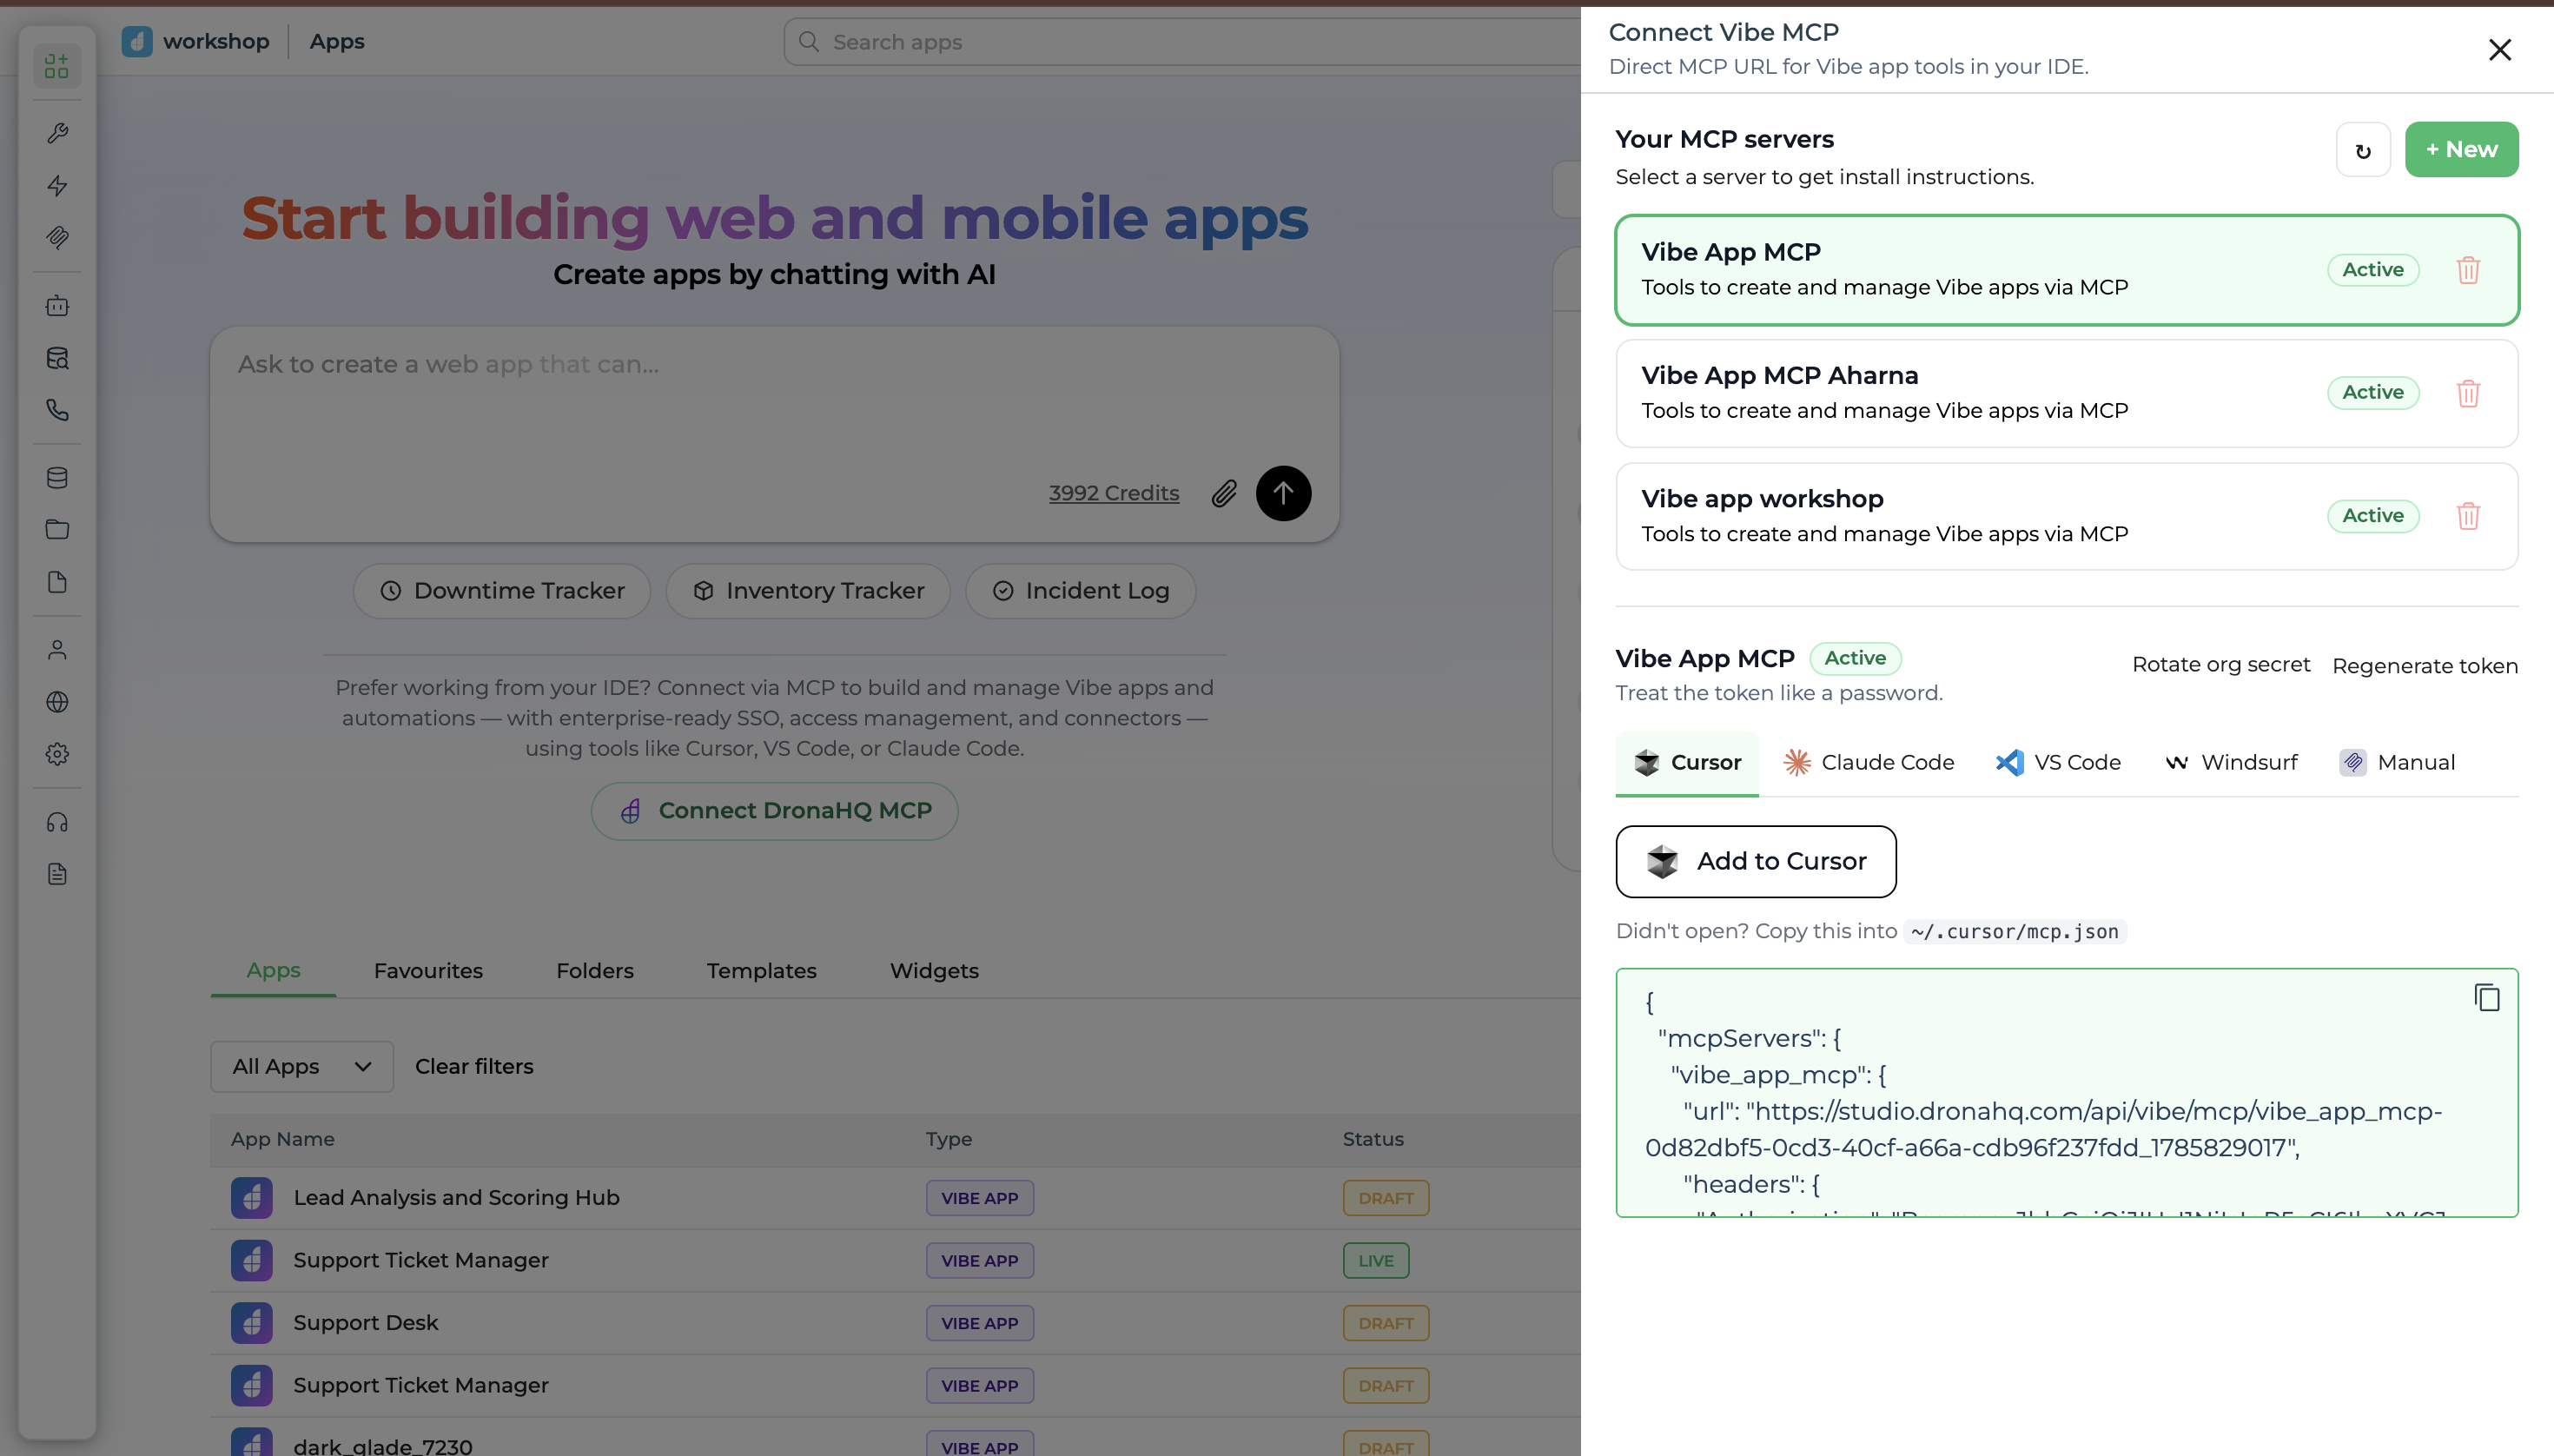
Treat the token like a password. Use Rotate org secret or Regenerate token if it is exposed.
Step 3 : Add MCP server to your AI client
DronaHQ Vibe MCP is a standard HTTP-transport MCP server, so it can be registered in any MCP-compatible client. Pick the tab that matches your setup.
Cursor
Add the server to .cursor/mcp.json in your project (or your global Cursor MCP config) manaually or use the one-click button:
{
  "mcpServers": {
    "vibe_app_mcp": {
      "url": "http://localhost:24314/api/vibe/mcp/<your-server-id>",
      "headers": {
        "Authorization": "Bearer <your-token>"
      }
    }
  }
}
Reload the MCP settings panel in Cursor and confirm Vibe App MCP shows as connected.
Windsurf
Add the server to your Windsurf MCP config (~/.codeium/windsurf/mcp_config.json or the in-app MCP settings panel):
{
  "mcpServers": {
    "vibe_app_mcp": {
      "serverUrl": "http://localhost:24314/api/vibe/mcp/<your-server-id>",
      "headers": {
        "Authorization": "Bearer <your-token>"
      }
    }
  }
}
Restart Windsurf's MCP connection from the settings panel to pick up the new server.
VS Code
If you're using an MCP-enabled extension (e.g. the DronaHQ extension or a generic MCP client extension), add the server via the extension's MCP settings UI, or directly to its mcp.json:
{
  "servers": {
    "vibe_app_mcp": {
      "type": "http",
      "url": "http://localhost:24314/api/vibe/mcp/<your-server-id>",
      "headers": {
        "Authorization": "Bearer <your-token>"
      }
    }
  }
}
Claude Code (terminal)
Run the command copied from Studio in your terminal:
claude mcp add --transport http vibe_app_mcp -s user \
  "http://localhost:24314/api/vibe/mcp/<your-server-id>" \
  --header "Authorization: Bearer <your-token>"
Manual (any other MCP client)
If your client doesn't have a dedicated tab in the drawer, configure it manually using the same two values:
- Endpoint URL:
http://localhost:24314/api/vibe/mcp/<your-server-id> - Transport: HTTP
- Header:
Authorization: Bearer <your-token>
Any client that supports HTTP-transport MCP servers with custom headers can connect this way.
Verify connection
Regardless of client, confirm the Vibe App MCP server is listed and tools such as vibe_create_app, vibe_write_file, vibe_save_app, and vibe_run_db_query are available.
Step 4 : Prompt the AI to build an app
Start a new session and describe what you want. Reference DronaHQ MCP explicitly so the agent uses Vibe tools instead of generic code, regardless of which client you're in.
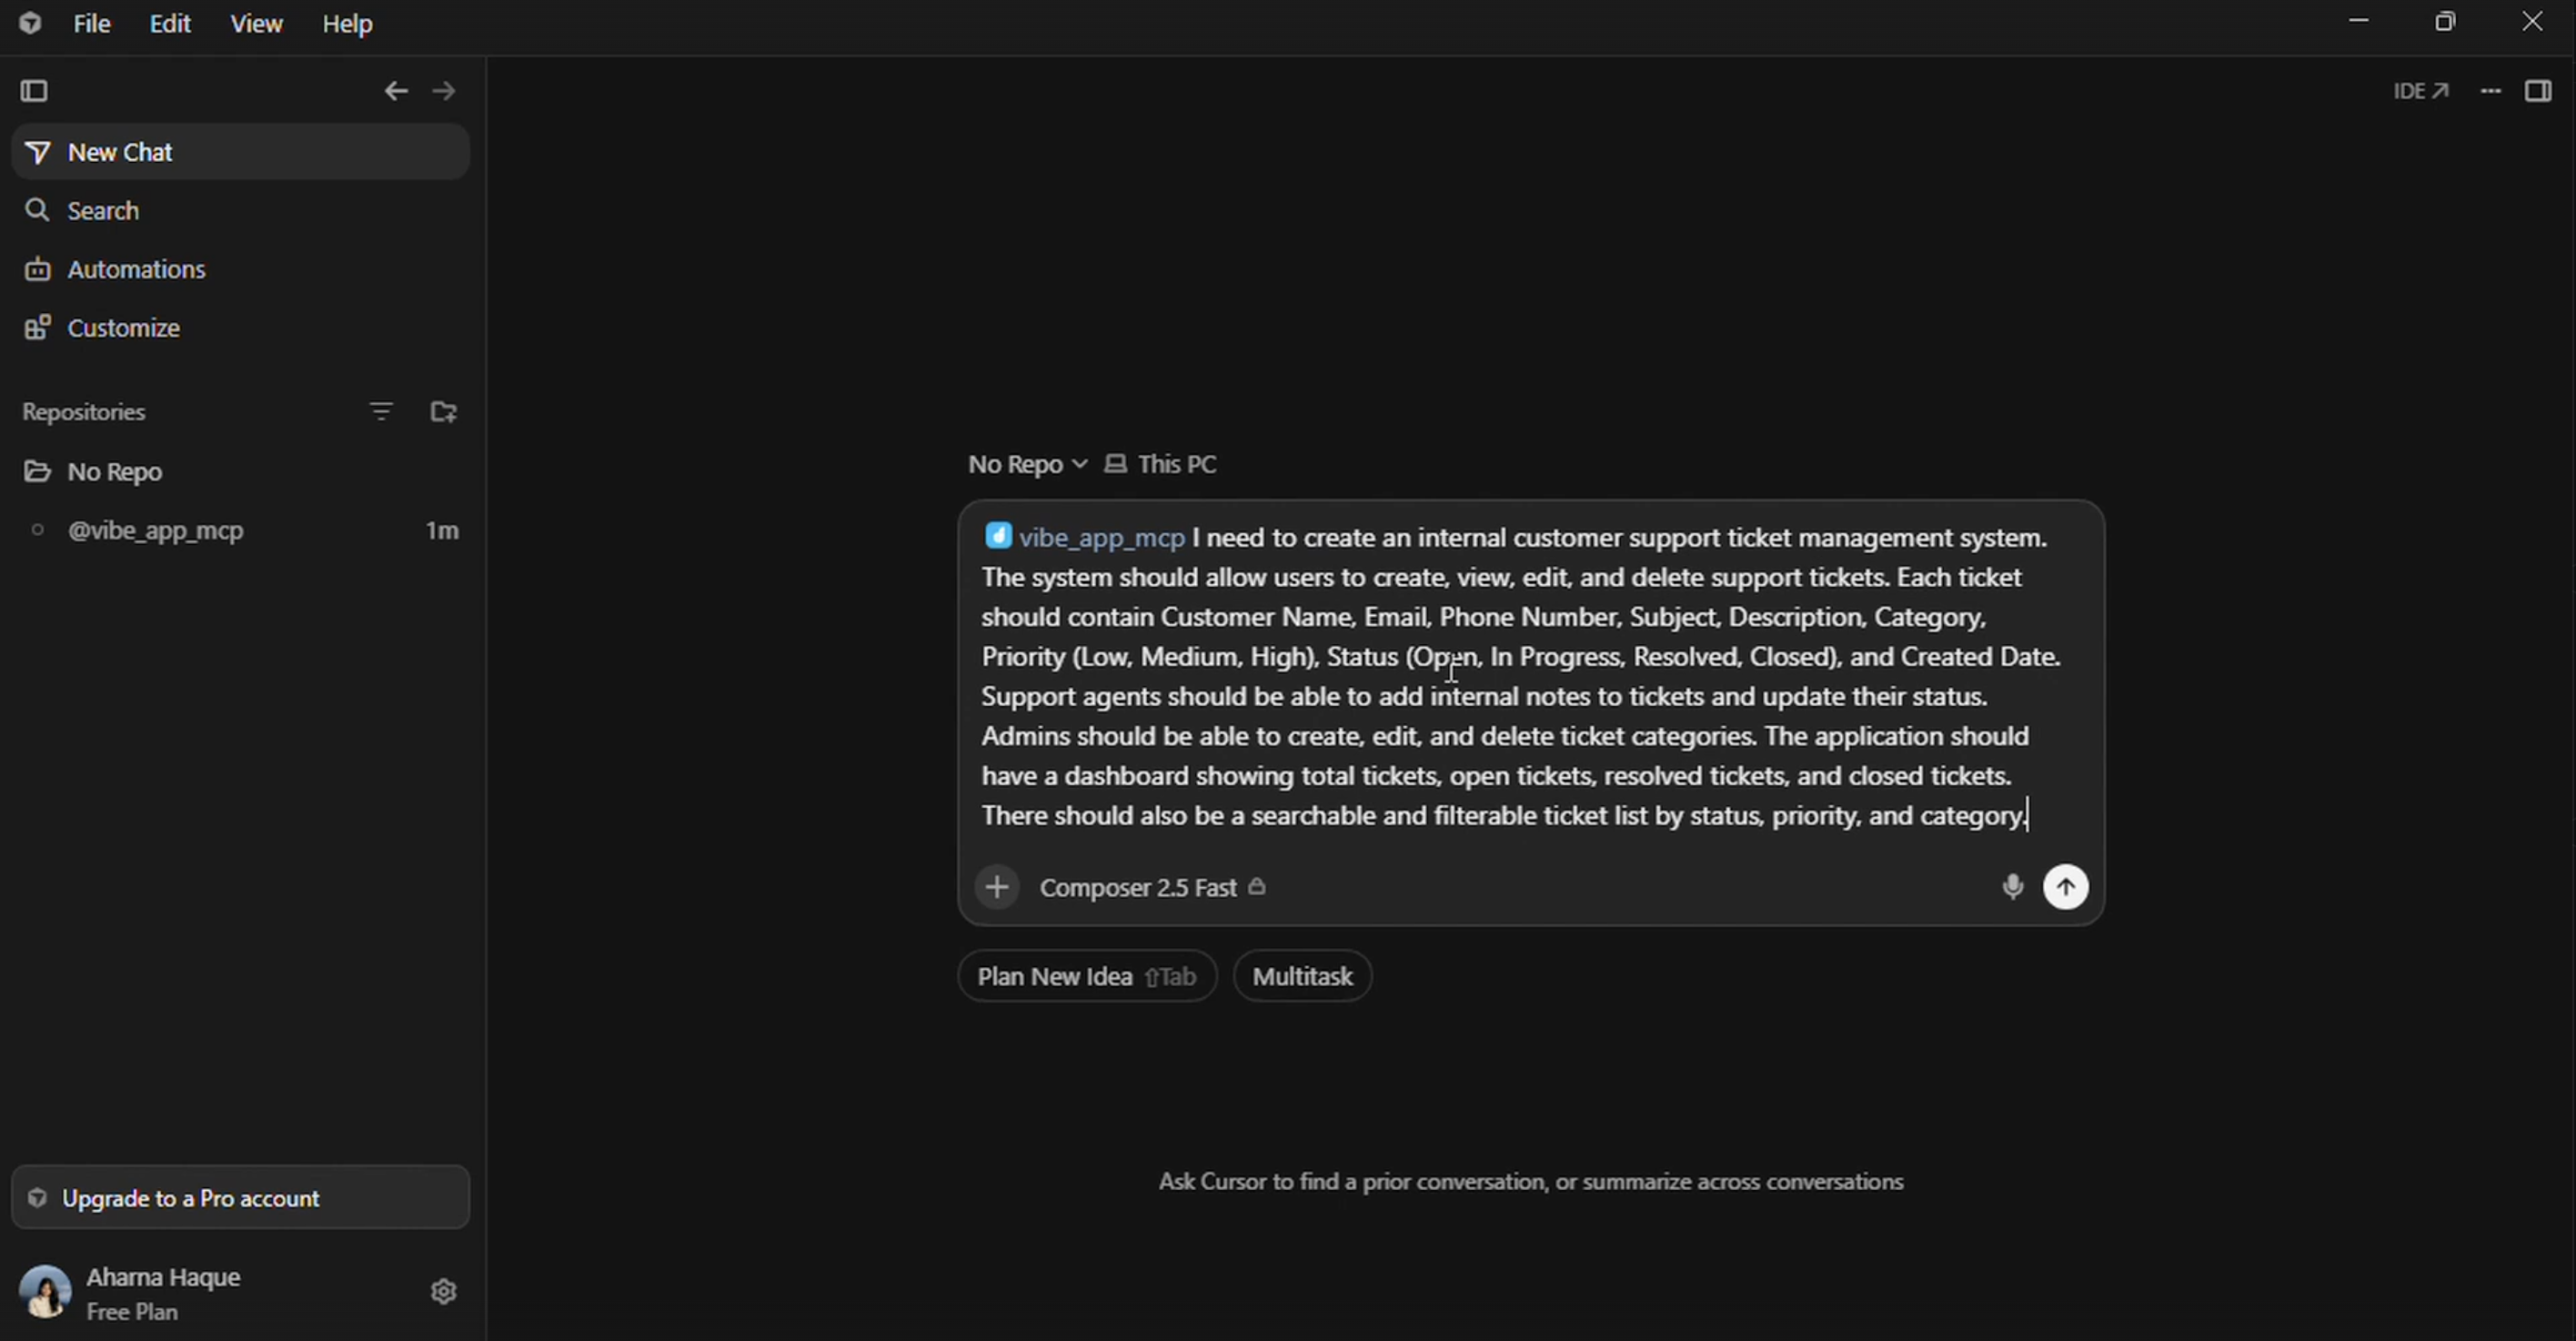
The agent should respond with user stories for confirmation before creating the app.
Tips for better results:
- Confirm user stories before the agent calls
vibe_create_app - Name your database connector when asked (e.g.
RAJ_mysql12) - Approve the proposed table schema before DDL runs
Step 5 : Choose connector and approve schema
When the app needs persistence, the agent lists your Studio connectors and proposes a schema.
Example flow:
- Agent lists connectors (
harshPG,harsh_mysql,RAJ_mysql12, …) - You reply:
ok use RAJ_mysql12 for db connector - Agent proposes tables (e.g.
taskflow_users,taskflow_tasks, …) - You approve; agent runs DDL via
vibe_run_db_query
Step 6 : AI builds source and saves to Studio
The agent uses MCP tools in this order:
| Tool | Purpose |
|---|---|
vibe_create_app | Create new Vibe app → returns pluginId |
vibe_write_file | Write index.html, src/main.jsx, components, sql/queries.sql |
vibe_run_db_query | DDL + seed data on bound connector |
vibe_build | Bundle for quick validation |
vibe_save_app | Persist changes to Studio |
vibe_preview_url | Get preview link |
Open the app in Studio:
http://localhost:24314/index?pluginid=<pluginId>
Step 7 : Review generated code (Code View)
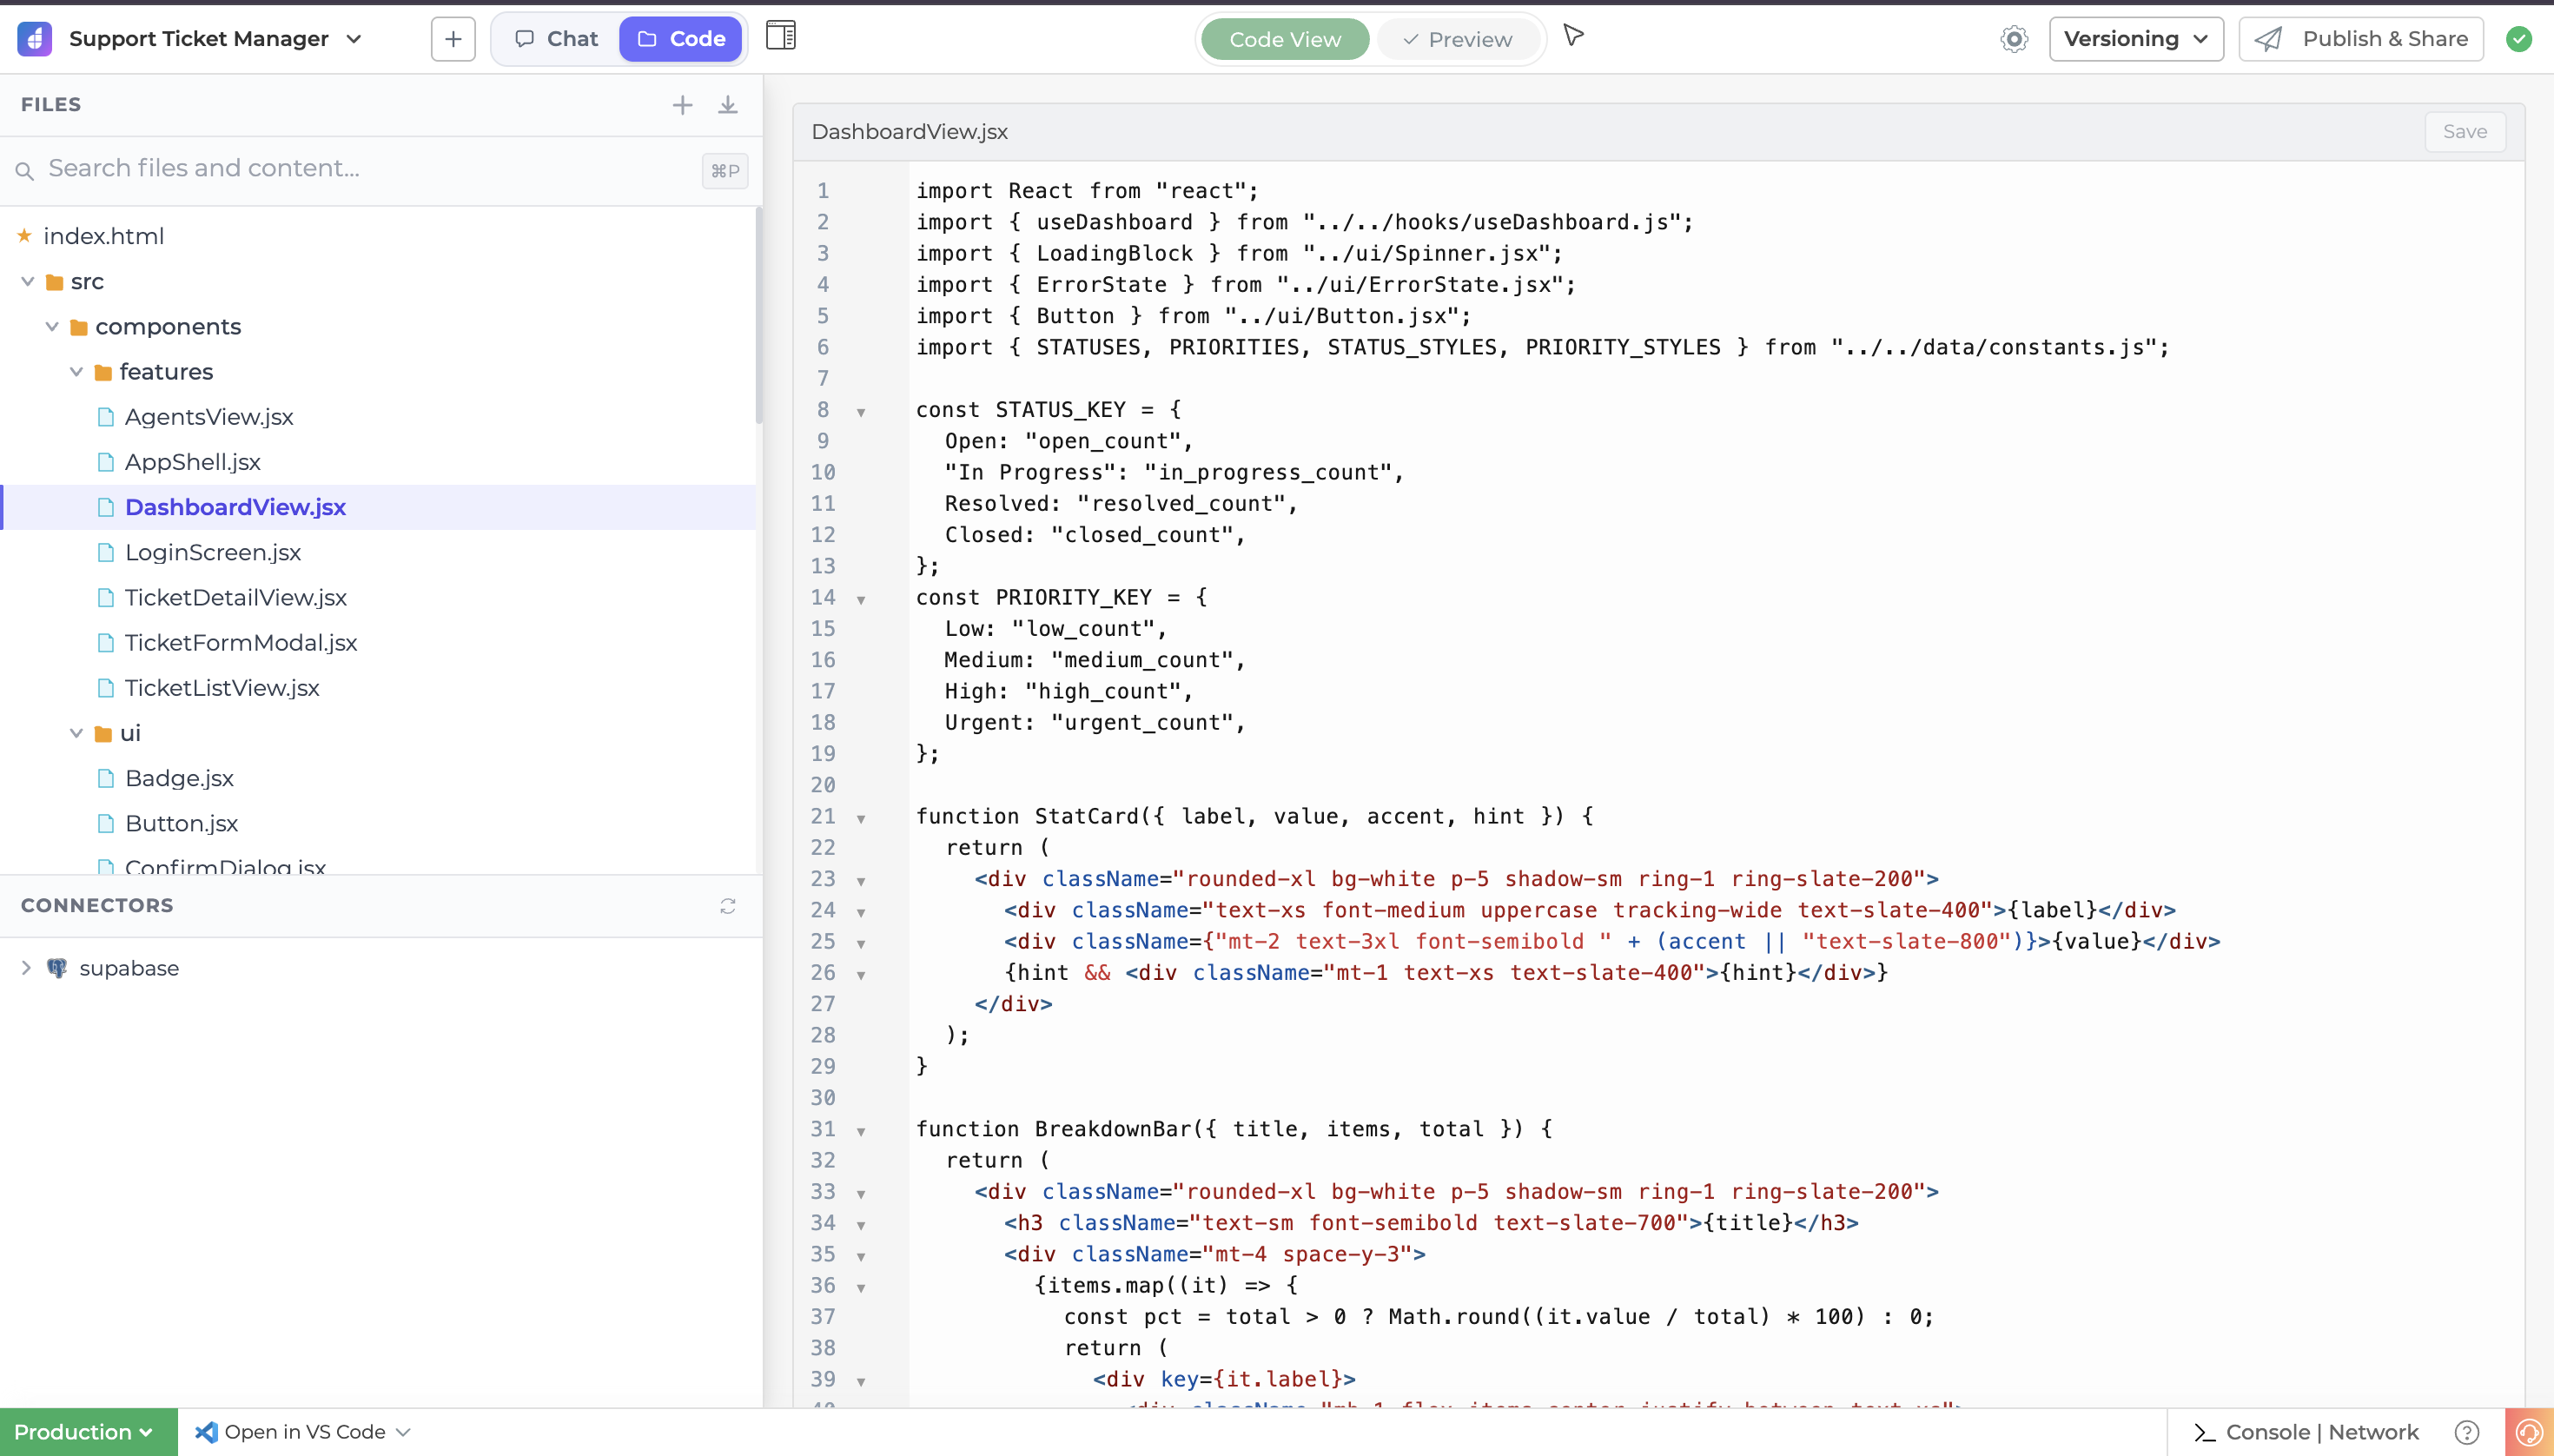
In Studio, switch to Code View to inspect the scaffold:
index.html: React, ReactDOM, Babel, Tailwind from CDNsrc/main.jsx: app entrysrc/components/: UI (Dashboard, Kanban, Tasks, Team, …)src/lib/db.js: connector execute-query layersql/queries.sql: reference SQL blocks
Use Open in VS Code (footer) for local editing with the DronaHQ extension if preferred.
Step 8 : Preview the running app
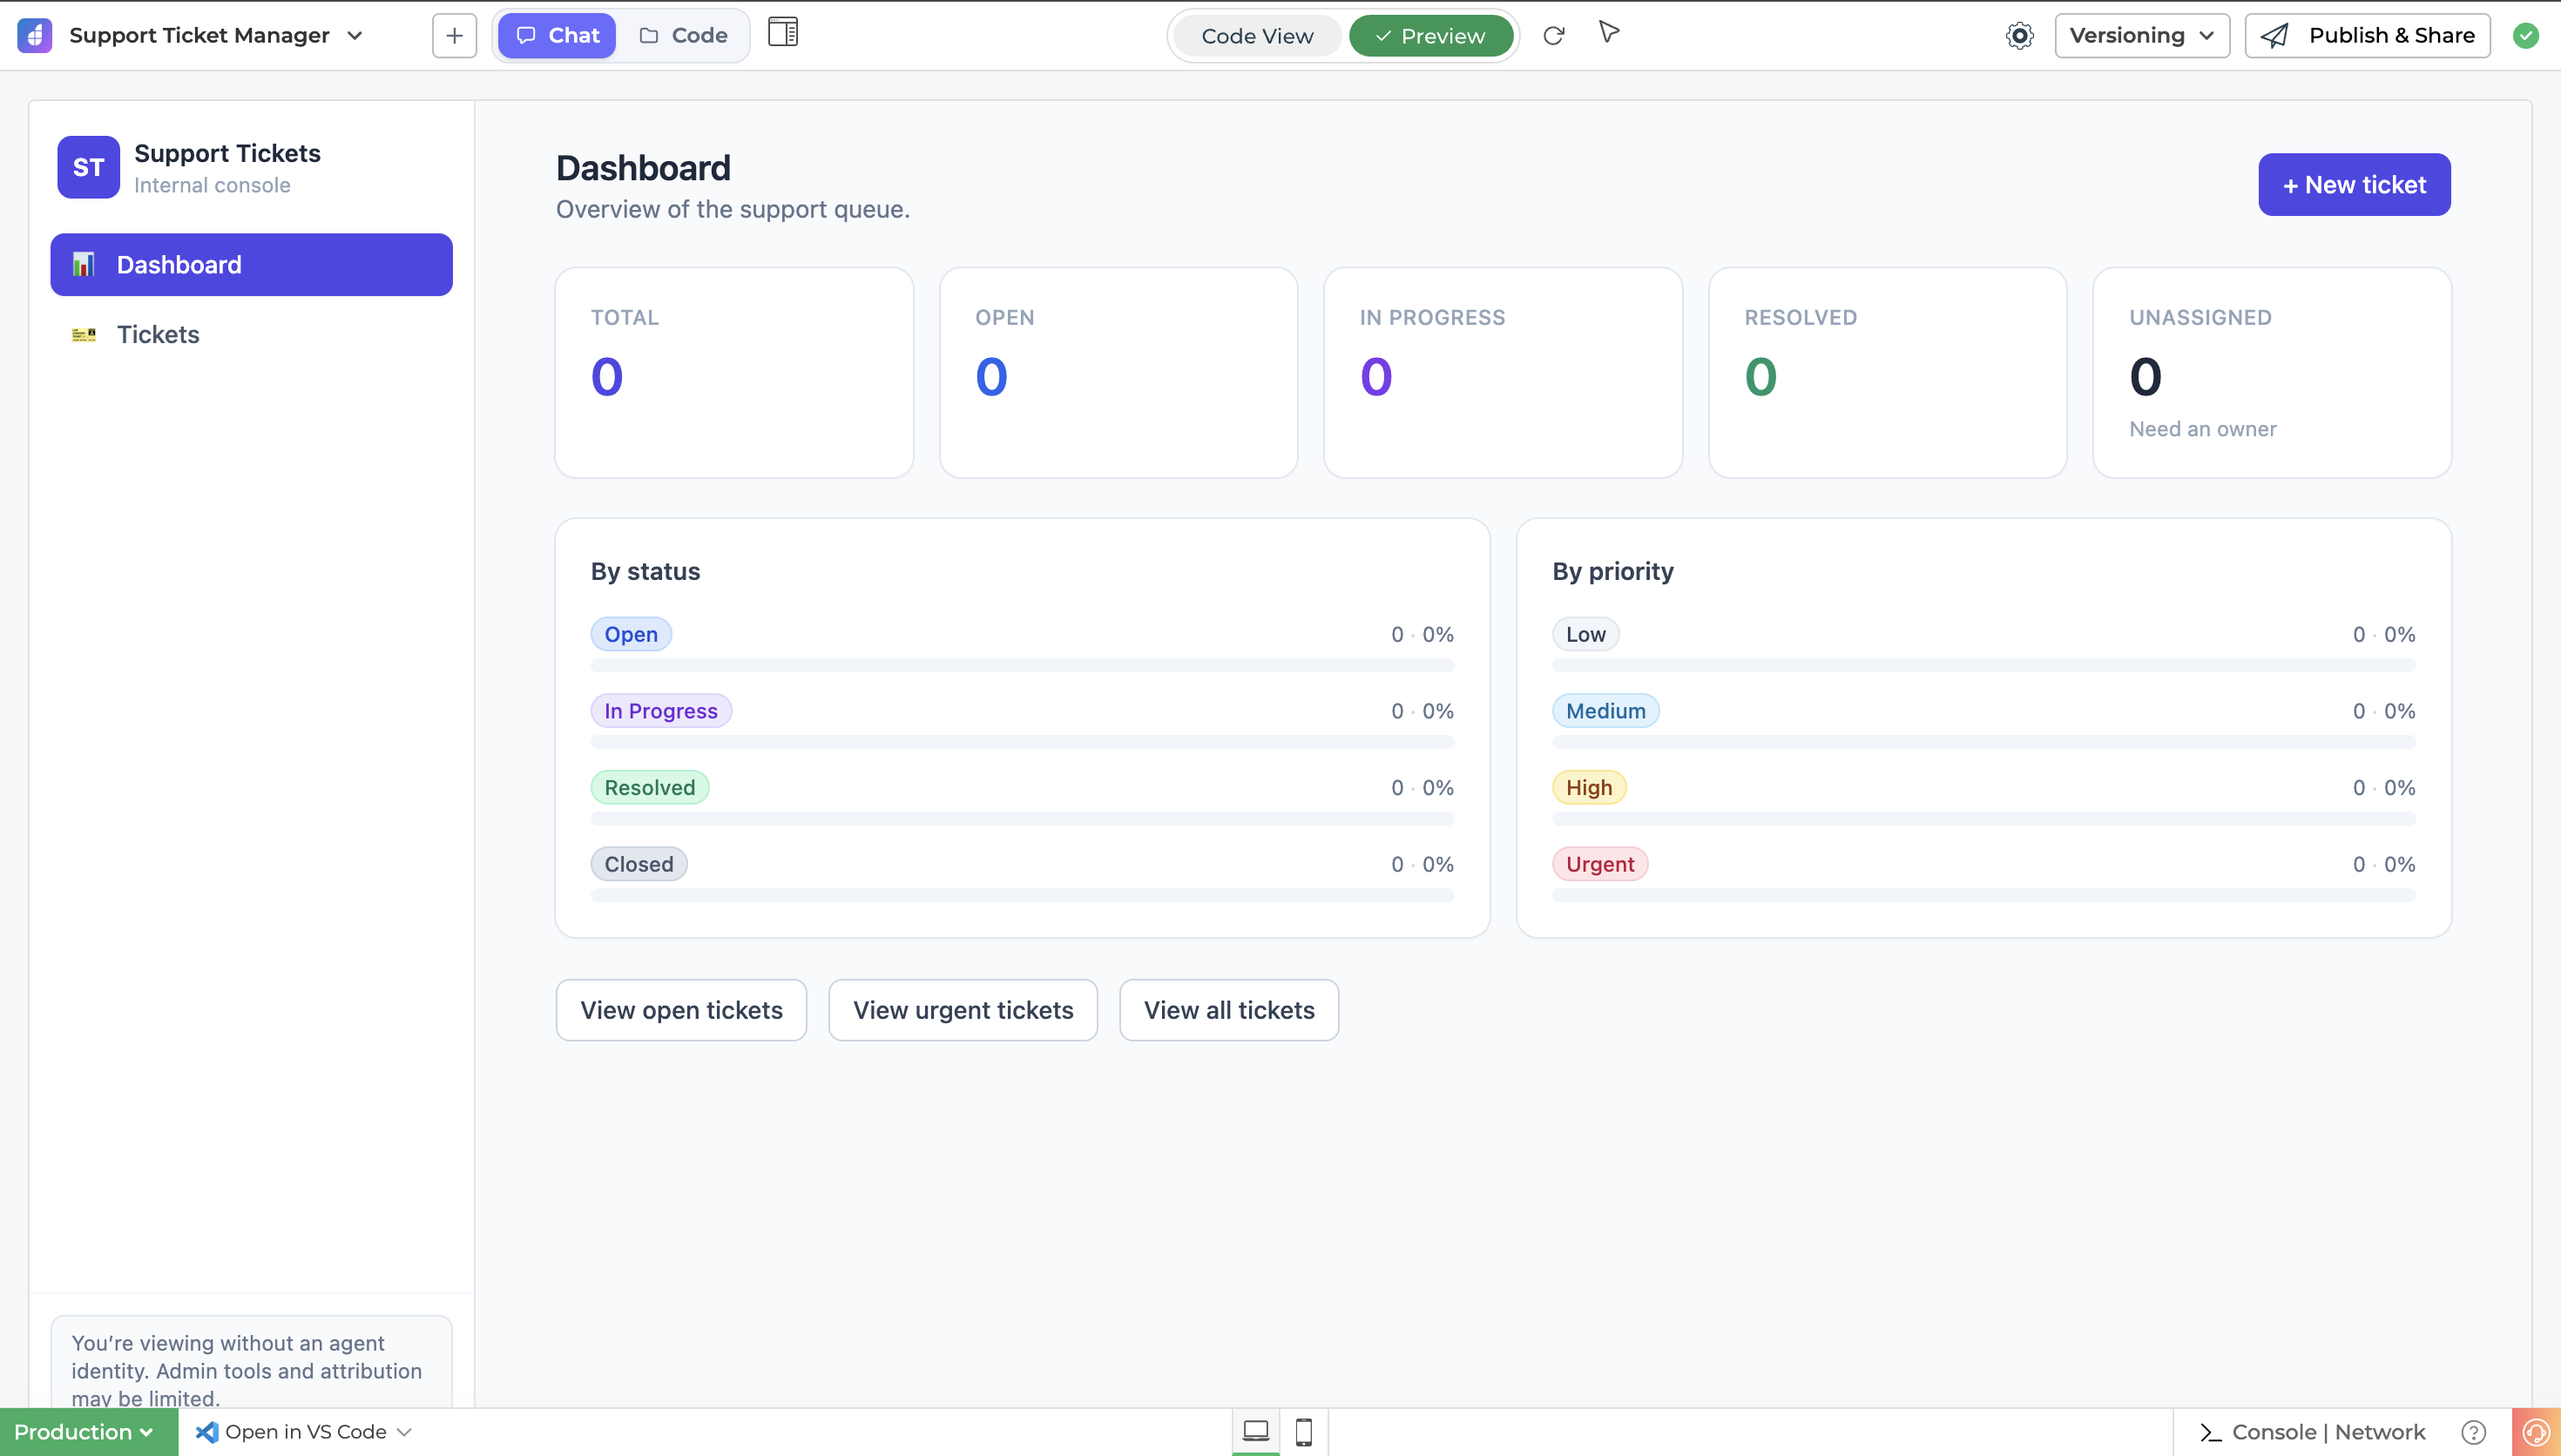
Switch to Preview. Confirm:
- Connected badge (live database via connector)
- UI matches your requirements
- Data loads from the database (not offline mock)
Step 9 : Iterate with follow-up prompts
After the first build, keep the same pluginId and prompt for changes:
Update TaskFlow (pluginId 7465):
- Replace dummy data with flowchart dealers/subjects
- Add update_link column and quarterly frequency
- Rebuild dashboard as dealer tiles with pending popup
- Skip WhatsApp automation for now
The agent edits via vibe_write_file → vibe_save_app and updates the database via vibe_run_db_query.
Quick reference : MCP tools you will use most
| Tool | When |
|---|---|
vibe_list_connectors | Pick existing SQL/REST connector |
vibe_get_db_schema | Inspect tables before/after DDL |
vibe_run_db_query | CREATE TABLE, ALTER, seed data |
vibe_create_app | New Vibe app only (once per project) |
vibe_write_file | Create or overwrite source files |
vibe_save_app | Persist to Studio (required before preview updates) |
vibe_preview_url | Get preview URL for testing |
vibe_publish | Release version (optional) |
Troubleshooting
| Issue | Fix |
|---|---|
| MCP tools not visible | Re-register the server in your client (re-run claude mcp add, reload Cursor/Windsurf MCP config, or restart the VS Code extension); check the token |
| Preview shows mock data | Open inside Studio preview (not raw HTML); check the Connected badge |
vibe_save_app needed | Changes from vibe_write_file are not live until saved |
| Automation tools fail | Automation server may be offline; app CRUD still works via connector |
| Token expired | Regenerate in the Connect Vibe MCP drawer |
Security notes
- Never commit MCP bearer tokens to git
- Rotate tokens if shared or leaked
- MCP runs against your local Studio instance, keep Studio reachable only on trusted networks
- Each client (Cursor, Windsurf, VS Code, Claude Code, manual) stores the token locally in its own MCP config, treat all of them as sensitive files