Configure Microsoft Entra ID SAML
Use this guide to configure Microsoft Entra ID SSO with SAML on DronaHQ. Once configured, users can log in to DronaHQ with their Microsoft Entra ID credentials.
Prerequisites
To set up Microsoft Entra ID SAML in DronaHQ, you will need:
- Permissions to create an Microsoft Entra ID Enterprise application.
- Manage Users access on self-hosted DronaHQ instance or DronaHQ Cloud to configure SSO configurations.
Setting up Microsoft Entra ID
To create an Microsoft Entra ID Enterprise application, follow the steps in this documentation.
In the
Microsoft Entra ID portal, add a newEnterprise application.DronaHQ is not listed in the Microsoft Entra ID Gallery, so select
Create your own application.Give User friendly Name for the application to identify SSO for DronaHQ.
Select
Integrate any other application you don’t find in the gallery (Non-gallery).
Assign users to the DronaHQ application in Azure
For users to access DronaHQ using Microsoft Entra ID SSO, they must:
- Be assigned to the application
- Have a Name and Email defined on their profile
Assign users to the DronaHQ application and confirm their required attributes in the Microsoft Entra ID admin center.
Configure SAML Settings in Azure
- Download and open DronaHQ metadata file. To locate this file, Go to
DronaHQ -> Manage Users -> SSO CONFIGURATION -> + Add SSO -> SAML 2.0. UnderEntity ID and Metadata URL, open this url file that will be useful in next steps. - In the
Microsoft Entra ID admin center, select theDronaHQEnterprise application. Set up single sign on for the DronaHQ application, selectingSAMLas the sign-on method. Use the following SAML settings. Leave Relay state and Logout URL blank.
| Setting | Value |
|---|---|
| Identifier (Entity ID) | Locate this in DronaHQ metadata file downloaded above. For eg - https://studio.dronahq.com/saml/metadata |
| Reply URL (Assertion Consumer Service URL) | It is the location where SAML assertion is sent with an HTTP POST, known as SAML Assertion Consumer Service URL. Locate this in the Metadata downloaded and paste it here. Ex - https://studio.dronahq.com/callback/saml |
| Sign on URL | Use the Same as Assertion Consumer Service URL added above. Ex - https://studio.dronahq.com/callback/saml |
Set the following attributes and claims.
| Setting | Value |
|---|---|
| Unique User Identifier (Name ID) | user.mail |
| firstName | user.givenname |
| user.userprincipalname |
You must also edit each claim and clear the value for the Namespace field.
Configure in DronaHQ
In order to configure SAML in DronaHQ, we will need metadata file of Azure. To get this file from Azure, on the same page you configured SAML settings in the Microsoft Entra ID admin center, download the Federation Metadata XML file (listed under the SAML Signing Certificate).
- Now that we have metadata file, In DronaHQ, Go to
Manage Users -> SSO Configuration -> + ADD SSO -> SAML 2.0
Enter form with below fields -
| Field | Description |
|---|---|
| Name | Provide Friendly Name of this SSO configuration |
| Entity ID | The entity ID is present in Azure metadata file. Copy the ID and paste it. |
| Login URL / SSO URL | Enter the details of location of AssertionConsumerService from Azure metadata file for POST method. |
| X509 public certificate | X509Certificate file in .cer format. This file you can create following this step whose content you can locate in the Azure metadata file. |
| Binding type | Enter HTTP POST. |
| Restricted Domain | Enter domain name for which you want your users to login with for this SSO Configuration. You can add multiple domain names as well. eg - domain1.com , domain2.com. DronaHQ will automatically redirect to SSO url when we encounter any user’s sign in request with an email id belonging to the given restricted domain. |
| Want Auth request signed | Keep this default setting as False. |
| Add Claim List | We have already assigned Email and Name on Azure while integrating SAML. We will now enter same key name - email and name and map it to DHQ User Name and DHQ User Email respectively. |
| Enable JIT user provisioning | Toggle this ON so that you won’t have to manually invite each user to DronaHQ first. |
| Enable SCIM User Provisioning | Enable this in case you want to create, update and deactivate User accounts at your Azure portal and sync it with DronaHQ user management. |
- Save the draft. Again navigate back to the SSO configuration option. You can see the newly created SAML.
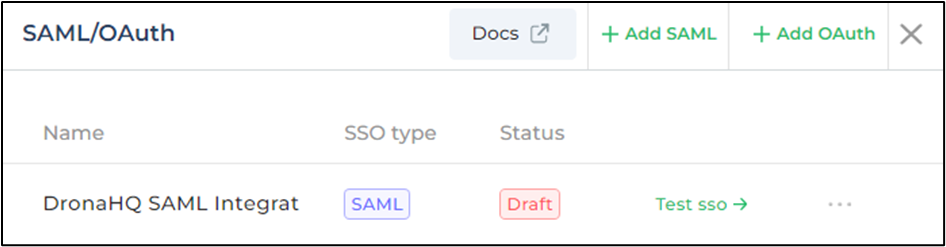
You can click on
Test SSObutton and it will open SSO Login url in a popup window.Once you login successfully and if everything is set up correctly, then finally you will see a success message at the bottom.

- Now, that testing is successful, you can click on the more option for above SSO configuration and click on
Activateto make it live.

Microsoft Entra ID SAML in Action
Now, since our Microsoft Entra ID SAML SSO is live, we check in either DronaHQ End user portal - Web, Android or iOS and see our configured okta saml sso in action.
Simply go to DronaHQ End user webapp and enter your email id with domain that matches the configured restricted domain specified in SSO configuration and Click Continue.
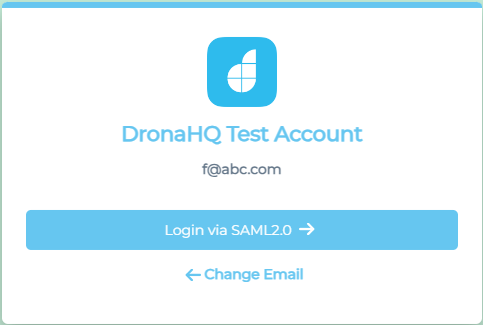
Instead of asking for password, it asks for Login via Microsoft Entra ID SAML SSO provider. Click on it to open a popup window for the user to login with Microsoft Entra ID login credentials.
Go to Manage User section on DronaHQ and you will see the new user created since JIT was enabled.