Logsene Integration
This documentation provides step-by-step instructions on how to integrate Logsene as an audit logger within the DronaHQ platform.
Introduction
Logsene integration allows you to capture and manage logs efficiently in your DronaHQ modules. Follow the steps below to set up Logsene as your audit logger.
Prerequisites
Before you begin, ensure that you have the following prerequisites in place:
- A DronaHQ account with an Enterprise Plan.
- Access to a Logsene account.
- Logsene connection details.
Configuration Steps
To get started with Logsene integration, follow these steps:
Create a new Logsene Application or select an existing one to send your logs to.
Under
Application settings > Tokens > Copy read/write token.

To configure Logsene as your audit logger, follow these steps:
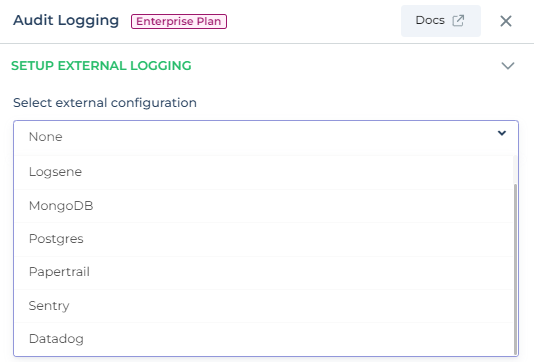
Under the
Audit Loggersection, click onSetup External Logging.In the "Select Logger Configuration" dropdown, choose "Logsene."
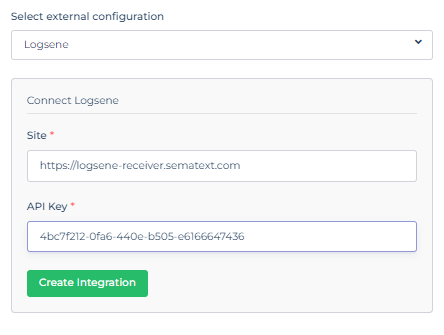
Provide the Logsene Application Token in the appropriate field.
Click the "Create Integration" button to initiate the integration process.
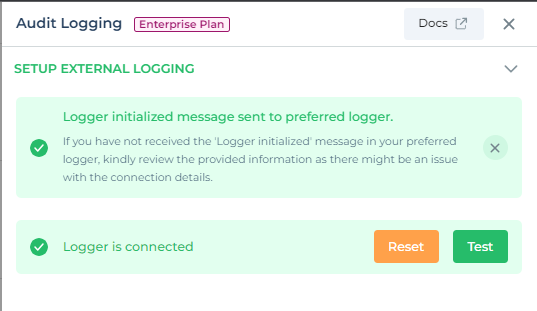
Once the integration is successful, you will see a
Logger Initializedmessage.
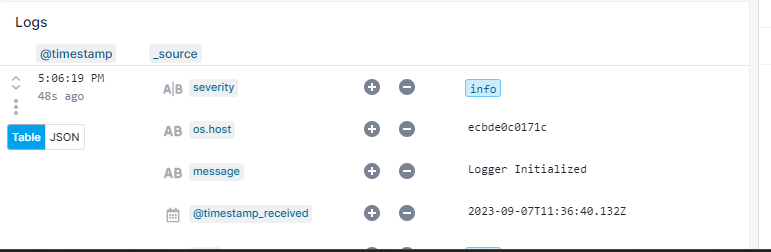
Expected log in Logsene:
Testing Logsene Integration
You can test the Logsene integration to ensure it's functioning as expected:
Within the External Logging settings, look for the
Testbutton and input custom log details.Log specific details such as event names, user information, organization ID, and more. This data will be useful for monitoring and analysis.
By following these steps, you can seamlessly integrate Logsene as an audit logger in your DronaHQ account, enhancing your log management capabilities.
Note: Ensure that you provide accurate Logsene connection details for a smooth integration experience.