Data Environments
DronaHQ provides the ability to configure multiple data environments for your connector, which can be beneficial to separate workspaces for different teams and enforce access management.
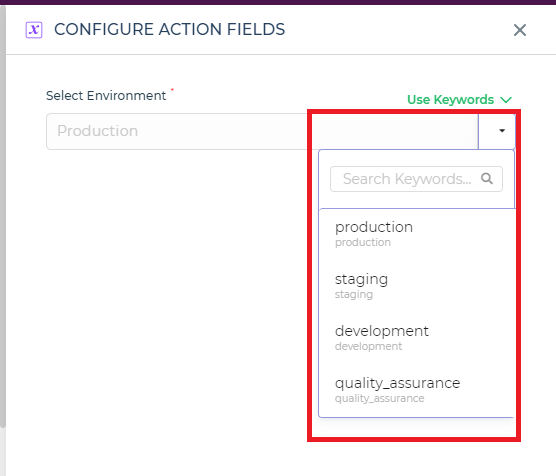
DronaHQ comes pre-configured with three data environments: Production, Staging, and Development, where Production is the default environment. These environments cannot be removed or modified.
Create a new environment
You can create and manage data environments from Manage Environments. To create a new environment click on + Add Environment and give a unique name and select the Sheet Environment where your data would be mapped for the newly created environment.
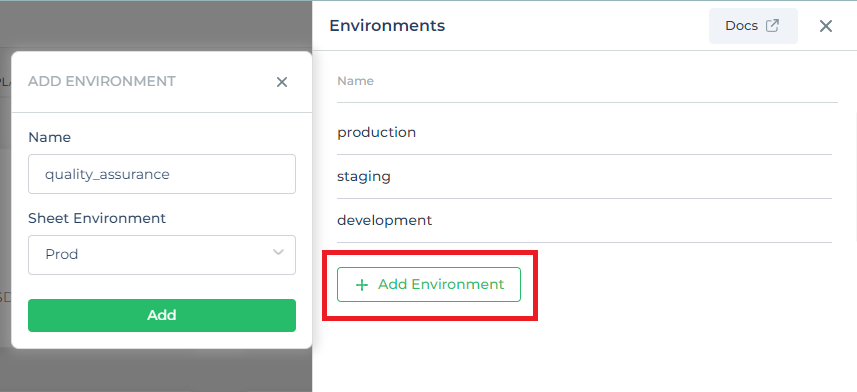
The environment name should not start with a number and special characters cannot be used.
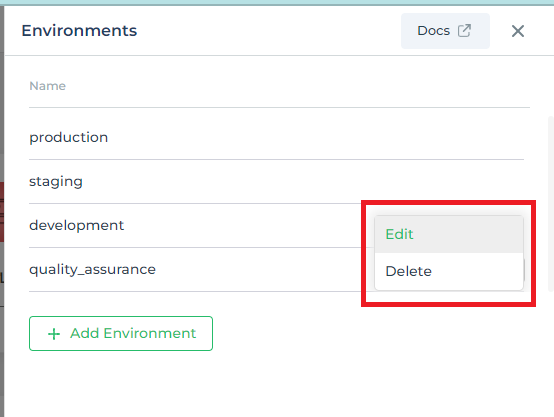
You can also edit or delete the environment by clicking on more options indicated by the three dots (…)
Configure environment credentials
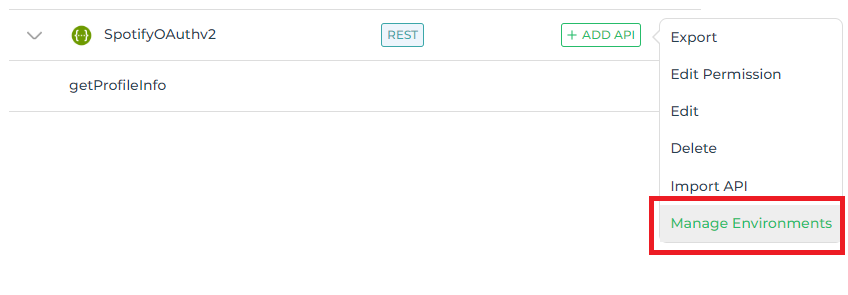
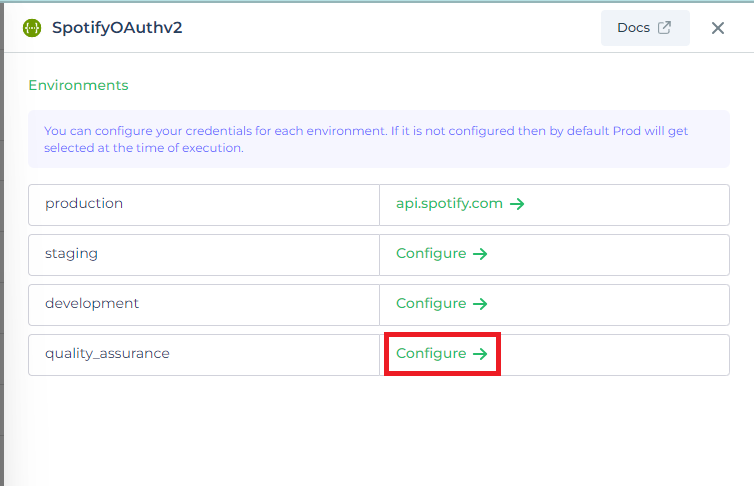
You can configure multiple environments for your data sources (e.g., database or API) by adding environment-specific credentials. Click on more options indicated by the three dots (…) against your data source and select Manage Environment option. Also, add the appropriate credentials for the environment you want to setup.
Testing data source queries
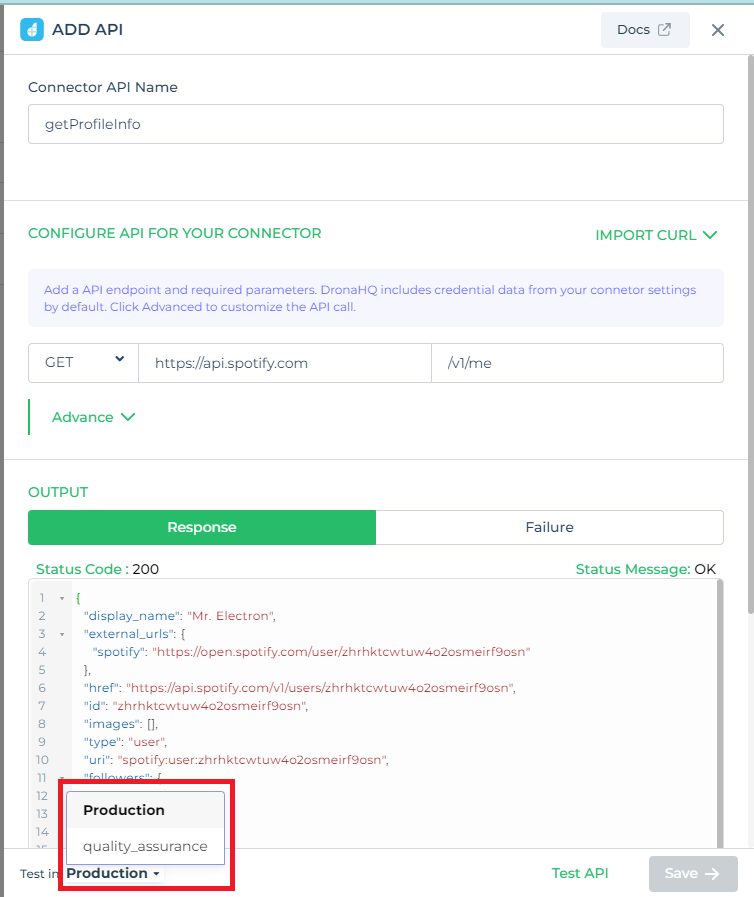
You can test the configured credentials for the data environments inside the data source queries by toggling the environment dropdown as shown below.
Switch environment in app preview
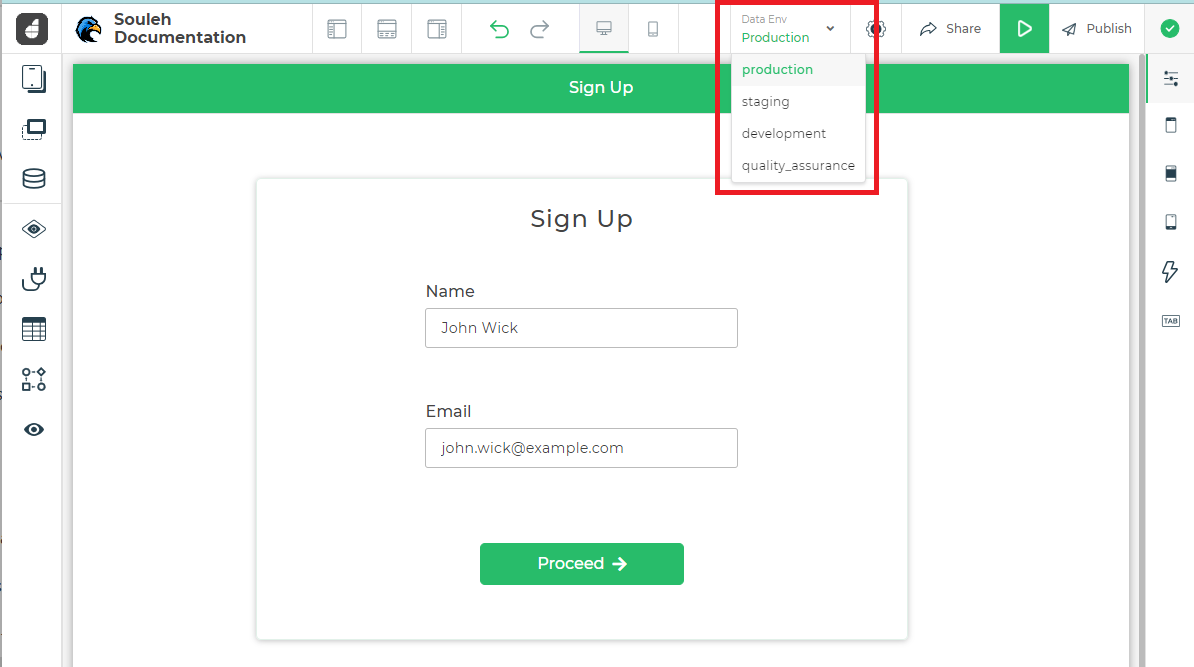
You can switch between data environments while previewing the app by toggling the environment dropdown as shown below.
Setting environment using on-screen action
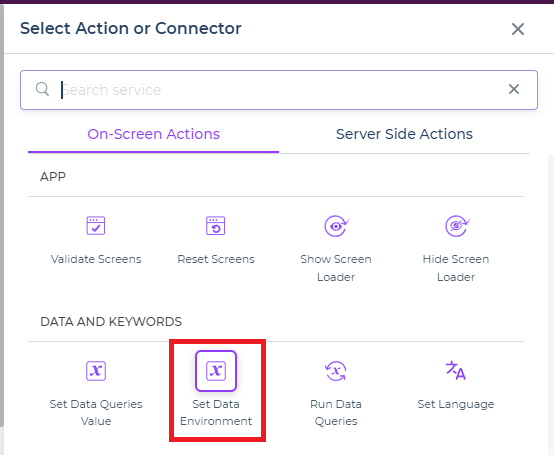
You can set the data environment for an app using the Action flow's Set Data Environment action. Navigate to Action Flow -> (+) Add action -> On-Screen Actions -> Set Data Environment. Now select the environment from dropdown and continue.
