Configuring SSO with OIDC
DronaHQ's OpenID Connect integration utilizes the Authorization Code Flow. When configuring SSO with OIDC in DronaHQ, it requires either an ID token or access token to be a JSON Web Token (JWT) containing the authenticated user's email.
Setting up OIDC SSO
Prerequisites
To set up OIDC SSO in DronaHQ, you will need:
- OAuth client ID for your application.
- OAuth client secret for your application.
- A list of scopes to grant to DronaHQ.
- Authorization endpoint for your OpenID provider.
- Token endpoint for your OpenID provider.
Ensure you understand how your SSO provider formats its ID Token and access tokens, as DronaHQ decodes these tokens as JWTs. You must provide DronaHQ with the corresponding path in the decoded JWT that contains the user's information.
Adding SSO Configuration
For setting up OIDC SSO in DronaHQ, Go to Manage Users -> SSO CONFIGURATION -> + Add SSO -> OIDC OpenID Connect
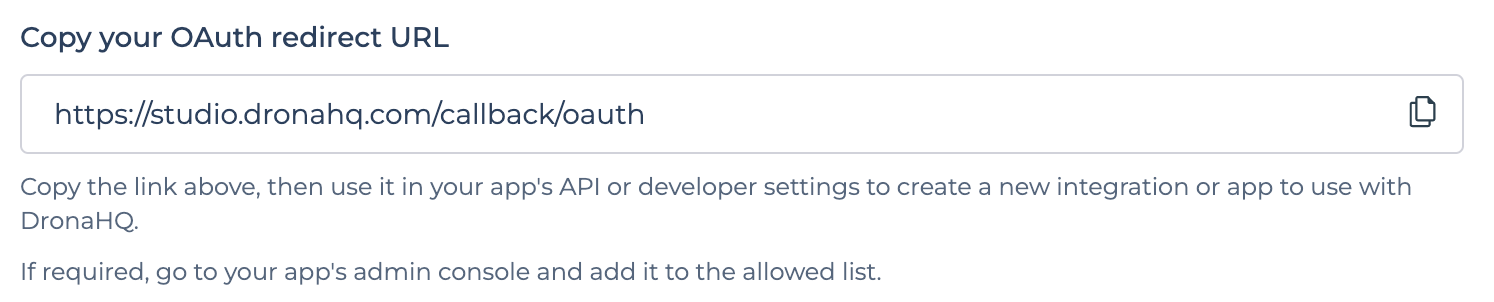
Copy DronaHQ OAuth Redirect URL and paste it to your OAuth Client App's redirect uri configuration.
Enter form with below fields -
| Field | Description |
|---|---|
| Name | Provide Friendly Name of this SSO configuration |
| Restricted Domain | Enter domain name for which you want your users to login with for this SSO Configuration. You can add multiple domain names as well. eg - domain1.com , domain2.com. DronaHQ will automatically redirect to SSO url when we encounter any user’s sign in request with an email id belonging to the given restricted domain. |
| Client ID | Client ID from your OAuth app. It may also be called Consumer Key or API Key. This property can be referenced in Token request as {{auth.client_id}}. |
| Client Secret | Client Secret from your OAuth app. It may also be called Consumer Secret or API Secret. This property can be referenced in Token request as {{auth.client_secret}}. |
| Scope | OAuth scopes values seperated with a comma or space that you want DronaHQ to access data. For eg - openid email |
| Authorization Request | Authorization endpoint for your OpenID provider |
| Access Token Request | Token endpoint for your OpenID provider. Modify request parameters if required. |
| Refresh Token Request | Token endpoint for your OpenID provider. Modify request parameters if required. This will be called, when using current access token returns 401 status code response |
| Add Claim List | You can map your User's ID, Name, Email and Group with corresponding values in DronaHQ. Here, you need to provide exact path of corresponding key present in JWT Token received from Token endpoint. For eg - Add {{idToken.email}} to map against DHQ User Email, this will refer to email key present in idToken parameter. Similarly you can use {{accessToken.email}} in case Email is received in Access Token key's value. |
| Enable JIT user provisioning | Just in time (JIT) user provisioning enables DronaHQ to provision user accounts when users sign in via SSO for the first time. This means you won't have to manually invite each user to DronaHQ first. |
- Enable JIT user provisioning toggle to automatically add new users provisioned by SSO into DronaHQ
- Map group name to provide restricted access of the App to the specific group of end users. For Example, you may want to restrict the Finance related Apps to your Finance team members in your organization and HR specific apps to your HR Team in your organization and so on. By default all users will be mapped to the Default group in DronaHQ.
- If user's group is mapped with DronaHQ Group, and at time of user login, if its group name doesn't exists then DronaHQ will create a new group with same name and map it with this user.
Steps
- Fill above form.
- Once, above form is filled, click on
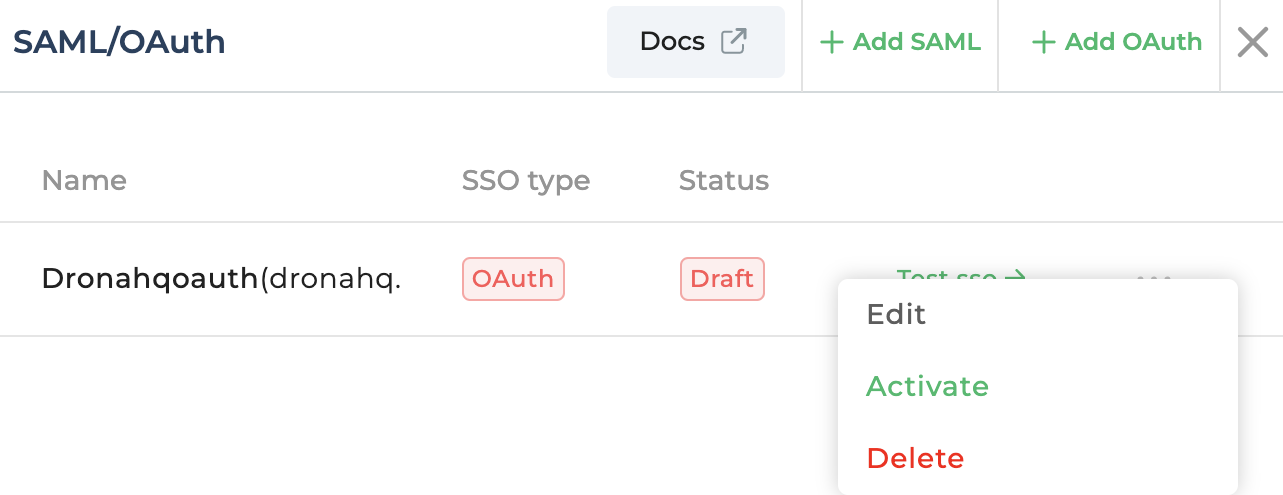
Save to draftoption to save your SSO Configuration. - You will be able to view your recently saved SSO configuration in the list. You can click on
Test SSObutton and it will open SSO Login url in a popup. Once you login successfully and if everything is set up correctly, then finally you will see a success message at the bottom. - Now, that testing is successful, you can click on the
more optionfor above SSO configuration and click onActivateto make it live.
Once live, all your users belonging to above given domain will be redirected to your SSO login from both the End User Portal and Creator Portal.
With OIDC Single Sign-On (SSO), users can login into DronaHQ using a single set of login credentials. It simplifies user provisioning and management. User accounts can be created, updated, and deactivated centrally, ensuring efficient administration across all connected applications.