SCIM user provisioning
SCIM, also known as System for Cross-domain Identity Management, represents the established industry standard for automating the provisioning of user accounts. This powerful protocol proves particularly valuable in scenarios where organizations rely on third-party Single Sign-On (SSO) providers such as Okta or Azure Active Directory for managing employee authentication. By leveraging SCIM, the seamless creation, updating, and deactivation of user accounts can be effortlessly synchronized across various applications, including the robust capabilities offered by DronaHQ. Consequently, companies utilizing DronaHQ alongside their preferred SSO provider can ensure efficient and automated user management processes, resulting in enhanced security and streamlined operations.
DronaHQ implements a comprehensive subset of the SCIM 2.0 API, specifically designed to seamlessly integrate with IDP vendors such as Okta. This allows for efficient user and role management within your applications.
To enable SCIM user provisioning, follow these steps:
Go to
Manage Users→SSO Configuration→Add SSO→Add SSO→Add SAML→ Fill in the information.Now enable SCIM User Provisioning.
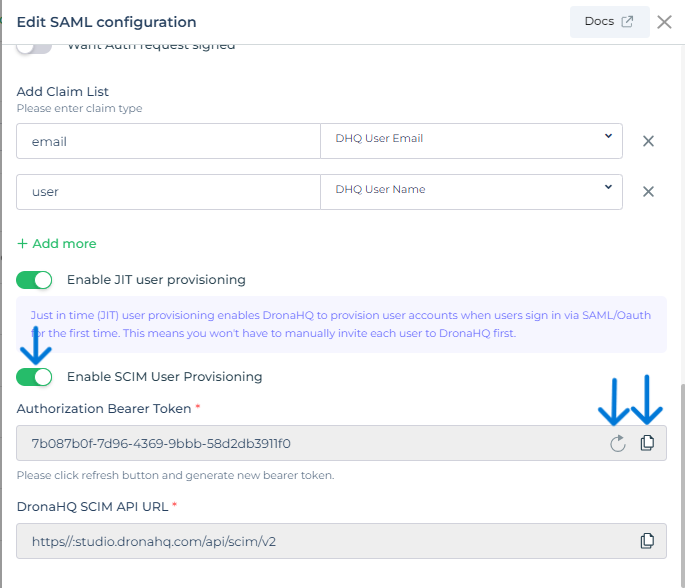
Enable SCIM User provisioning Generate the Authentication Token and copy the Auth Token.
Save the Authentication Token to Draft.
DronaHQ setup is now complete.
Next, follow the steps below in your Okta Account:
- Go to
Admin→Applications. - In the Applications page, click on
Create App Integrationand selectSAML 2.0→ Insert Configuration Settings. - In the General Setting, under App Settings, select
Editand then in Provisioning, chooseSCIMand save it. - Now, the Provisioning Tab will be enabled. In the Provisioning Tab, go to Setting sections → Integration → SCIM Connection → Edit.
- Enter SCIM Connector base URL:
https://<yourdomain.com>/api/scim/v2, and select Supported provisioning actions. Also, enter the Auth token copied from DronaHQ.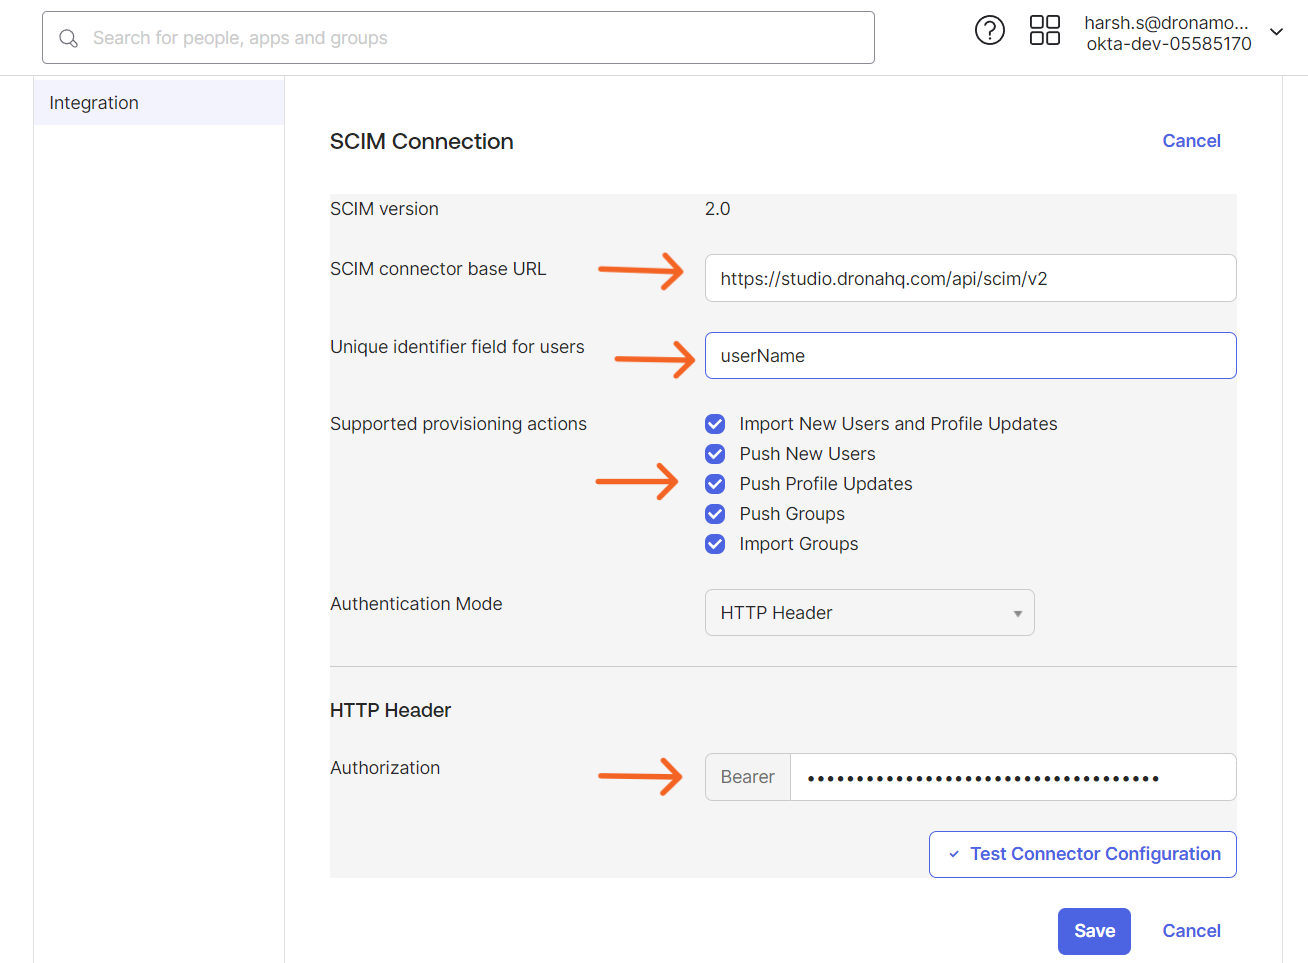
SCIM Connection - Test and Save the Integration part.
- In Settings, go to the To App Section → Edit.
- Enable:
Create Users,Update User Attributes,Deactivate Users, and Save it.
How to Add a User to Okta and DronaHQ:
- To add a User Account that will be reflected on Okta and DronaHQ, go to
Directory→People→Add Person→ add information and save it. - This user is still not added to your DronaHQ App because it is created on part of Okta but not assigned to DronaHQ App. To perform that, go to
Applications→ select DronaHQ App integration →Assignment Tab→ ClickAssign→ Assign to People → Search for your username. - Click
Assignand then clickDone. By performing these actions, it will replicate the creation of the user in DronaHQ. You can see their account added in the Manage User section.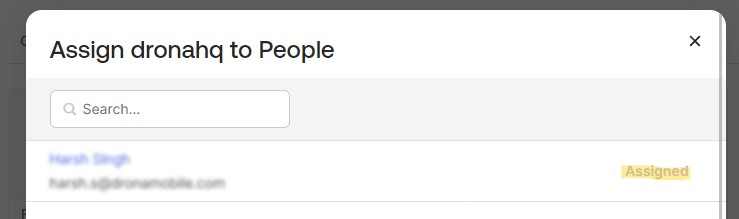
Okta Assign People 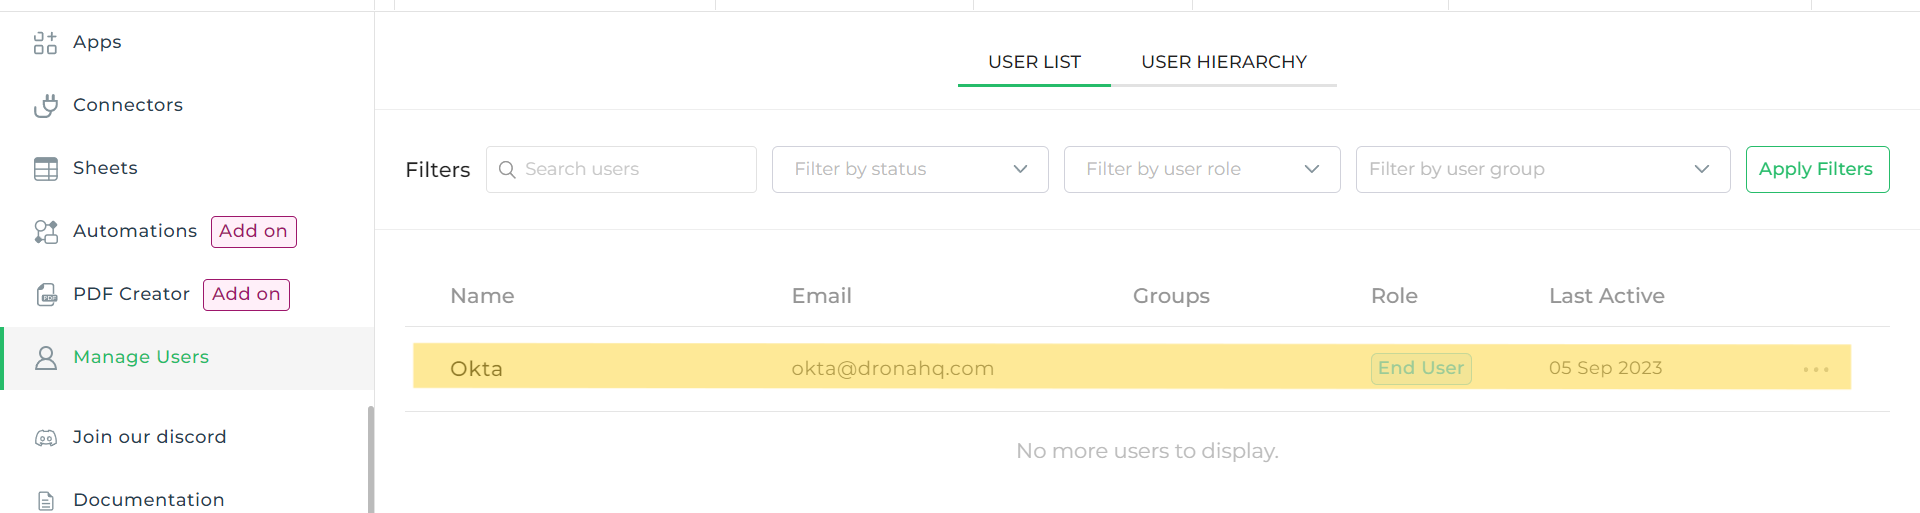
DronaHQ Added User Output
How to Add a Group to Okta and DronaHQ:
- To add a Group, go to
Directory→Groups→Add Group→ Enter Group Name. - To add people to the group, click on the specific group name, Click on
Assign Peoplebutton → Search for the user you want to add and click on the+button to assign people to that group. After that, click onDone. - This Group is still not added to DronaHQ, as it is not Pushed to DronaHQ. To push it, go to your application, go to
Push Groups Tab→ Click onPush Groupsbutton. - Search for the group, select the group and Save it. This will replicate your Groups in DronaHQ.
- One can see the push status, and it should turn to
Activeafter a few seconds.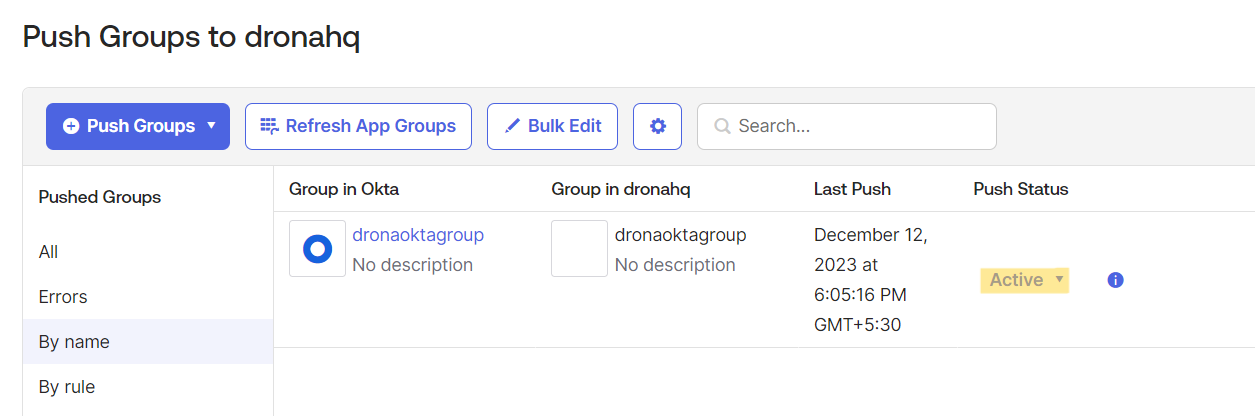
Okta Assign Group - To check groups in DronaHQ, go to
Manage Userssection →Manage Groups, and it will list all the Groups.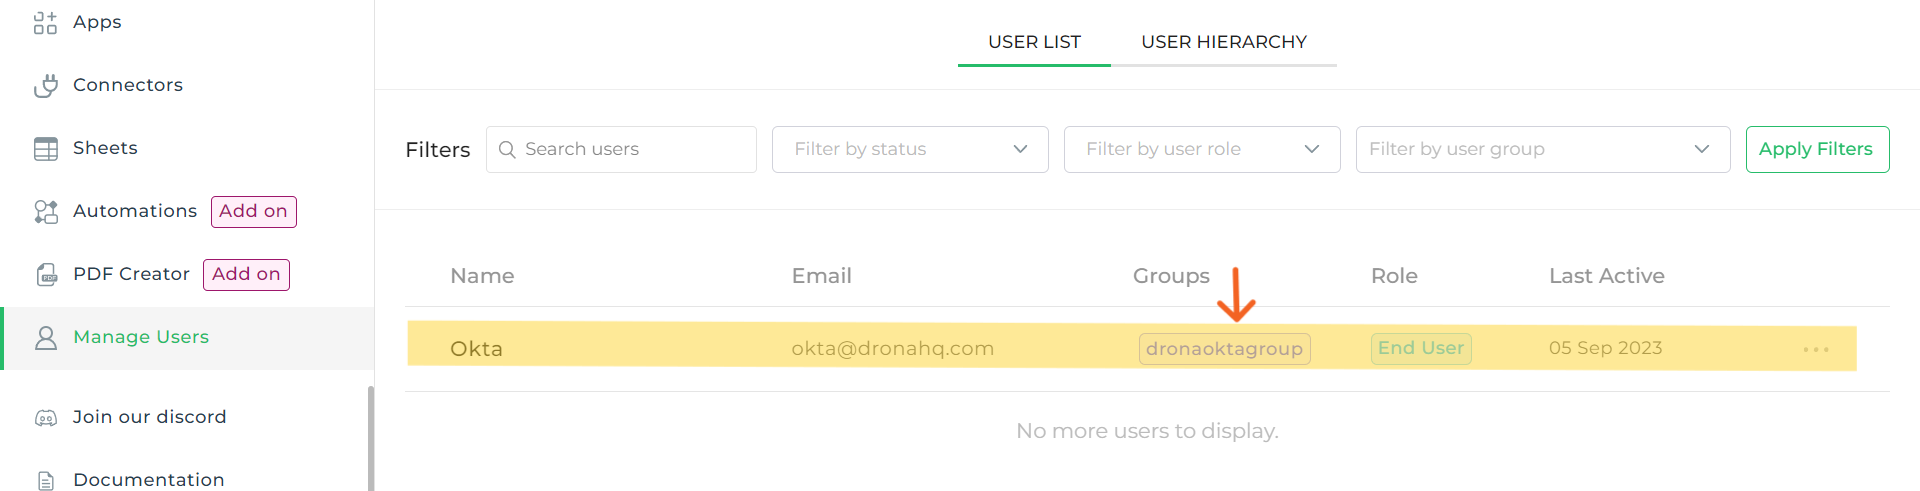
DronaHQ Added Group Output