Google Sheet - Multiple Row update
In this guide, we will cover how to update multiple rows in a Google Sheet using DronaHQ, particularly when some fields remain unchanged or are set to null. We will go through the steps to connect Google Sheets, enable multi-row edits in a TableGrid control, write JavaScript code for the update action.
1: Connect Google Sheet to TableGrid via DataQuery
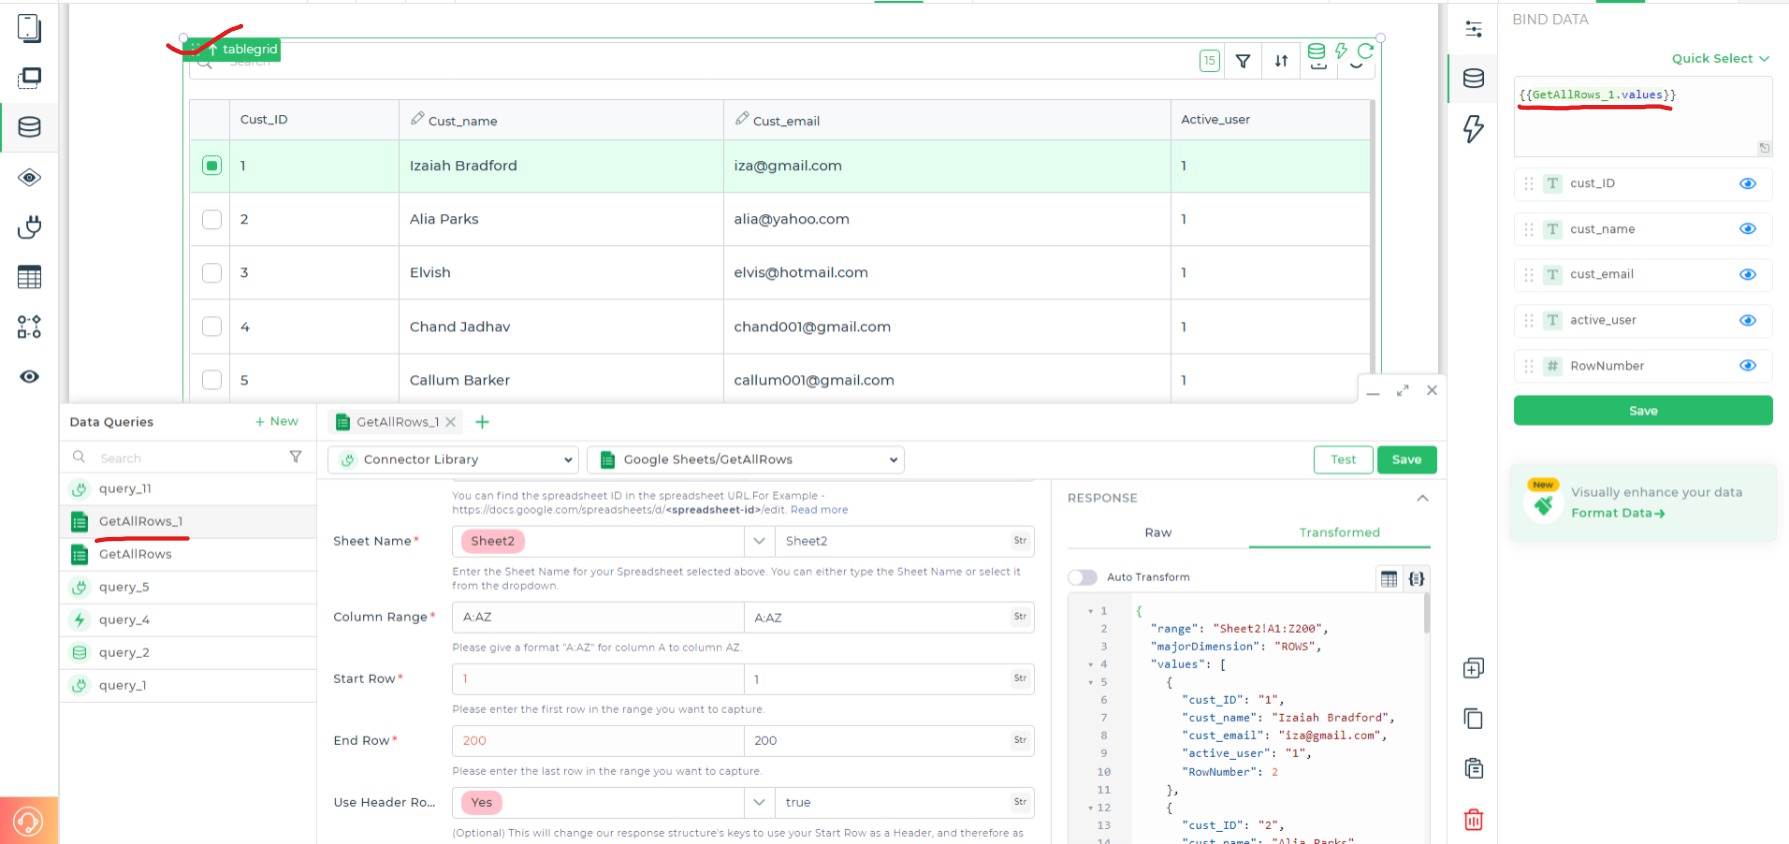
To begin, you need to connect the Google Sheet to your TableGrid control in DronaHQ using a DataQuery. This will allow you to pull data directly from Google Sheets into the TableGrid, making it editable within the app.
- In your DronaHQ app, add a TableGrid control.
- From the
Bind Datasection, chooseQuick Select > Connector Library > Google Sheets > GetAllRows. - Map the fields (columns) from your Google Sheet to the TableGrid so that you can display and update them later.
2: Enable Editable Columns Property for TableGrid
Select the TableGrid control and navigate to its properties. Select the columns which you want to make editable, which will allow users to edit more than one row at a time. You can check out the Building Interactive table article to know about editable columns in table grid control.

3: Preparing data to send to Google Sheet - using JavaScript
So for scenarios where some fields in your dataset may need to be left blank or filled with null. We will cover the entire setup, including using JavaScript to manipulate the data and update the Google Sheets rows effectively.
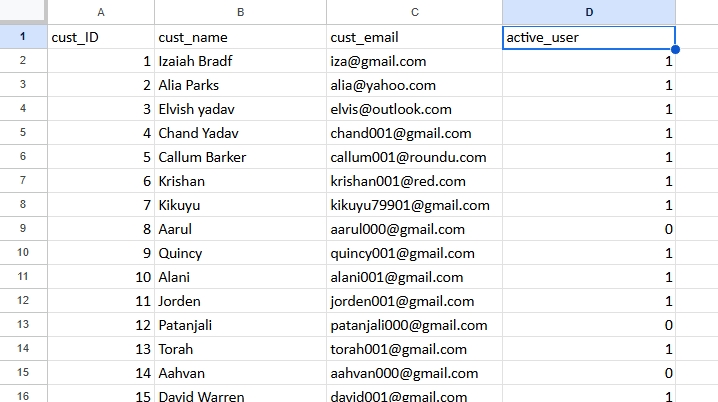
Suppose our response after fetching data from Google Sheet, looks somethings like this:
[
    {
        "cust_ID": "1",
        "cust_name": "Izaiah Bradford",
        "cust_email": "iza@gmail.com",
        "active_user": "1",
        "RowNumber": 2
    },
    {
        "cust_ID": "2",
        "cust_name": "Alia Parks",
        "cust_email": "alia@yahoo.com",
        "active_user": "1",
        "RowNumber": 3
    }
    // More data...
]
Now, we need to prepare JS Code which return array of edited values for each column and null in case of no change.
You want to update these rows in Google Sheets starting from row 2, but you only want to update specific fields while leaving others as null. For example, you might want to update only the cust_name and cust_email, while keeping other fields as they are or null.
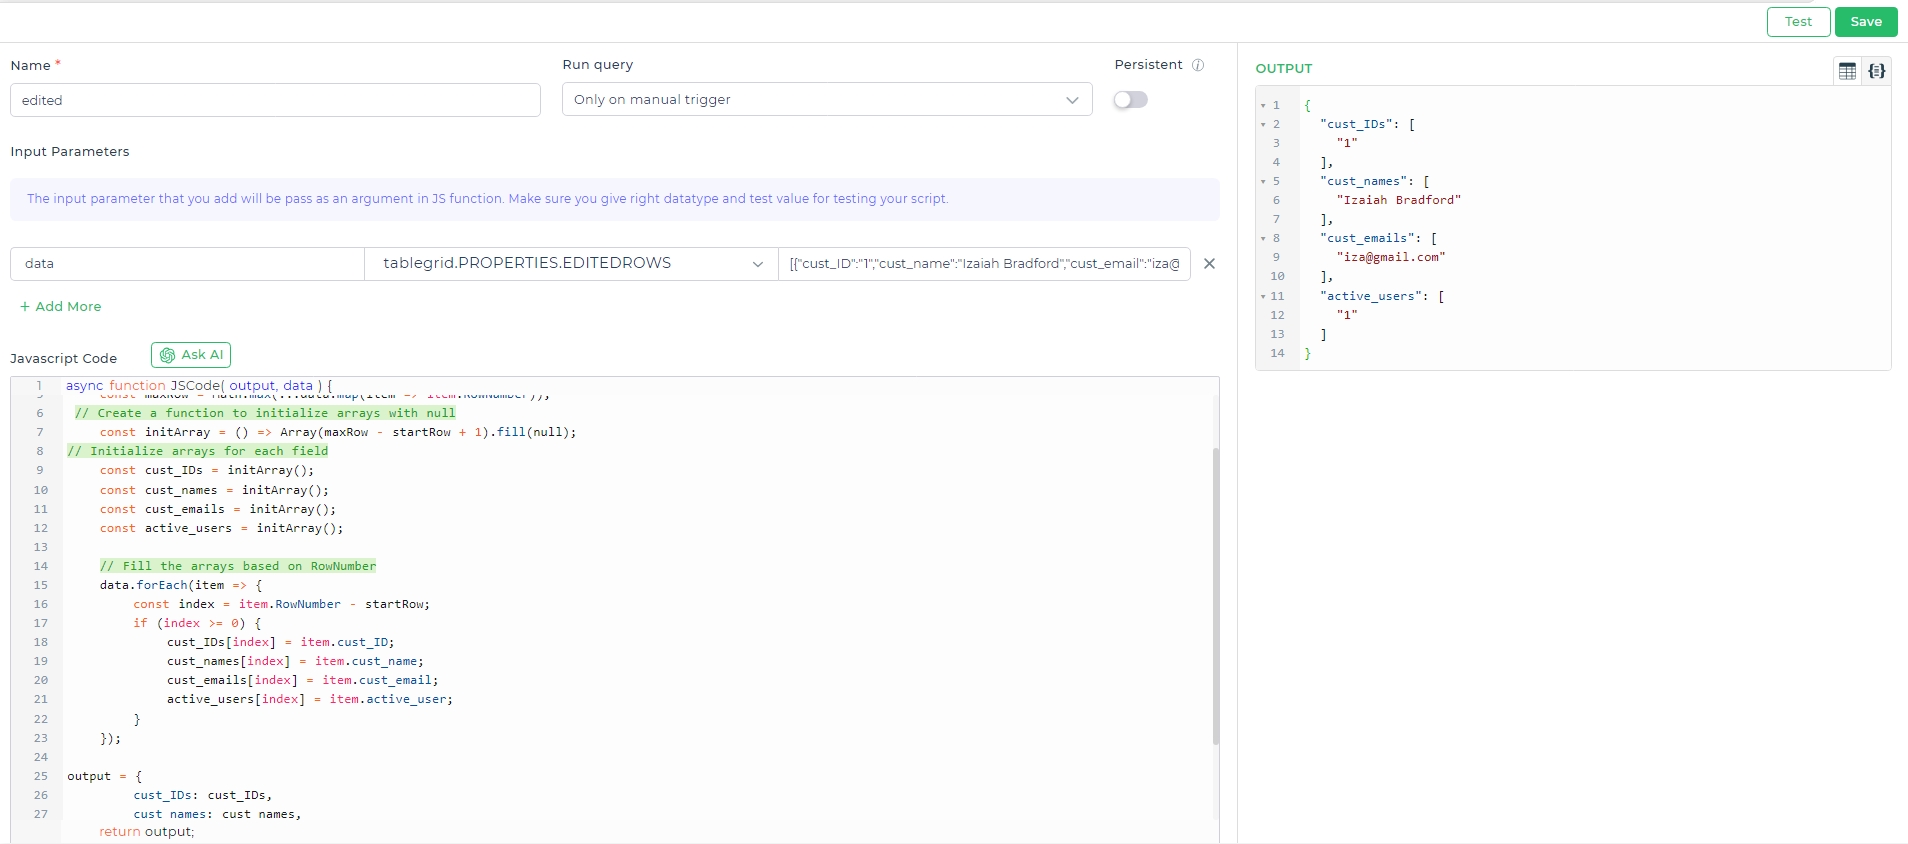
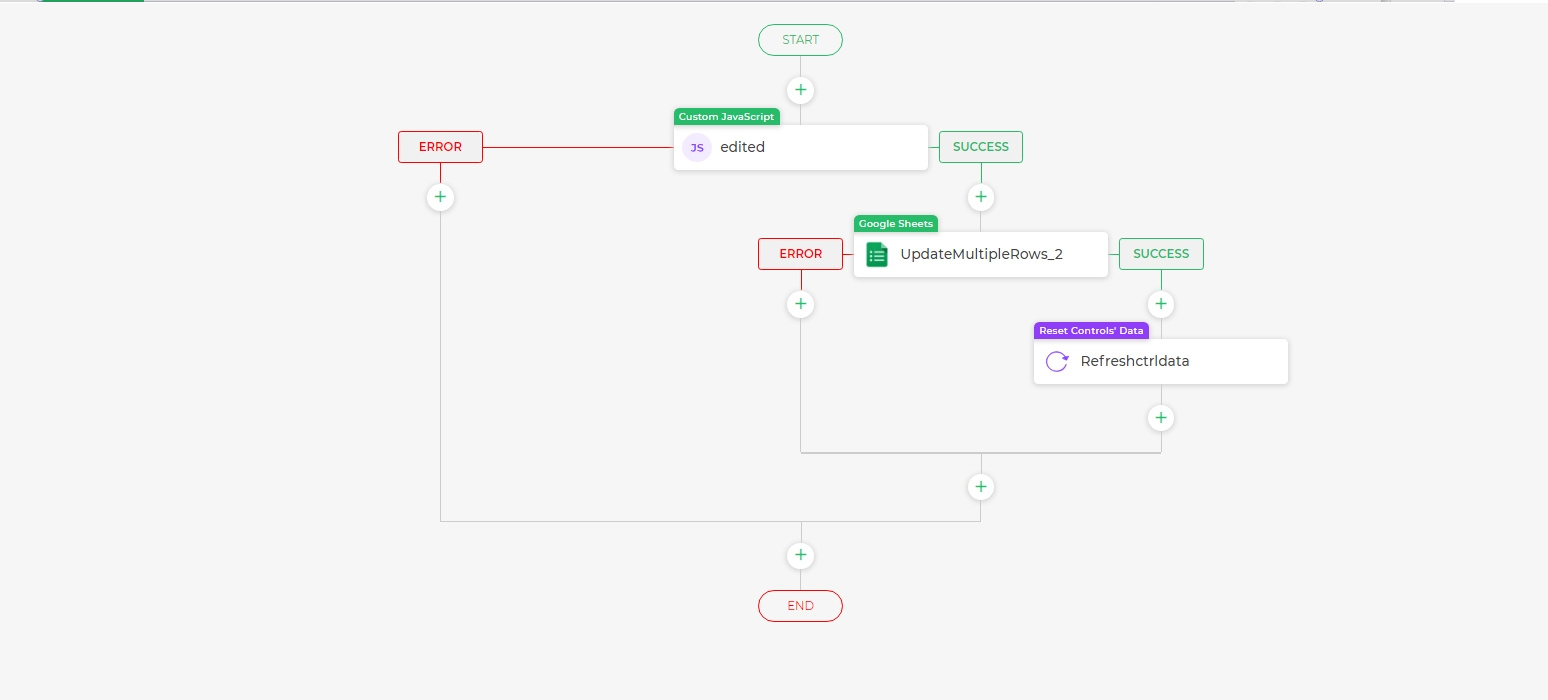
Now in the action flow, we need to add a JS Code action block, for a simple transformation of the edited data from a tablegrid control.
JS CODE
const startRow = 2;

// Find the maximum RowNumber in the data
    const maxRow = Math.max(...data.map(item => item.RowNumber));
 // Create a function to initialize arrays with null
    const initArray = () => Array(maxRow - startRow + 1).fill(null);
// Initialize arrays for each field
    const cust_IDs = initArray();
    const cust_names = initArray();
    const cust_emails = initArray();
    const active_users = initArray();

    // Fill the arrays based on RowNumber
    data.forEach(item => {
        const index = item.RowNumber - startRow;
        if (index >= 0) {
            cust_IDs[index] = item.cust_ID;
            cust_names[index] = item.cust_name;
            cust_emails[index] = item.cust_email;
            active_users[index] = item.active_user;
        }
    });

output = {
        cust_IDs: cust_IDs,
        cust_names: cust_names,
        cust_emails: cust_emails,
        active_users: active_users
    };
CODE EXPLANATION
Start Row Setup:
startRow = 2indicates the row where data processing starts.Find Maximum Row Number: The code determines the highest
RowNumberto know how many rows need handling.Initialize Null Arrays: Arrays for customer data (IDs, names, emails, active status) are created, filled with
null, and sized based on the number of rows betweenstartRowand the max row.Populate Arrays: The data is looped through, and for each row, the corresponding array position is filled with data if the row falls within the valid range, otherwise leaving
null.Return the Result: The filled arrays are returned, where any missing rows are represented by
nullvalues.
4: Map JavaScript Output to Google Sheets Update Action
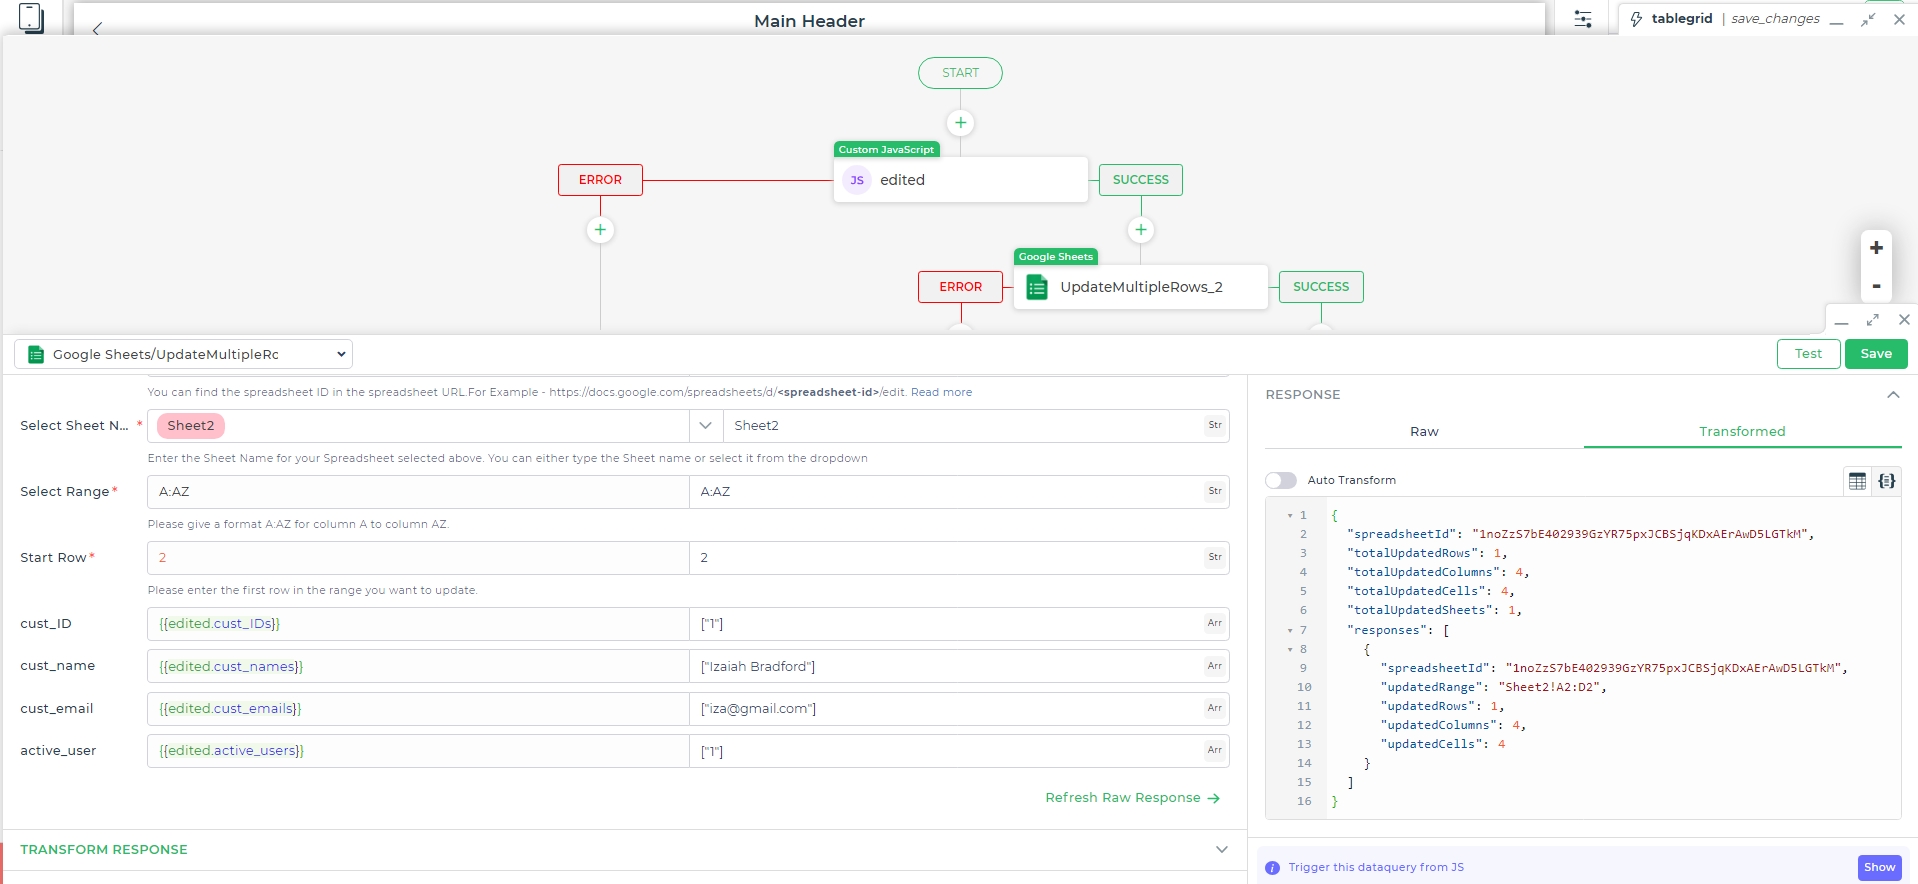
Now we can add the Google Sheet connector in the actionflow and send the output of the JavaScript Action block to the Google Sheets update query along with the other details. Here’s how the variables would be mapped in DronaHQ:
cust_ID: {{edited.cust_IDs}}
cust_name: {{edited.cust_names}}
cust_email: {{edited.cust_emails}}
active_user: {{edited.active_users}}
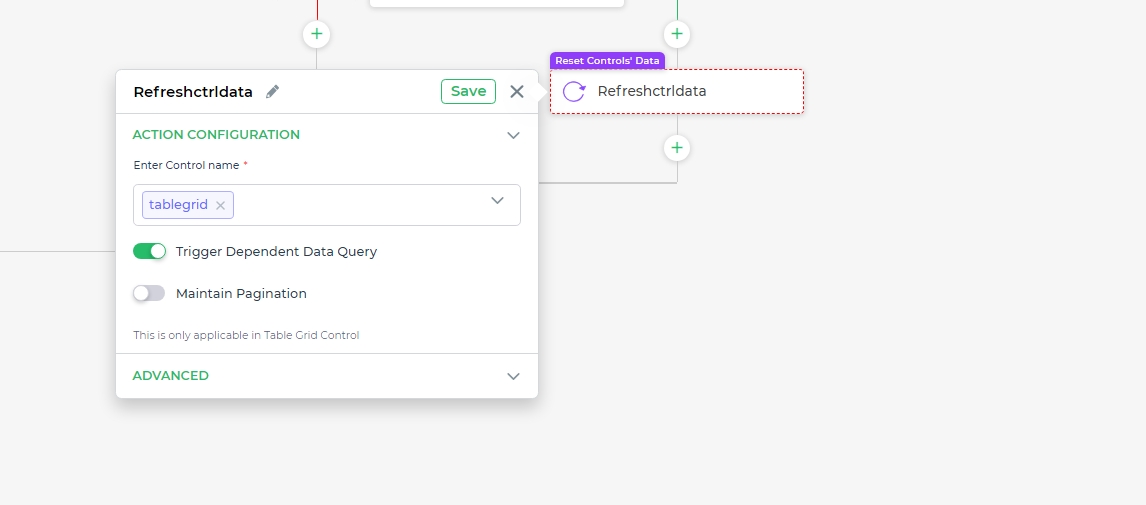
5: Refresh TableGrid Control
Once the data is updated in Google Sheets, you should refresh the TableGrid control to display the updated data in your app.
Use the Reset Control Data Action block to refresh and fetch the latest data from the Google Sheet.
Preview
Action Flow -
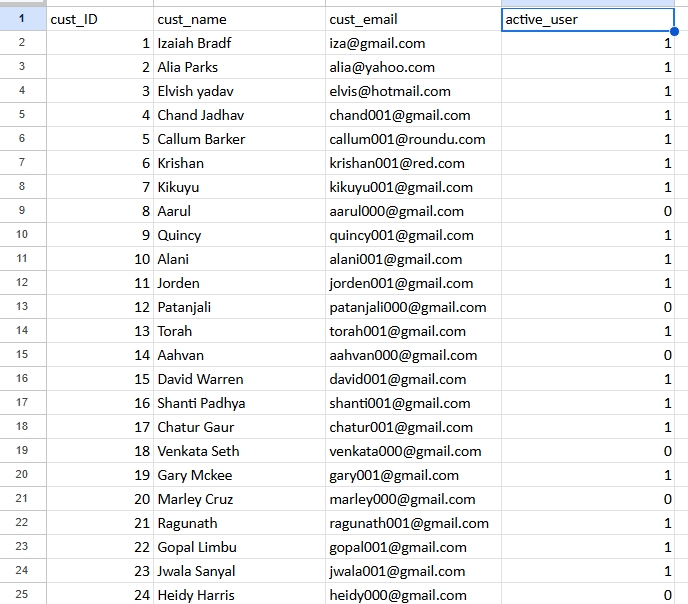
Data before Update Request -
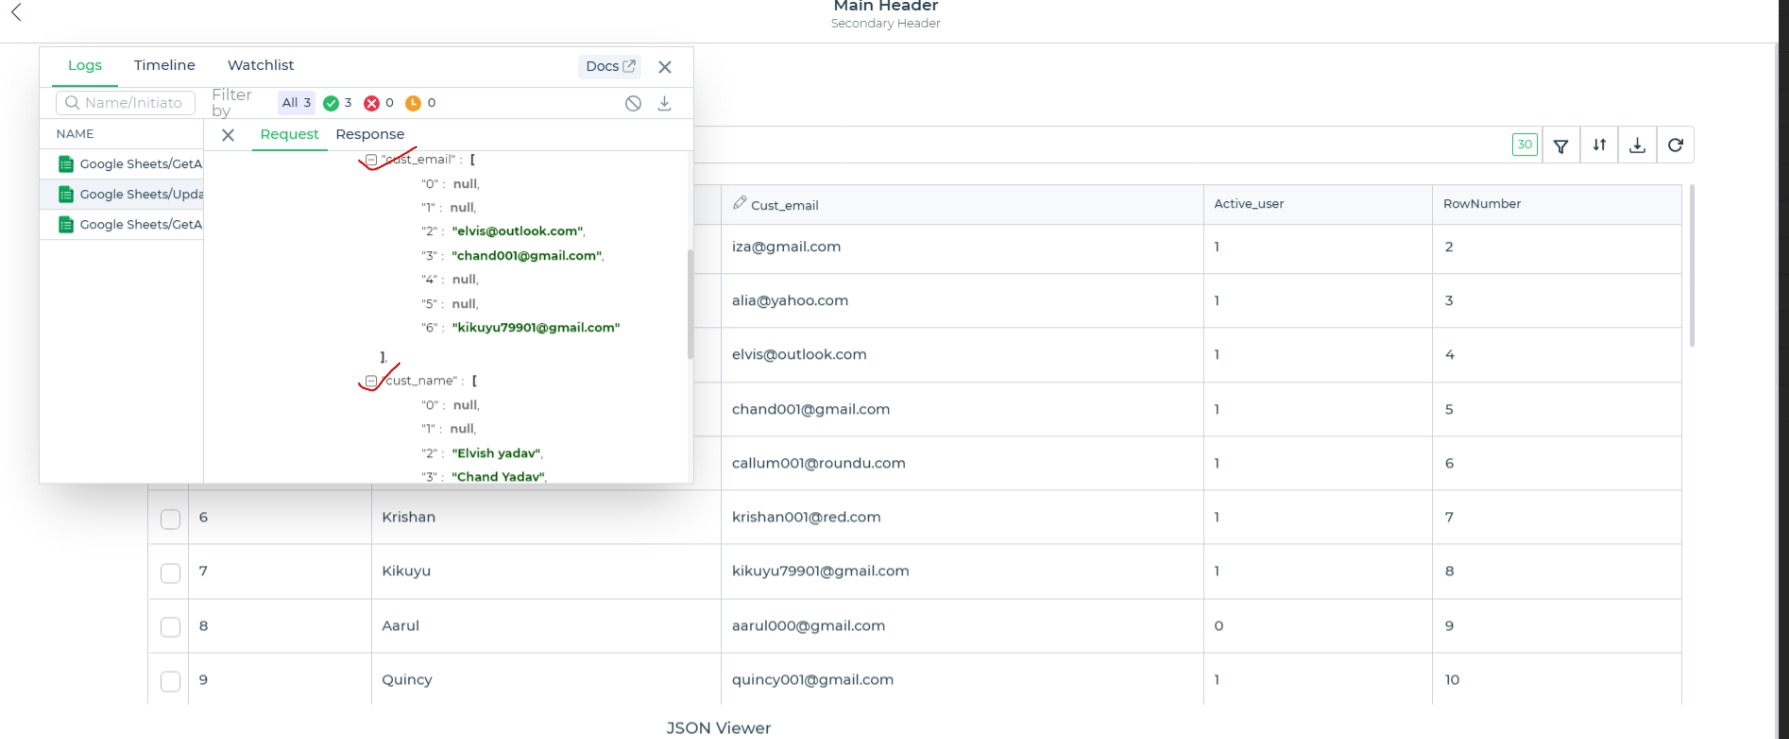
Performing Update Request -
data after Update Request -
