WebSocket Integration Using DronaHQ
This document provides a detailed overview of integrating WebSockets into DronaHQ. We will see establishing a WebSocket connection, create real-time data streams, and trigger events within your DronaHQ application.
The provided steps demonstrate how to build a dynamic WebSocket interface that interacts with Binance’s API, but the methodology can be adapted to other WebSocket API.
Integrating WebSocket into Custom Control
DronaHQ’s Custom Control allows developers to embed custom HTML, JavaScript, and CSS inside the DronaHQ platform using an iframe. With this setup, you can pass data between DronaHQ controls and the custom logic embedded within your HTML.
Objective of WebSocket inside a Control
- Allow users to input cryptocurrency tickers (like BTC, ETH).
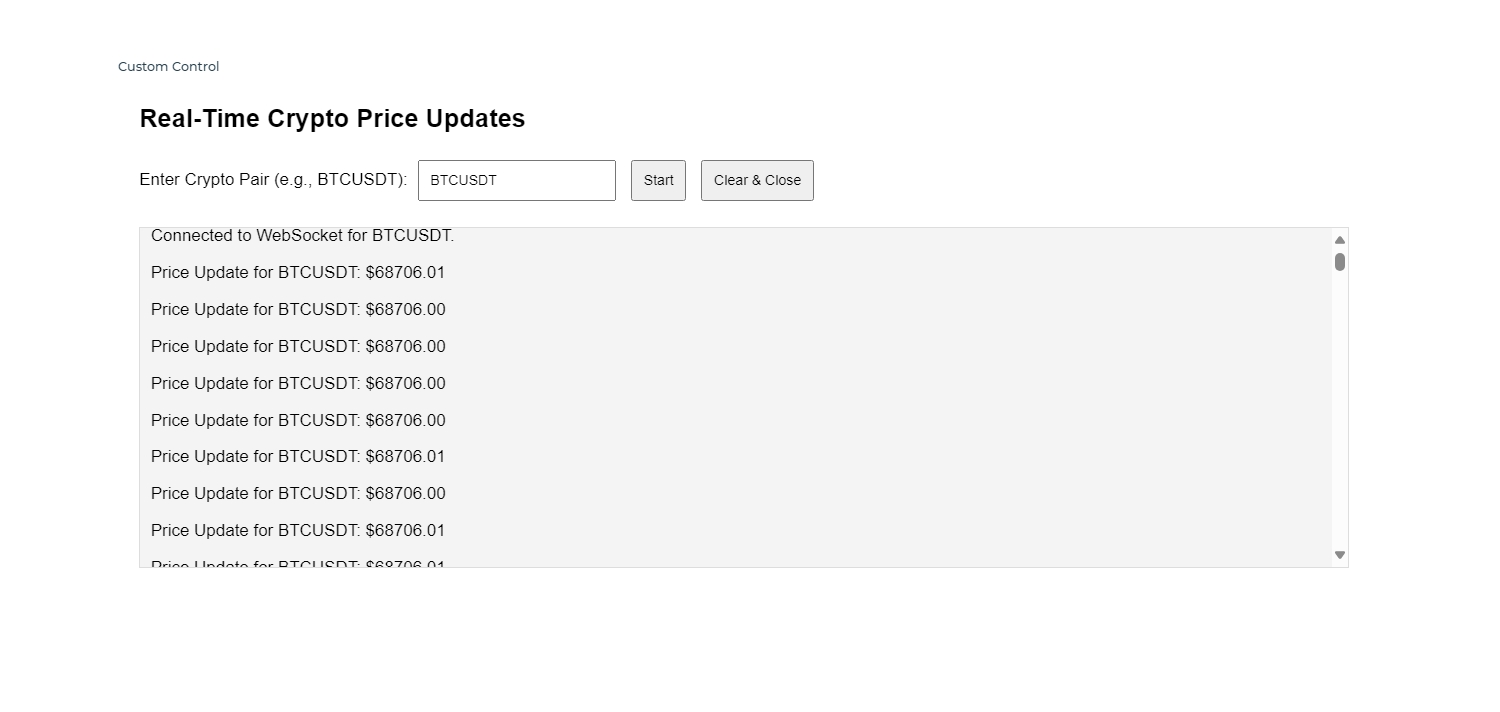
- Show real-time price updates from Binance WebSocket API.
- Include functionality to reset/close the WebSocket connection dynamically.

Prerequisites
- Basic knowledge of WebSocket API, JavaScript, and DronaHQ custom controls.
- An enterprise DronaHQ subscription.
- Access to the Binance WebSocket API
(wss://ws-api.binance.com:443/ws-api/v3).
Steps to Implement WebSocket in DronaHQ
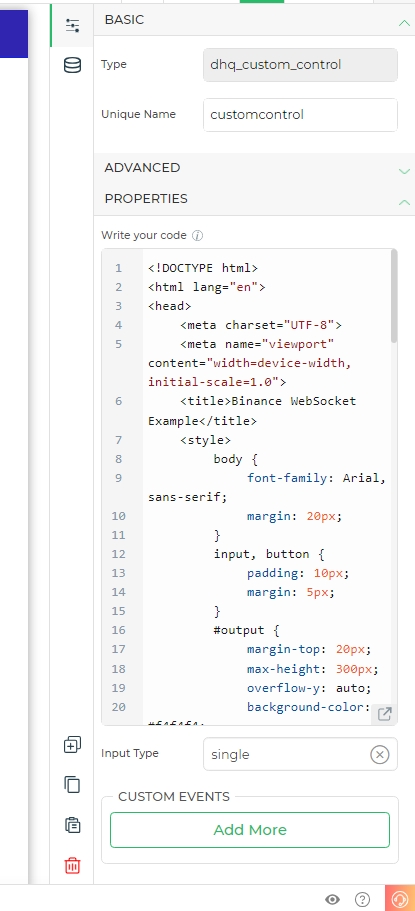
Create a Custom Control in DronaHQ
- Drag and drop Custom Controls in the DronaHQ interface.
- Go to its property and put the code under
Write your code.

HTML Code for WebSocket Control
<!DOCTYPE html>
<html lang="en">
  <head>
    <meta charset="UTF-8" />
    <!-- Sets character encoding for the page -->
    <meta name="viewport" content="width=device-width, initial-scale=1.0" />
    <!-- Makes the page responsive for all devices -->
    <title>Binance WebSocket Example</title>

    <style>
      /* Styling the page elements */
      body {
        font-family: Arial, sans-serif;
        margin: 20px;
      }
      input,
      button {
        padding: 10px;
        margin: 5px;
      }
      #output {
        margin-top: 20px;
        max-height: 300px; /* Limits the height of the output area */
        overflow-y: auto; /* Adds a vertical scrollbar if content exceeds the height */
        background-color: #f4f4f4;
        border: 1px solid #ddd;
        padding: 10px;
      }
    </style>
  </head>
  <body>
    <h2>Real-Time Crypto Price Updates</h2>

    <!-- Input field for entering a crypto pair -->
    <label for="symbolInput">Enter Crypto Pair (e.g., BTCUSDT):</label>
    <input type="text" id="symbolInput" placeholder="Enter coin pair" />

    <!-- Buttons to start WebSocket connection and clear the output -->
    <button id="startBtn">Start</button>
    <button id="clearBtn">Clear & Close</button>

    <!-- Div to display the incoming price updates -->
    <div id="output"></div>

    <script>
      let socket; // Variable to store the WebSocket instance
      const output = document.getElementById('output'); // Reference to the output div

      // Function to display messages inside the output div
      function displayMessage(message) {
        const p = document.createElement('p'); // Create a new paragraph element
        p.textContent = message; // Set its content to the provided message
        output.appendChild(p); // Add the paragraph to the output div
      }

      // Function to initiate WebSocket connection for the given crypto pair
      function startWebSocket(symbol) {
        const streamUrl = `wss://stream.binance.com:9443/ws/${symbol.toLowerCase()}@trade`; // Binance WebSocket URL
        socket = new WebSocket(streamUrl); // Create a new WebSocket instance

        // Event listener for when the connection opens
        socket.addEventListener('open', () => {
          displayMessage(`Connected to WebSocket for ${symbol}.`);
        });

        // Event listener for incoming messages (price updates)
        socket.addEventListener('message', event => {
          const data = JSON.parse(event.data); // Parse the JSON data from the WebSocket
          const price = parseFloat(data.p).toFixed(2); // Extract and format the price
          displayMessage(`Price Update for ${symbol}: $${price}`); // Display the price update
        });

        // Event listener for handling errors
        socket.addEventListener('error', error => {
          displayMessage(`WebSocket Error: ${error.message}`);
        });

        // Event listener for when the connection closes
        socket.addEventListener('close', () => {
          displayMessage('WebSocket connection closed.');
        });
      }

      // Start WebSocket connection when the "Start" button is clicked
      document.getElementById('startBtn').addEventListener('click', () => {
        const symbol = document.getElementById('symbolInput').value.trim(); // Get the entered symbol
        if (symbol) {
          if (socket) socket.close(); // Close any previous connection
          startWebSocket(symbol); // Start a new WebSocket connection
        } else {
          alert('Please enter a valid crypto pair.'); // Alert if input is empty
        }
      });

      // Clear the output and close WebSocket connection when the "Clear & Close" button is clicked
      document.getElementById('clearBtn').addEventListener('click', () => {
        output.innerHTML = ''; // Clear the output area
        if (socket) {
          socket.close(); // Close the WebSocket connection
          socket = null; // Reset the socket variable
        }
      });
    </script>
  </body>
</html>
HTML Explanation
- The
<input>field allows users to enter the cryptocurrency pair they want to track. - Two buttons control the interaction: one to start the WebSocket connection and another to clear the output and close the connection.
- The
<div id="output">is where real-time price updates are displayed.
JavaScript Explanation
1. Variables
let socket; // Variable to store the WebSocket instance
const output = document.getElementById('output'); // Reference to the output div
socket: This variable will hold the WebSocket connection instance, allowing us to send and receive data, and control the connection (open/close).output: This is a reference to the<div id="output">element where messages (like connection status and price updates) will be displayed.
2. Functions
A. displayMessage(message)
function displayMessage(message) {
  const p = document.createElement('p'); // Create a new <p> element
  p.textContent = message; // Set the content of <p> to the provided message
  output.appendChild(p); // Append the <p> to the output div
}
This function creates a new paragraph (<p>) element for every message received or status update, then adds it to the
output section on the webpage.
B. startWebSocket(symbol)
function startWebSocket(symbol) {
  const streamUrl = `wss://stream.binance.com:9443/ws/${symbol.toLowerCase()}@trade`; // Construct WebSocket URL
  socket = new WebSocket(streamUrl); // Create a new WebSocket connection

  socket.addEventListener('open', () => {
    displayMessage(`Connected to WebSocket for ${symbol}.`); // Notify on successful connection
  });

  socket.addEventListener('message', event => {
    const data = JSON.parse(event.data); // Parse the incoming JSON data
    const price = parseFloat(data.p).toFixed(2); // Extract and format the price value
    displayMessage(`Price Update for ${symbol}: $${price}`); // Display the price update
  });

  socket.addEventListener('error', error => {
    displayMessage(`WebSocket Error: ${error.message}`); // Handle and display connection errors
  });

  socket.addEventListener('close', () => {
    displayMessage('WebSocket connection closed.'); // Notify when the connection is closed
  });
}
Creates the WebSocket URL:
For example, if the user entersBTCUSDT, the URL becomes:wss://stream.binance.com:9443/ws/btcusdt@tradeopenEvent:
When the WebSocket connection is established, it displays a message:Connected to WebSocket for BTCUSDT.messageEvent:
When new data (e.g., price update) is received from the WebSocket, it:- Parses the JSON data from Binance.
- Extracts the price (
data.p) and rounds it to 2 decimal places. - Displays the update, e.g.:
Price Update for BTCUSDT: $30500.45
errorEvent:
If there's a WebSocket error, it displays the error message.closeEvent:
If the connection closes, it shows a message to inform the user.
3. Event Listeners
a. Start Button Event Listener
document.getElementById('startBtn').addEventListener('click', () => {
  const symbol = document.getElementById('symbolInput').value.trim(); // Get the entered symbol
  if (symbol) {
    if (socket) socket.close(); // Close any existing connection
    startWebSocket(symbol); // Start a new WebSocket connection
  } else {
    alert('Please enter a valid crypto pair.'); // Alert if input is invalid
  }
});
- On clicking the "Start" button, it reads the input from the user (e.g.,
BTCUSDT). - If a WebSocket connection is already open, it closes it before starting a new one.
- If the input is empty or invalid, it shows an alert asking the user to enter a valid crypto pair.
b. Clear Button Event Listener
document.getElementById('clearBtn').addEventListener('click', () => {
  output.innerHTML = ''; // Clear all content in the output div
  if (socket) {
    socket.close(); // Close the WebSocket connection
    socket = null; // Reset the socket variable
  }
});
- On clicking the "Clear & Close" button, it:
- Clears the content inside the output area.
- Closes the WebSocket connection (if open) and resets the
socketvariable tonull.
Conclusion
This project showcases how to stream live cryptocurrency prices using WebSocket connections from Binance. It provides an easy way to manage connections—allowing users to enter a crypto pair, view real-time updates, and close the connection anytime.
This example serves as an excellent starting point for building more complex trading applications or dashboards.