Stripe
The Stripe connector enables you to build your payment infrastructure in a matter of minutes. You can build your Apps interface on top of the payment data. You can find the connector beneficial to get customer details, create customers, initiate refunds, and others for your Stripe account.
Prerequisite
Stripe API Key: Obtain an API key from Stripe by signing up for an account and creating a new API key. This key is required to authenticate your requests when using the Stripe Connector.
Environment Setup: Ensure you have a development environment capable of making HTTP requests to external APIs. This could involve using programming languages like Python, JavaScript, or any language that supports HTTP requests.
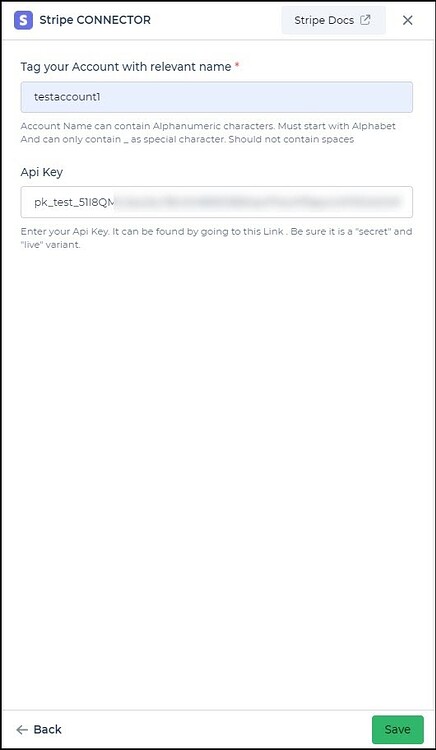
Configuring API Connector in DronaHQ
Add a Account name. Then add the API key for the connector account. Once all details are added, click Save. Your connector configuration is now done.
After successfully configuring and saving the connector settings, you can easily access your newly connected account by navigating to the connected accounts list. You can find this option from the Connector -> Manage Account section. This centralized location allows you to conveniently monitor and manage your connected accounts.
Supported API endpoints
| Action | Description |
|---|---|
| GetAccount | Retrieve details about the connected Stripe account. |
| GetCustomerList | Fetch a list of customers associated with your Stripe account. |
| CreateCustomer | Create a new customer profile within your Stripe account. |
| UpdateCustomer | Update an existing customer's information within your Stripe account. |
| GetAllCharges | Retrieve a list of all charges made through your Stripe account. |
| InitiateRefund | Initiate a refund for a specific payment using its charge ID. |
| CreateProduct | Create a new product within your Stripe account. |
| GetProductDetails | Fetch details about a specific product using its ID. |
| ListAllProducts | Retrieve a list of all products within your Stripe account. |
| DeleteProduct | Delete a product using its ID from your Stripe account. |
| ListAllPrices | Retrieve a list of all prices associated with your Stripe account. |
| CreatePrice | Create a new price for a product within your Stripe account. |
| CreatePriceRecurring | Create a recurring price for a product with subscription intervals. |
| GetPriceDetails | Fetch details about a specific price using its ID. |
| CreatePaymentLink | Generate a payment link for receiving payments outside of your Stripe-integrated app. |
| ListAllPaymentLinks | Retrieve a list of all payment links created in your Stripe account. |
| GetPaymentLinkDetails | Fetch details about a specific payment link using its ID. |
Using Stripe connector
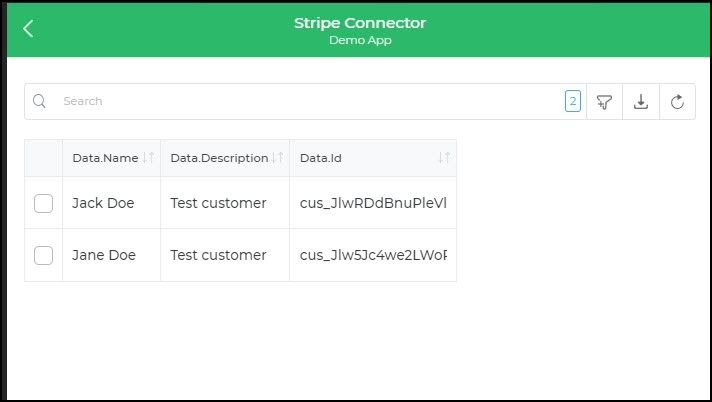
Get Customers
We'll explore how to retrieve a list of Customers, a significant resource within your Stripe account. Customer details encompass profiles, billing, tax information, as well as shipping and billing addresses. You may need to retrieve customer data for various purposes, such as payment collection and invoicing.
Follow these steps to retrieve customer data using the Stripe connector:
- Begin by connecting your Stripe account, as we've previously demonstrated.
- Integrate a Table Grid control into your form.
- Navigate to
Bind Data Option -> Quick Select -> Connector Library, select the Stripe Connector from the list of connectors and proceed. - Choose the
GetCustomersaction from the available options. - Authenticate the connected account and proceed.
- Configure the connector fields as required, select the display keys, and save your settings.
Upon running the form, you'll witness the customer list within the Table Grid. Additionally, you can create an Action Flow or Workflow for more advanced functionality.
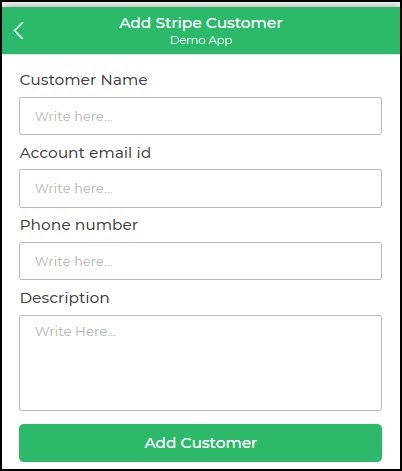
Adding a Customer
Suppose you wish to add a customer to your Stripe account. In that case, design a form incorporating an action button. Configure an Action Flow that triggers the Stripe Connector to achieve this.
- Under
Action Flow -> Server Side Actions,opt for the Stripe Connector. - Select the
CreateCustomeraction from the available choices. - Authenticate the connected account and proceed.
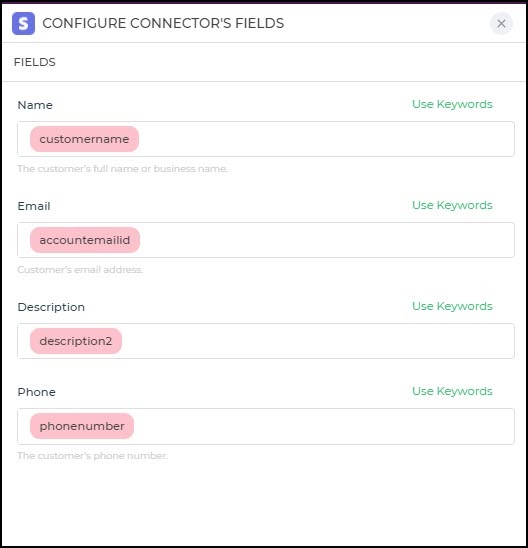
- Fill in the connector configuration fields, using keywords to link controls to respective fields.
- Add a connector name and any execution condition, then finish the setup.
Now, when users submit data through the form, the action flow will generate a new customer entry within your Stripe Account. You can also extend this functionality by integrating other connectors, like Shopify and Stripe, to create a comprehensive refund tool.
For a practical example of building a refund tool by integrating Shopify and Stripe, refer to this instructional video.