Sequin
Sequin is a powerful tool that enables you to harness the capabilities of SQL to seamlessly connect to external APIs. With Sequin, you can build on top of third-party services like Salesforce or Airtable using SQL queries, providing a fast and efficient alternative to direct API usage.
Configuring Sequin Sync
Prerequisites
Before you can use Sequin with DronaHQ, follow these steps to create a Sequin sync to your Postgres database:
Sign Up for Sequin:
- Start by signing up for Sequin here.
Connect to the API:
- Once you've signed up, connect Sequin to the API you want to sync. This is the external API you'll be working with.
Configure Schema:
- Configure your schema by selecting the specific tables and columns you want to sync from the API.
Database Connection:
- Sequin will prompt you to connect to your Postgres database. You can also opt to use a free demo Postgres instance hosted by Sequin.
Initiate Sync:
- Click
Createto initiate the synchronization process. Sequin will start syncing your data in real-time.
- Click
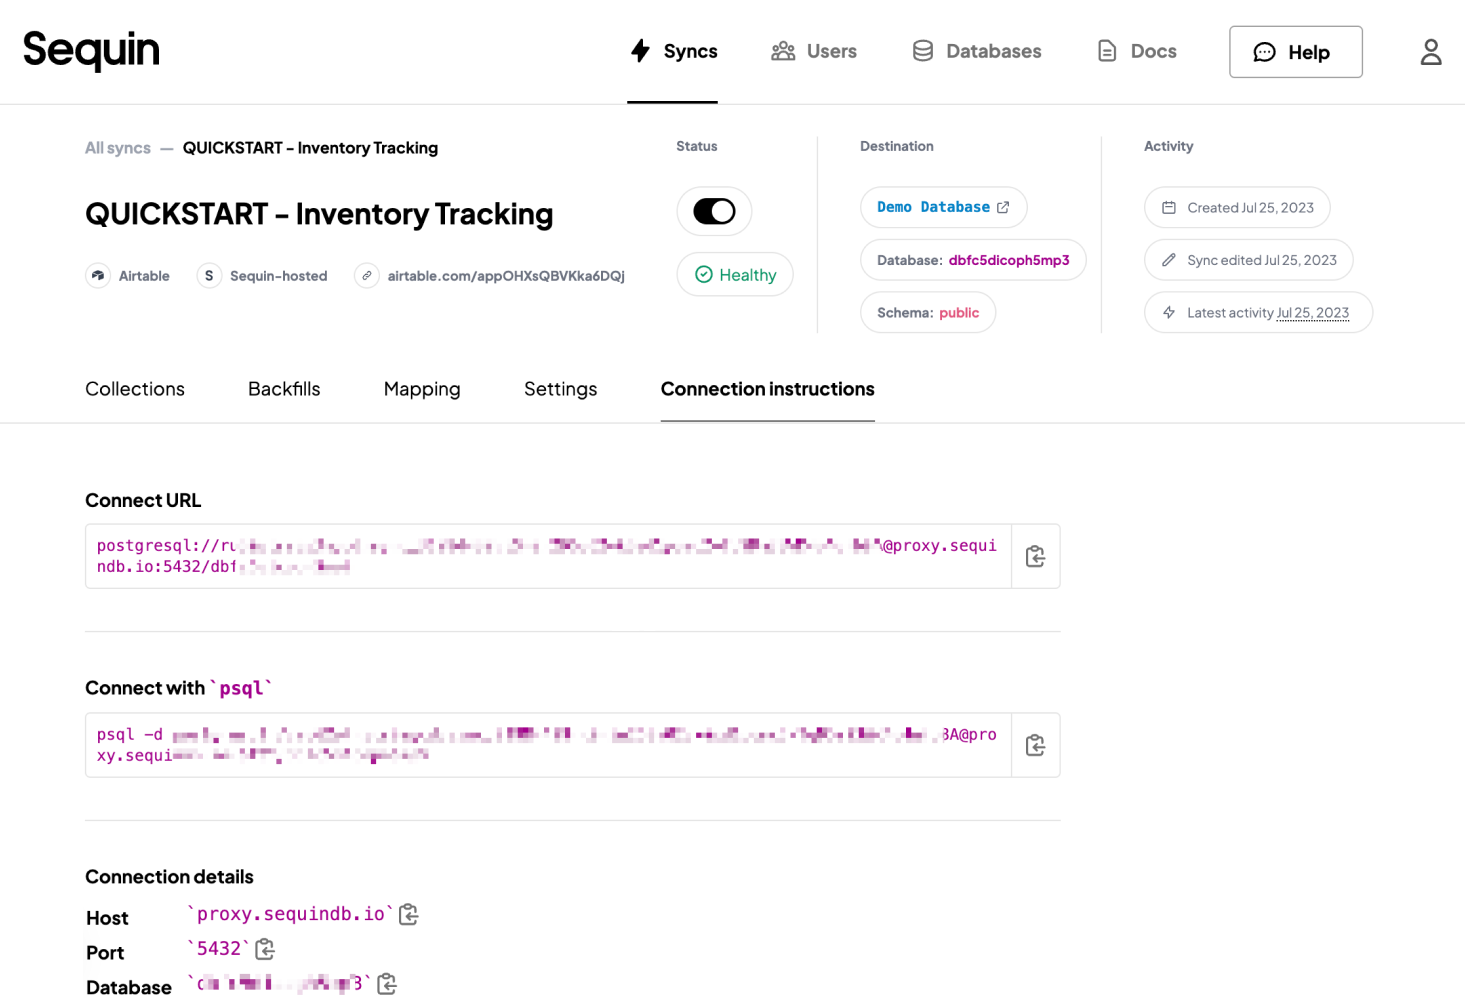
Connection Instructions:
- Sequin will provide you with connection instructions for your Postgres database. Keep this information accessible, as you'll need it to configure DronaHQ.
For more detailed guidance on setting up a Sequin sync, refer to this guide.
Setup Sequin Connector in DronaHQ
Sequin uses a Postgres Proxy to interface with your Sequin-synced tables. The Proxy lets Sequin capture inserts, updates, and deletes you make in your database and commit them to the API.
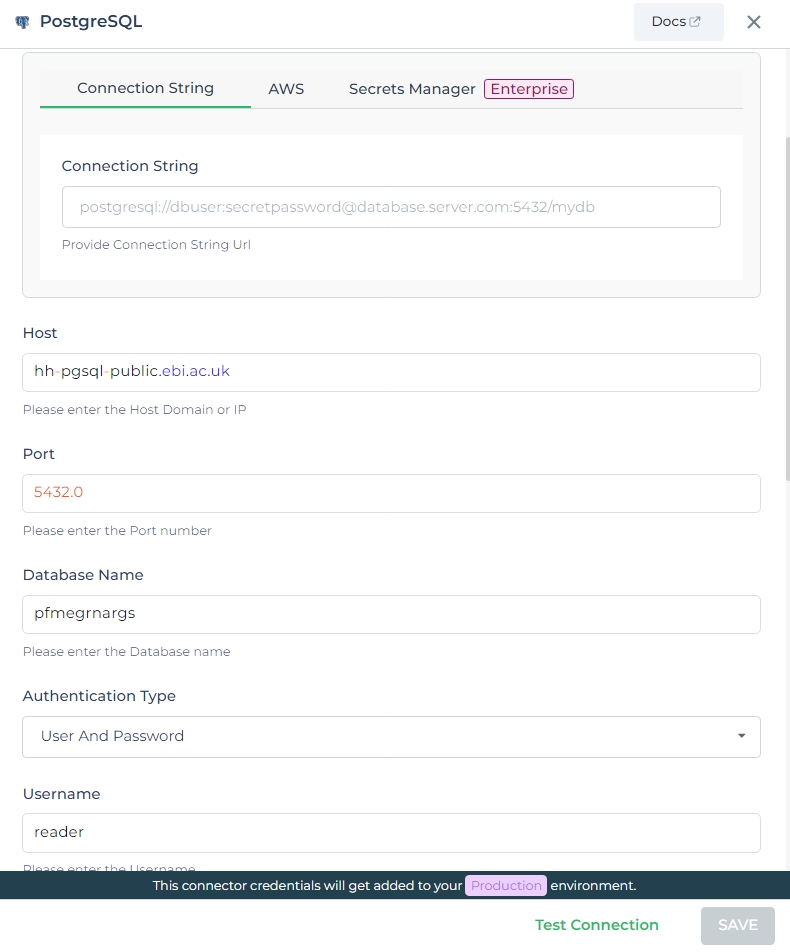
To add Sequin's Postgres Proxy as a DronaHQ connector, you can treat it as a regular Postgres resource and enter the connection details in the connector configuration:
Access your DronaHQ dashboard and navigate to the
Connectorssection.Click
+ Add Connectorand selectPostgreSQL Connector.Provide a name for the connector and paste the connection string from your Sequin dashboard.
Under
Connection Options,enableEnable converting queries to prepared statementsandConnect using SSLfor efficient and secure database access.Test the connection to ensure it's working correctly, then click
Save.
DronaHQ can Auto fill crucial connection values like host, name, password, and more from the connector's connection string or from a AWS IAM credentials using AWS Import.
General
| Field | Description |
|---|---|
| Host | Enter the Host Domain or IP |
| Port | Enter the Port number |
| Database Name | Enter the Database name |
| Authentication Type | Choose from User and Password or AWS IAM |
| Username | Enter the Username |
| Password | Enter the Password |
| AWS Access Key | Enter the AWS Access Key of your database. |
| AWS Secret Key | Enter the AWS Secret Key of your database. |
| AWS Region | Enter the AWS Region of your database. |
| Role to assume (ARN) | Enter the role to be used while accessing API. Example - arn:aws:iam::123456789012:role/RoleName |
Admin
| Advanced Option | Description |
|---|---|
| Connection Options | The key and value connection options in database configuration refer to specific settings (keys) and their corresponding values that dictate how the application connects to the database |
| Use Dynamic Database Host | Dynamically determine the host for the database connection. |
| Use Dynamic Database Name | Set the database name dynamically, allowing easy switching between databases. |
| Use Dynamic Database Credentials | Enable dynamic database credentials for secure and convenient management. |
| Enable Converting Queries to Prepared Statement | Opt for prepared statements to enhance database performance and security. |
| Connect using SSL | Securely access the database using an encrypted SSL connection, ensuring data integrity and confidentiality. |
| Enable SSH Tunneling | Securely access the database through encrypted SSH tunneling. |
| Whitelist IP | Enhance security by restricting database access to specific whitelisted IP addresses. |
Adding Database Queries
After configuring the connector, access it in your Connector Library. To add queries, click Add query once the
connection is ready. Create simple or complex queries, view tables and fields. Input Query name, run the query, and see
results in Response.
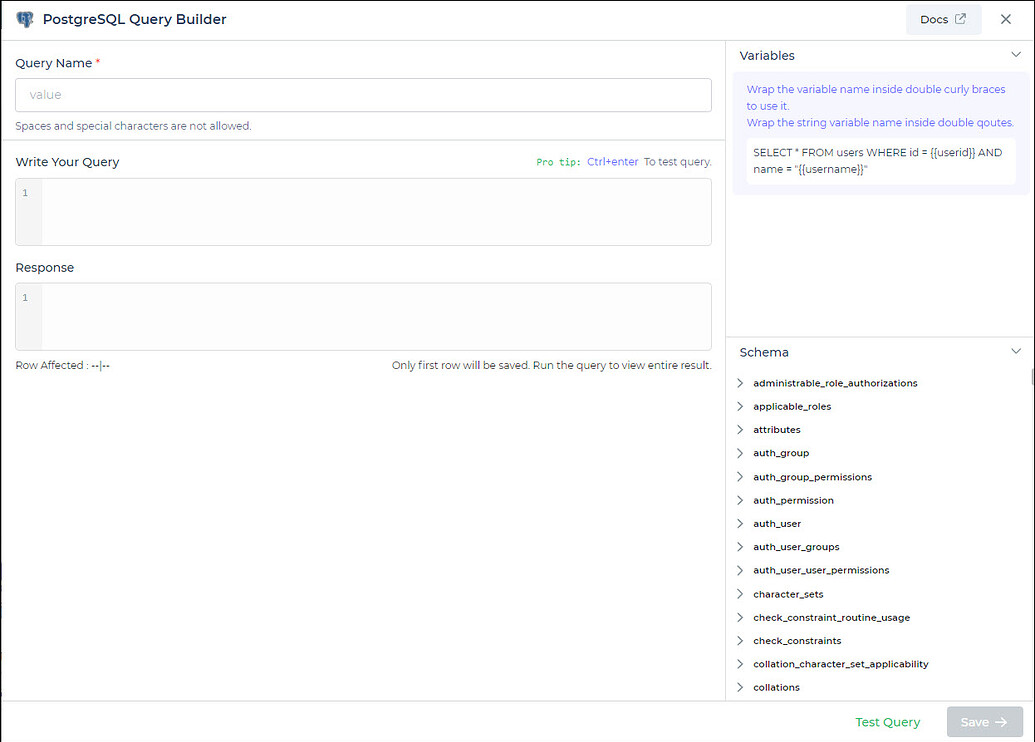
Use double curly brackets for dynamic variables. Test with sample values before saving. Link dynamic variables to controls/actions and more for runtime use.
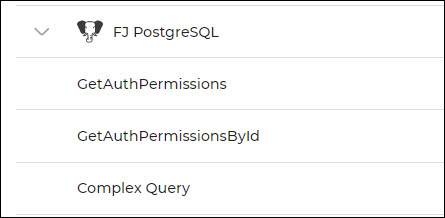
Saved queries appear under your connector in Connector Library.
Supported Query Operations
| Operations | Description |
|---|---|
| Raw SQL Query | Various select, insert, delete, update, join operations which are supported by PostgresSQL query. e.g. - select * from UserInfo; |
| Stored Procedure Call | You can call store procedure similar to that we call from workbench. e.g. - CALL getUserInfo; |
Using the Sequin Connector in DronaHQ
With Sequin syncing your API data to your database, you can now query this data within your DronaHQ app. Here's how to do it:
From your DronaHQ dashboard, access your app.
In the left rail, click on
Data Queries(the database icon), then click+ Newand selectConnector Query.Choose the Sequin Postgres Proxy connection as the connector.
Compose your SQL query using the schema for your Sequin-synced tables available on the right rail.
Click
Testto ensure your query runs as expected.
Here's an example Salesforce query that retrieves Salesforce Contacts belonging to a specific account:
select * from salesforce.contact
-- use a query variable, {{account_id}}
where account_id = '{{account_id}}'
limit 100;
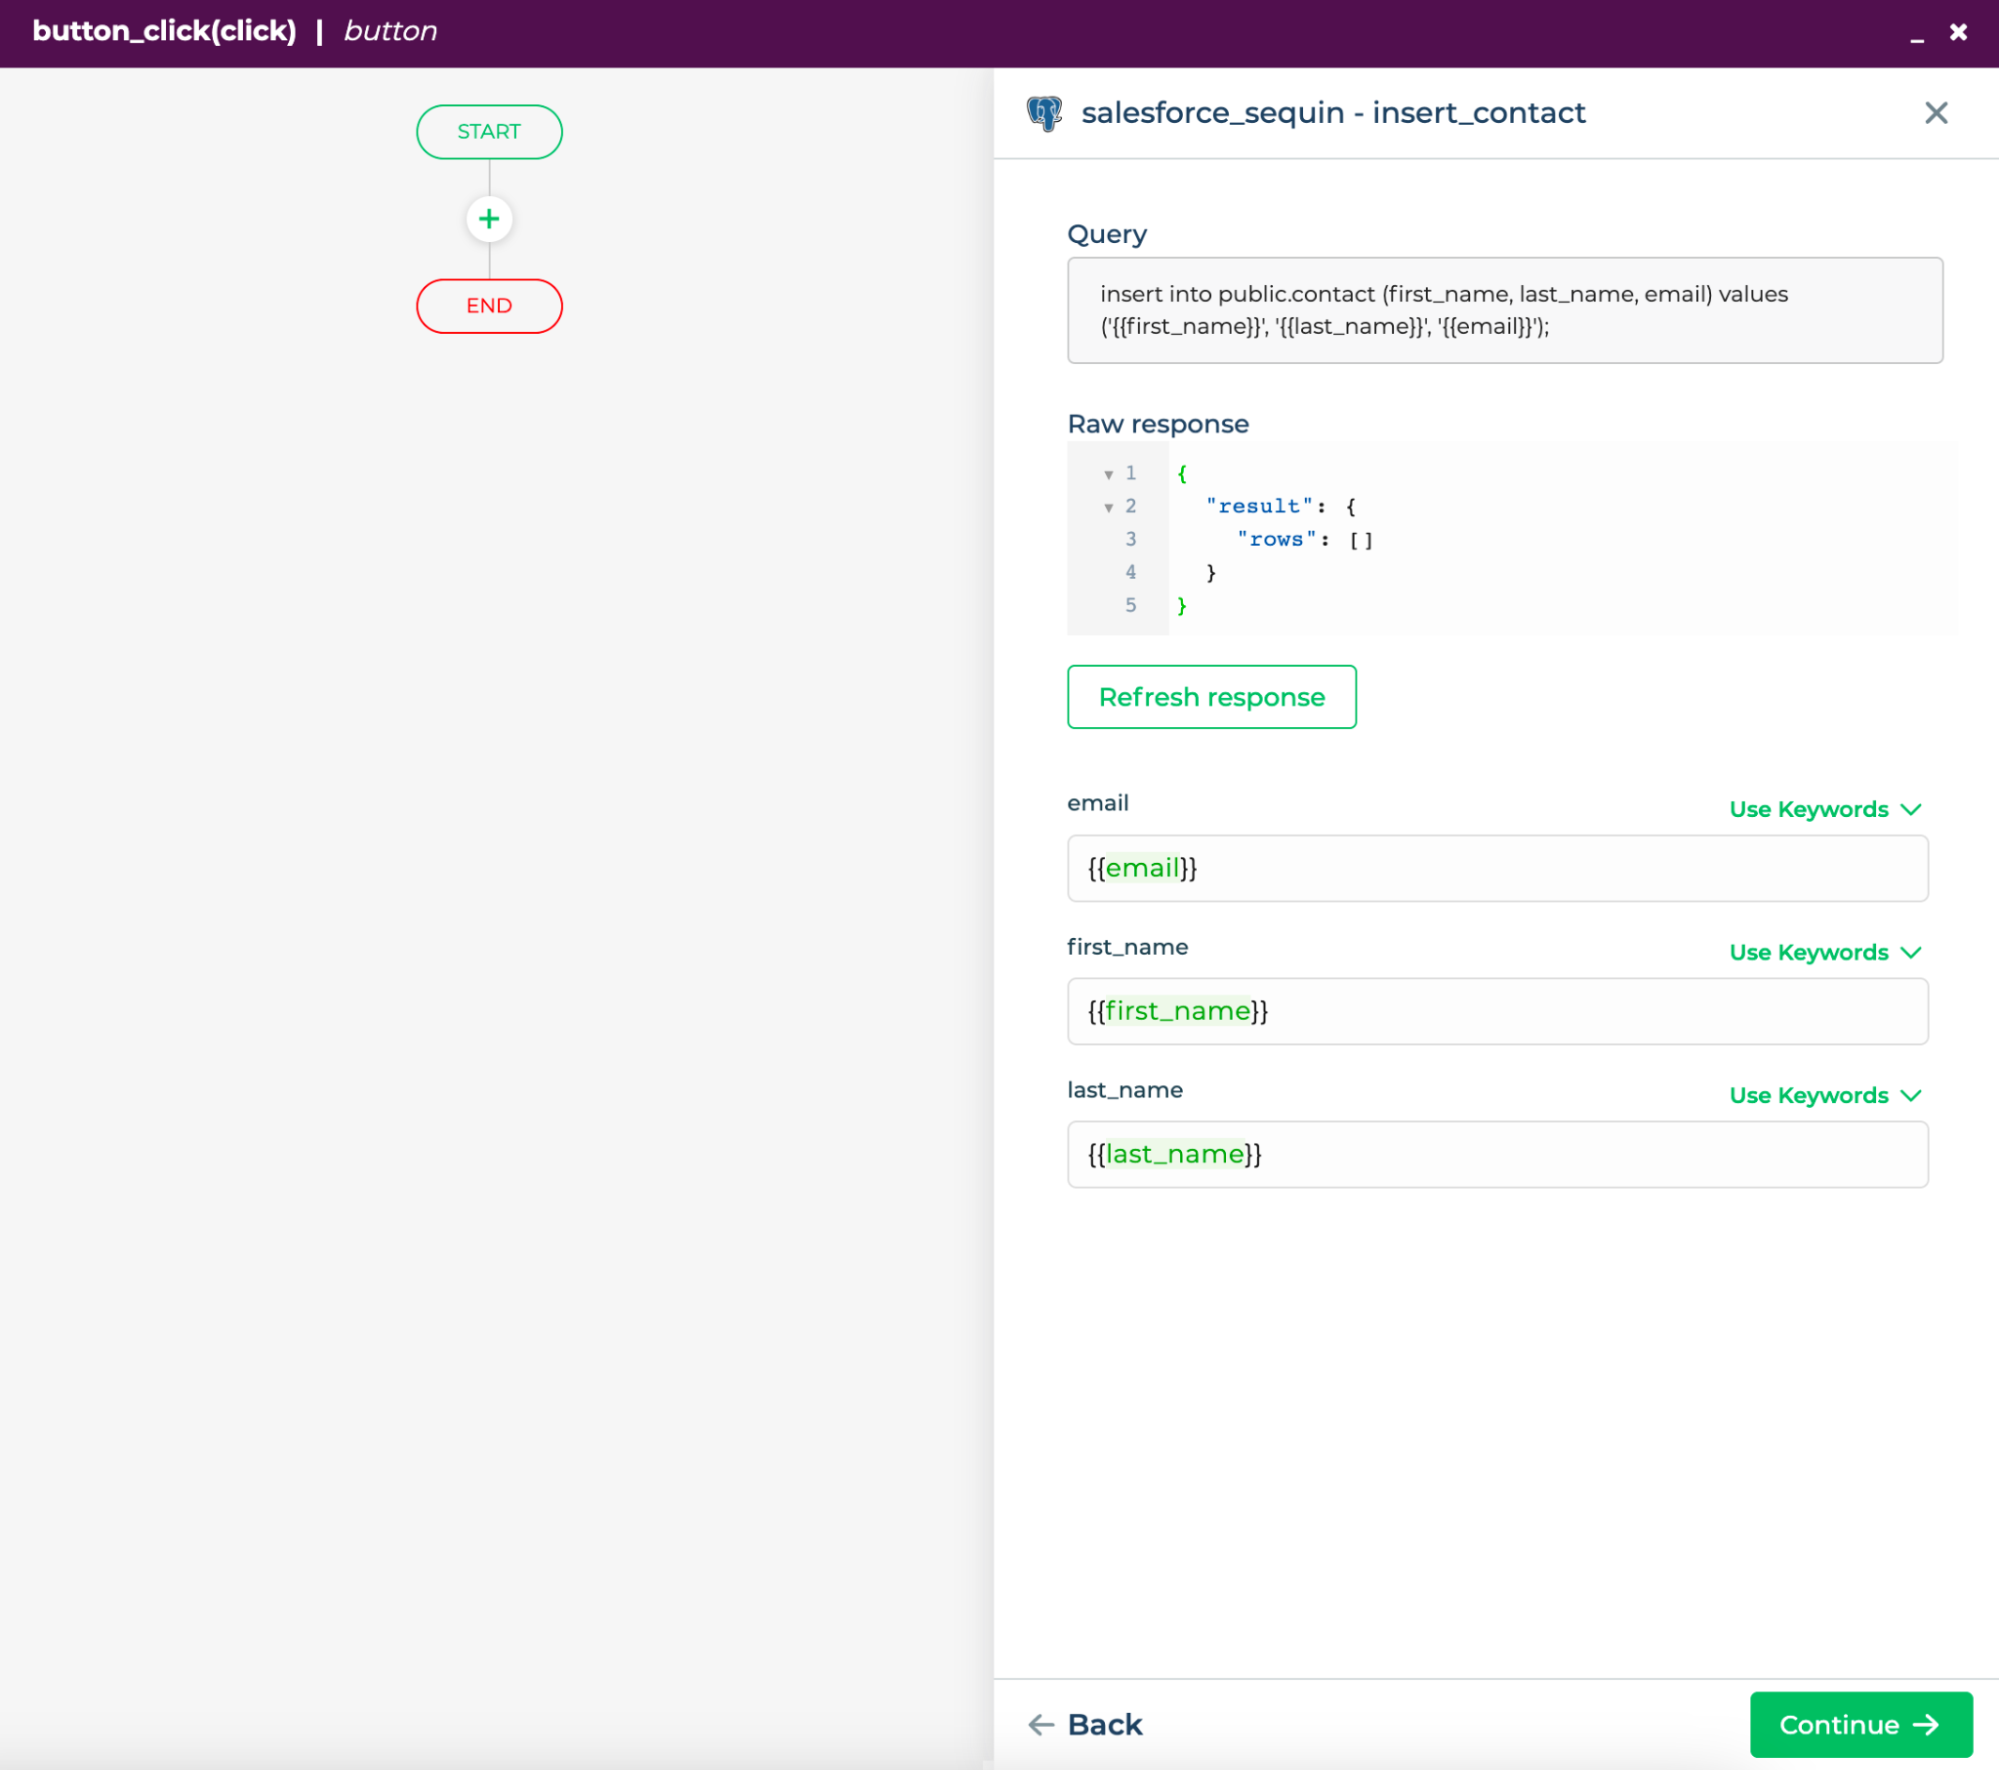
Writing Back to the API
Sequin allows you to perform mutations via your database, which are then applied to the external API. In DronaHQ, you can use custom-built or auto-generated forms to insert or update data in your Sequin-synced tables.
Create a form with input fields matching your Sequin-synced table columns.
Connect the
Submitbutton of your form to a database mutation query in DronaHQ.Configure the insert query by populating
valueswith input field values from your form.
insert into salesforce.contact (first_name, last_name, email)
values ('{{first_name}}', '{{last_name}}', '{{email}}');
Error Handling
In case Sequin encounters an error while applying a mutation to the upstream API, it returns a standard Postgres error. You can configure your app to display this error as an alert notification.
- In the event of an error, configure an
On-Screen Action(e.g., Toast) to display the error message.

With Sequin, you can seamlessly integrate third-party services into your DronaHQ app using SQL, making data management and utilization efficient and straightforward.
For more details on writing queries and understanding how Sequin works, refer to their documentation.