Razorpay
Integrate Razorpay to set up a powerful payment platform to enhance your Micro app’s capabilities as a full-fledged e-commerce solution. You can accept payments via debit cards, credit cards, net banking, and any of your supported wallets.
Prerequisite
Razorpay Account: You need to have an active Razorpay account to access their APIs and integrate with their services.
API Key and Secret Key: Obtain your Razorpay API Key and Secret Key from your Razorpay account dashboard. These keys will be used for authentication when connecting the Razorpay connector.
Configuring API Connector in DronaHQ
Add a Account name. Then add the API key and Secret key for the connector account. Once all details are added, click Save. Your connector configuration is now done.
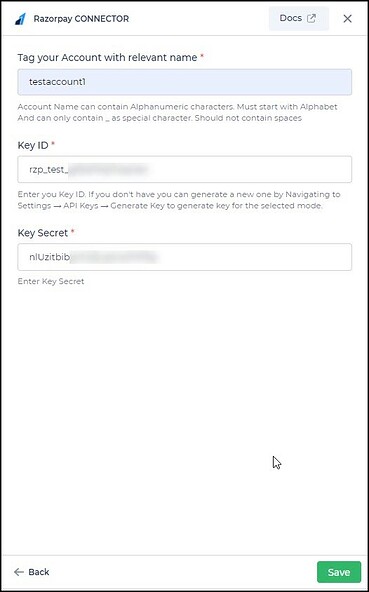
After successfully configuring and saving the connector settings, you can easily access your newly connected account by navigating to the connected accounts list. You can find this option from the Connector -> Manage Account section. This centralized location allows you to conveniently monitor and manage your connected accounts.
Supported API endpoints
| Action | Description |
|---|---|
| Create Payment Link | Generate a payment link for collecting payment. |
| List All Plans | View all available plans for subscription. |
| Create Subscription Link | Generate a subscription link to sign up for a plan. |
Using Razorpay Connector
Creating Payment Link
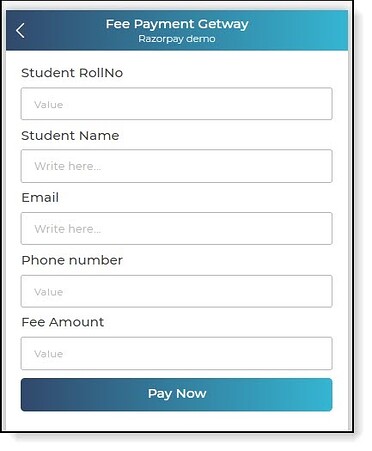
Razorpay's CreatePaymentLink action empowers you to generate and share payment links for various payment methods, such as net banking, cards, and UPI. Let's walk through an example of creating a payment link to pay school fees for a student.
Start by creating an Action Flow to send a payment link. Select Server-side Actions and pick the Razorpay connector, ensuring you've already authenticated your account.
Select the
CreatePaymentLinkaction and your connected account.
Configure the connector fields as needed. For instance, consider the
RollNoas a unique Reference ID for Razorpay. Use keywords to link controls for the amount, customer name, phone number, and email address.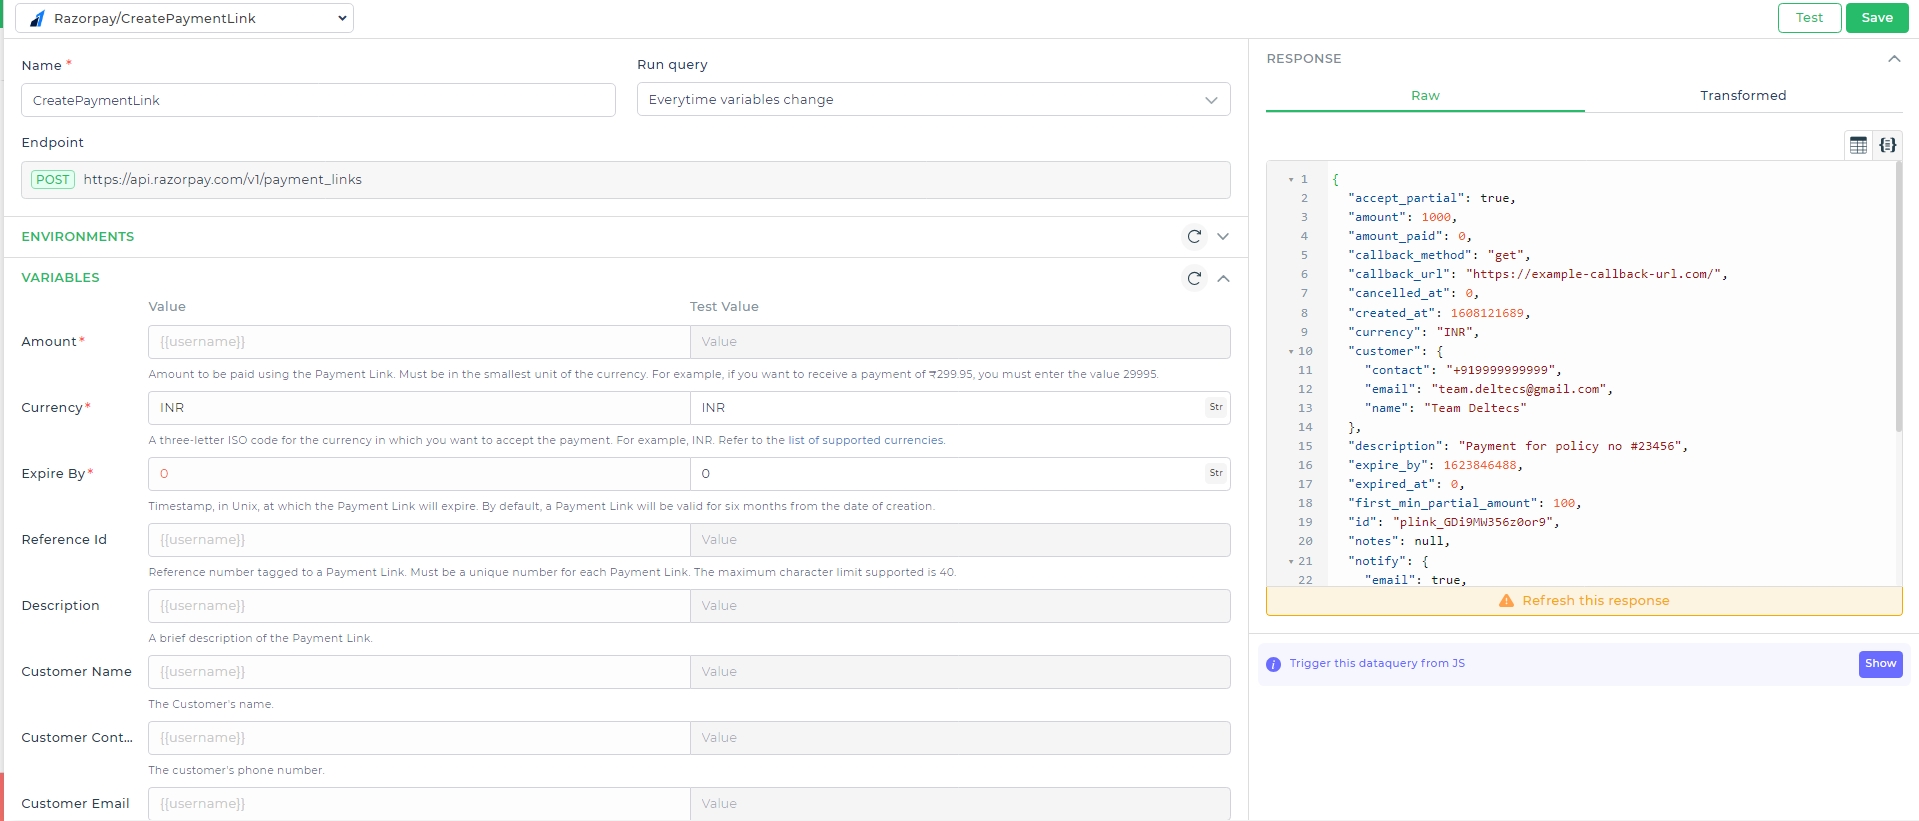
Configuration Set whether the link should be sent via email and SMS by selecting
Is SMS NotifyandIs Email Notify. You can also enable partial payments and specify the minimum amount.
- With the Action Flow ready, triggering it will send an email to the payee's address with payment details.
The email sent by Razorpay includes payment details. Note that we used Test Mode for sample payments. In live mode, the process remains the same.
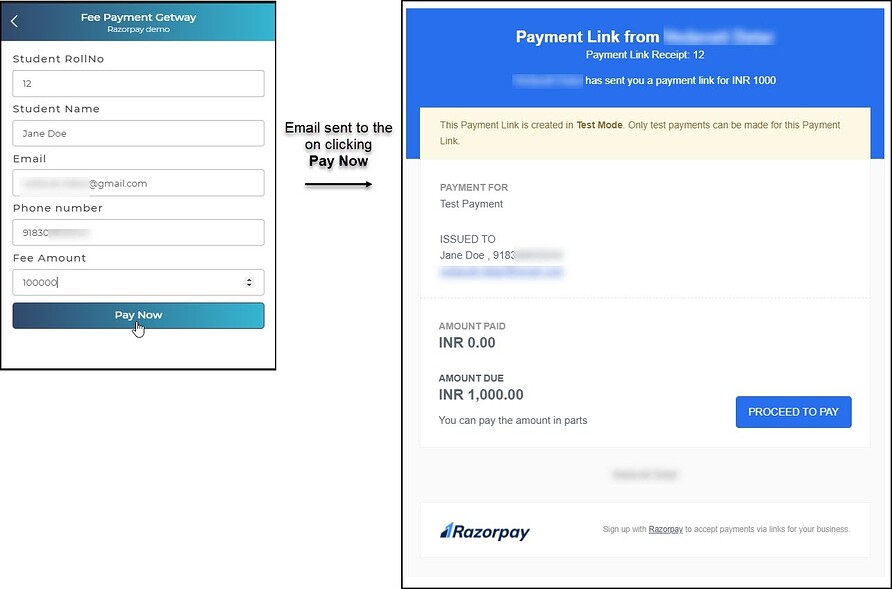
Notification Settings Depending on the user's preference, Razorpay allows complete or partial payments. Users can choose from payment modes like Card, UPI, Netbanking, or Wallet.
- Visit the Razorpay dashboard to track all transactions and payment links.
The Razorpay connector streamlines the configuration of a payment gateway powered by Razorpay for your users. It's a convenient solution to generate and manage payment links with ease.
Remember that when integrating with live transactions, you'll switch from Test Mode to Live Mode for seamless real-world payments.