Airtable
Airtable is a spreadsheet-database hybrid, with the features of a database but the power of a spreadsheet. DronaHQ provides integration with Airtable that allows you to manage the Airtable tables and keep track of anything and everything.
Prerequisite
Airtable Account: Ensure you have an active Airtable account with the appropriate permissions to access the data you intend to integrate.
Personal Access Token: Airtable's API requires a Personal Access Token for authentication.
Base ID: Identify the specific Base within your Airtable account that you want to connect with. You can find the Base ID by navigating to the Airtable API page and selecting the desired Base. Copy the Base ID from the Introduction section.
Table Name: Determine the exact name of the table within your chosen Base from which you want to retrieve data.
Configuring API Connector in DronaHQ
Add a Account name. Then add the API key/Personal Access Token, Base ID and Table name for the connector account. Once all details are added, click Save. Your connector configuration is now done.
API Keys are deprecated. Use Personal Access Tokens instead.
Personal Access Token
To Create one, Go to Create Access tokens page, and click on + Create New token. Enter Friendly Name and Add Following Scope -
- data.records:read
- data.records:write
- schema.bases:read
Add following Access
Under ALL WORKSPACES, Select → All current and future bases in all current and future workspaces
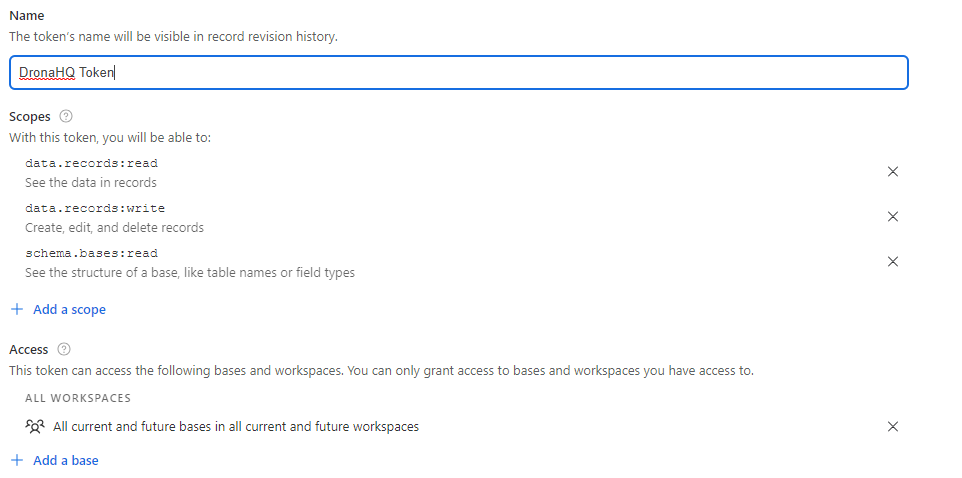
Click on Create Token. You will be shown Newly created Token. You can use this in Api Key section in DronaHQ.
Base ID
To find your Airtable Base ID, open the Airtable API page and click the Base that you want to use. You will find the ID of your base in the Introduction section.
Available API Endpoints
| Action Name | Description |
|---|---|
| ListBases | Retrieve a list of all bases available in the system. |
| ListBaseSchema | Fetch the schema of a specified base, including tables and fields. |
| FindRows | Retrieve multiple rows from a specific table using filters or conditions. |
| FindRowById | Fetch a row from a table using its unique identifier, such as a record ID or primary key. |
| CreateRow | Insert a new row into a table, filling in the necessary fields. |
| UpdateRow | Update existing data in a row with specified field changes. If value is not specified or empty string for any field it will not consider that field for update. Use UpdateRowV2 in case you want to update columns with empty values. |
| DeleteRow | Remove a row from a table using unique identifiers or specific criteria. |
| FindARow | Access a single row from a table based on specified criteria or field values. |
| UpdateRowV2 | Update existing data in a row with specified field changes. All the fields will be updated for the given row. In case you don't configure a column, then empty value will be updated. In case you want to skip updating a specific column, use {{NULL}} keyword. For Auto-generate or Formula column, always specify {{NULL}} keyword. |
Using Airtable Connector
Adding Airtable Connector to an Action Flow
- Navigate to the Action flow section.
- Under
Connectors > Libraryconnectors, choose theAirtableconnector. - Select a specific action from the available options and click
Continue. - Authenticate the account or select the environment you want to continue with.
Creating a New Row in Airtable
The integration with Airtable allows you to seamlessly add new records to your designated table. Let's take an example of adding a new record to the Marketing table within the Marketing Team base.
- Keep in mind that Airtable doesn't offer a meta API to list columns, so fetching 1 row from Airtable provides column information. Ensure you've added at least 1 row with all columns filled to reflect in the Add Row connector.
- To create a new row, select
Create rowunderSelect from Airtableand proceed. - Enter the Base ID copied from Airtable and specify the Table name.
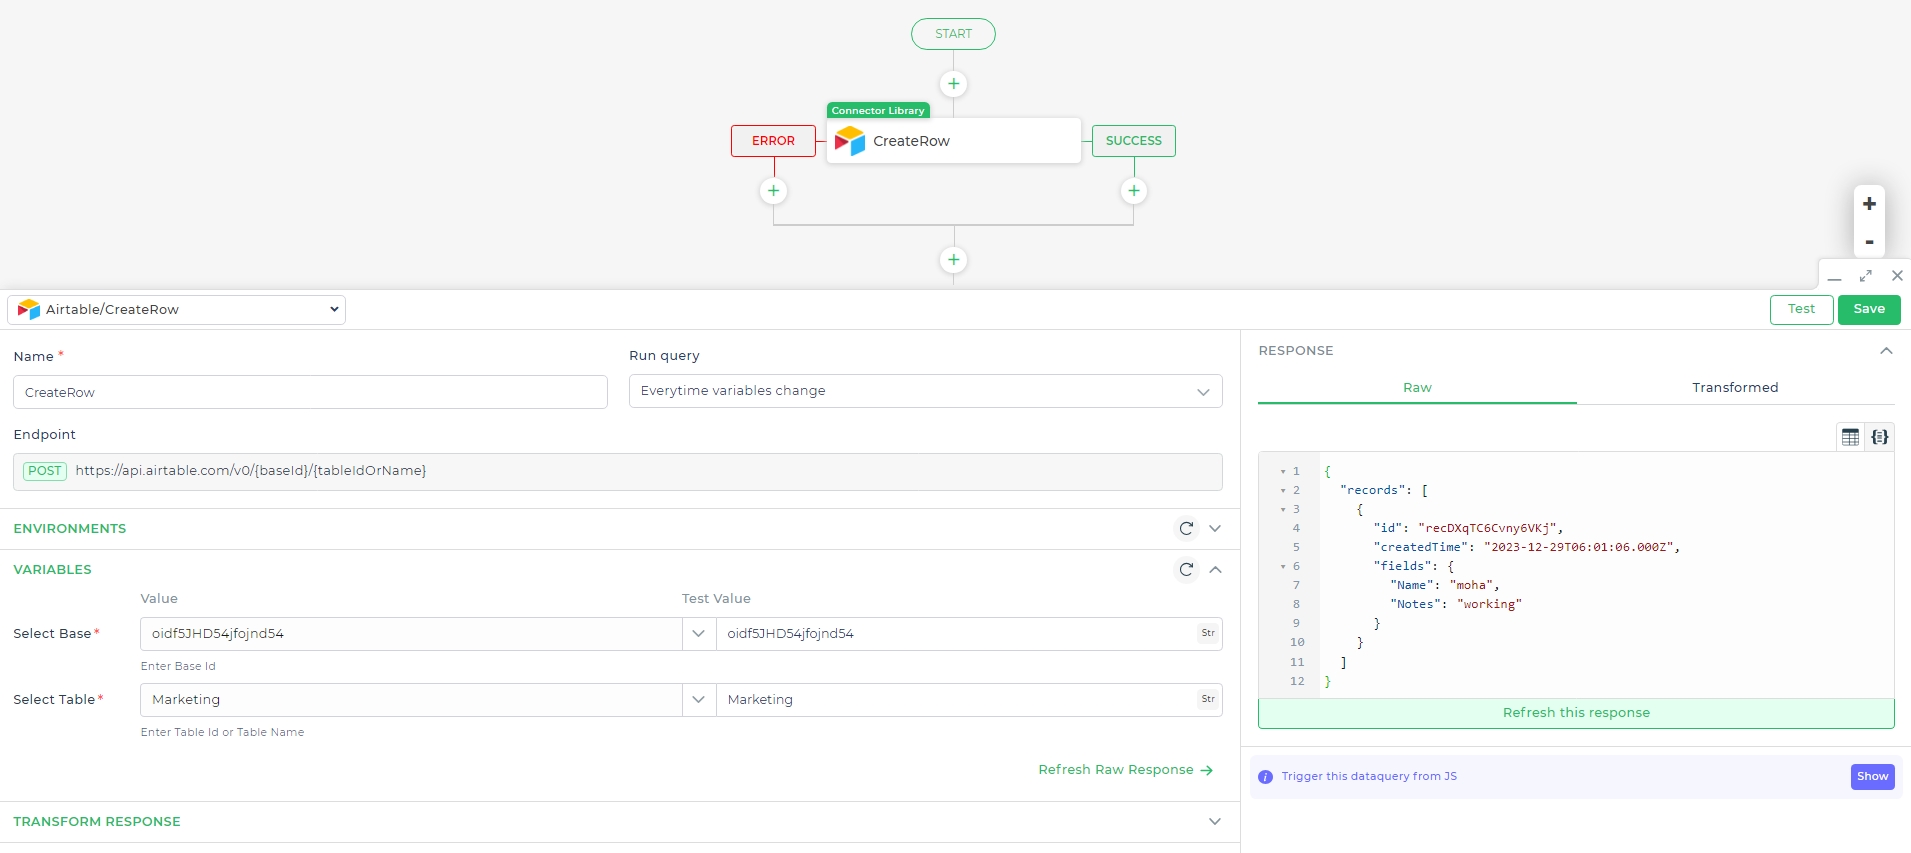
- List of table columns will be displayed. Input static or dynamic values using Keywords or values, depending on your needs.
- After entering the details, continue and provide a unique Action name.
- For complex column types like Attachments, ensure the data is prepared in the expected format. Custom functions or JS code can be used to handle such cases.
- Formula columns and nested key values should be managed appropriately.
- Custom functions can be implemented to support column formats that aren't natively supported.
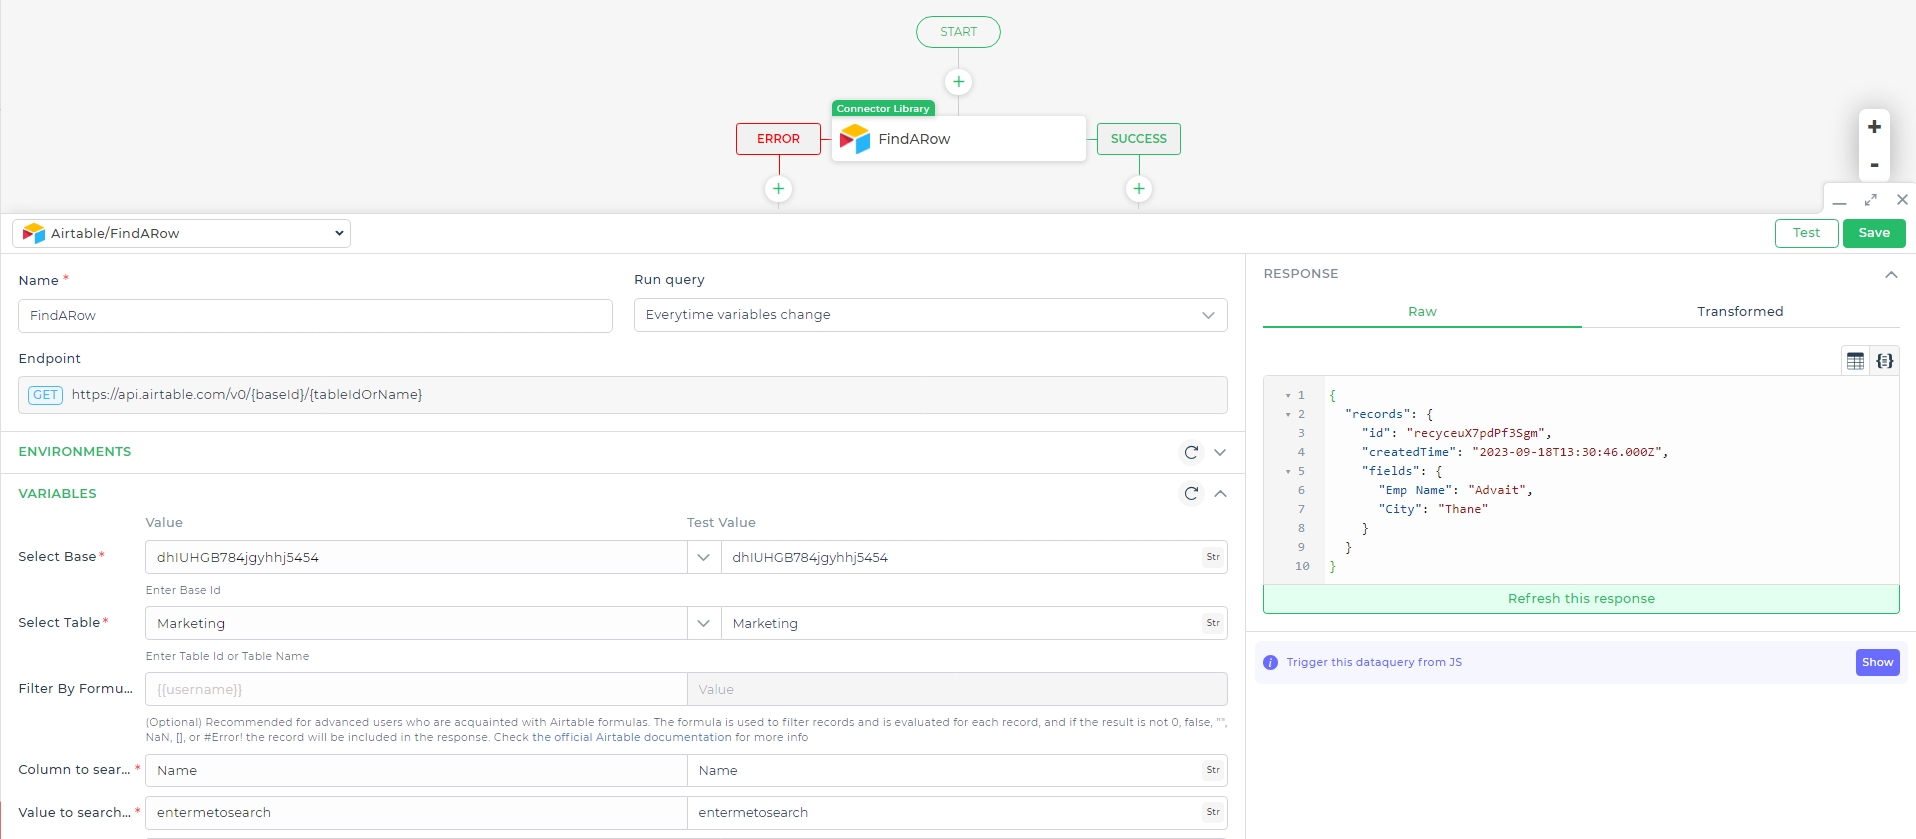
Finding Rows in Airtable
In scenarios where you need to locate specific records for actions like updates or deletions, the Find a row/ Findrows feature comes in handy. This process involves searching for rows based on certain criteria and obtaining their record IDs, which can then be utilized for targeted actions.
To find rows in Airtable using the connector, follow these steps:
- Select the connected Airtable account and proceed by clicking Continue.
- Specify the Column to search: Enter the name or use a keyword of the column to be searched.
- Provide the Value to search: Enter the value to be searched in the specified column. This can also be a dynamic value.
- Determine the Search Direction: Select whether to search from top to bottom or bottom to top in the table.
- Filter by Formula (optional): Advanced users can use Airtable formulas to further filter data. Refer to Airtable's formula documentation for more details.
- Enter the Base ID: This ID is available in your Airtable base's API Documentation under Help. Copy and paste it into the respective field.
- Specify the Table name: Enter the table name within the specified Base.
- Set the Sort attribute (optional): You can provide formulas to sort records based on specific attributes and order.
- Apply Transformations (optional): Modify connector response keys using Column transformations if needed.
- Depending on the action used (find row or find rows), the record IDs will be available as
FindARoq.records.id. This response can be used in subsequent connectors.
Keep in mind that the Airtable API returns only keys of rows with present values, which might differ from DronaHQ's expectation of consistent keys. To overcome this, ensure cells are filled or create a custom JavaScript function for consistent output.
Self-Hosted Installation
To use the Airtable Connector on the on-prem version, follow these steps:
Select the Connector: Choose the Airtable Connector from the list.
Provide the Necessary Details:
Environment/Account Name: The name can contain alphanumeric characters, must start with an alphabet, and can only contain
_as a special character without spaces.API Base URL: Enter the base URL of your API endpoint for the given environment. This should be a valid domain name followed by the http/https protocol (e.g.,
https://studio.dronahq.com).Personal Access Token: Enter your personal access token.
You can add multiple APIs, but you cannot edit them later. If changes are needed, you must redo the process from adding the API.