REST API
The REST API connector provided by DronaHQ allows you to integrate and interact with external services, systems, or platforms that expose their functionalities through a RESTful API. This connector enables you to perform HTTP requests such as GET, POST, PUT, and DELETE to retrieve data, send data, update information, or perform various actions.
Prerequisite
API Documentation: Obtain the documentation of the external service's RESTful API that you intend to integrate. This documentation should outline the available endpoints, required request parameters, headers, authentication methods, and response formats.
API Endpoint: Identify the specific API endpoint you want to interact with. This includes the full URL path to the endpoint, which may include variables, query parameters, or path parameters.
Authentication Credentials: Determine the authentication method required by the API, such as API key, OAuth token, or Basic Authentication. Obtain the necessary credentials or tokens for authenticating your requests.
NOTEDronaHQ REST API also supports multistep authentication methods
API Access: Ensure that the external service's API is accessible from the network where your DronaHQ application will be running. Confirm any firewall or network restrictions that might affect the connectivity to the API.
HTTP Methods: Understand the HTTP methods (GET, POST, PUT, DELETE, etc.) supported by the API and their corresponding purposes.
Configuring API Connector in DronaHQ
Use of the REST API allows you to easily connect to the Third-Party API and database and access important systems. It has different authentication methods, from where you can choose as of your choice.
Enter the Connector name and select the type of
Authenticationthat you want to use. Here we are going to use the optionNoAuthso selectNone.You need to provide the configuration parameter required by the specific API if any.
Provide a method, for example, a
GETmethod to get the data of the Top news stories.
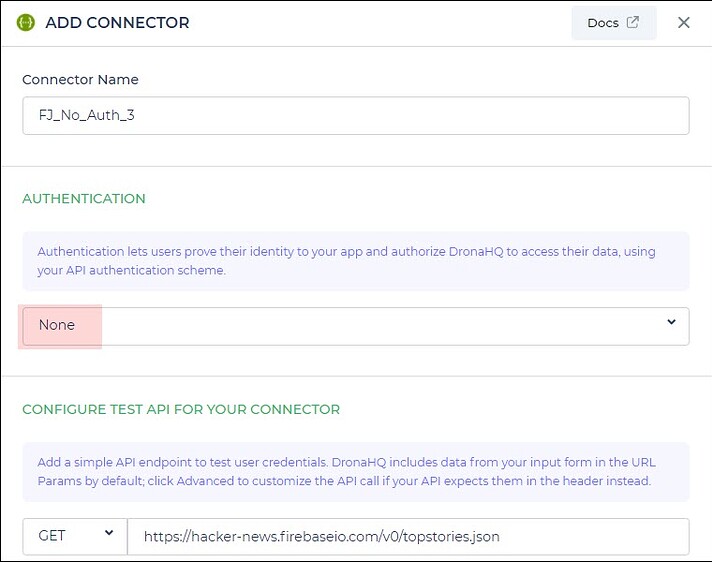
Once all details are added, click Save. Your connector configuration is now done.
After successfully configuring and saving the connector settings, you can easily access your newly connected account by navigating to the connected accounts list. You can find this option from the Connector -> Manage Account section. This centralized location allows you to conveniently monitor and manage your connected accounts.
Add API to configure
Now that you have configured the API category and added accounts you now need to add the API for configuration. Under DronaHQ > Connectors you can see your connector is added. To add this API, click Add API.
Now Add the Connector API Name and the URL. In this case, let us add GET method to get the best stories as shown below:
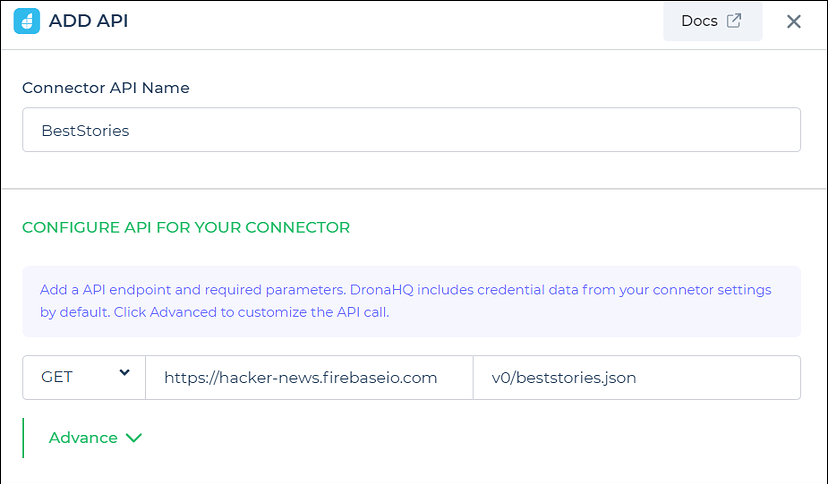
Once you have configured the API as required, you can click Test and Save. You can check the response accordingly to your request. The API is now added successfully to your Custom API connectors.