SMTP
You can now use DronaHQ’s SMTP connector to configure and send emails from all of your favorite emailing services providers like Gmail, Outlook, SendGrid, Amazon SES, etc. Right from your app.
Prerequisite
SMTP Server Details:
- Obtain the hostname or IP address of the SMTP server you will be using to send emails.
- Identify the port number used by the SMTP server for email communication (commonly 25, 465, or 587).
Authentication Credentials:
- Collect the username and corresponding password for the SMTP server. These credentials are used for authenticating and sending emails.
Sender Email Address:
- Choose the sender's email address that will be used to send emails through the SMTP server.
Recipient Email Addresses:
- Identify the recipient email addresses to which you intend to send emails.
Configuring API Connector in DronaHQ
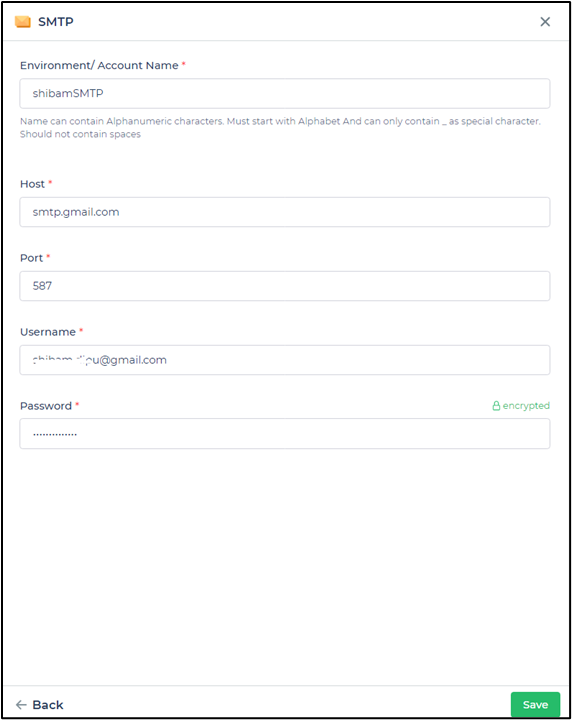
Add a Account name. Then add the necessary details such as Host & Port Number and Username and Password for the connector account. Once all details are added, click Save. Your connector configuration is now done.
After successfully configuring and saving the connector settings, you can easily access your newly connected account by navigating to the connected accounts list. You can find this option from the Connector -> Manage Account section. This centralized location allows you to conveniently monitor and manage your connected accounts.
Supported API endpoints
Using SMTP Connector
Send mail
Configure its components, such as the sender's email, receiver's email, subject, and more, directly from the action flow.
Navigate to the action flow where you wish to set up the SMTP action, specifically the
Connector > Libraryaction.Choose the SMTP action to send mail.
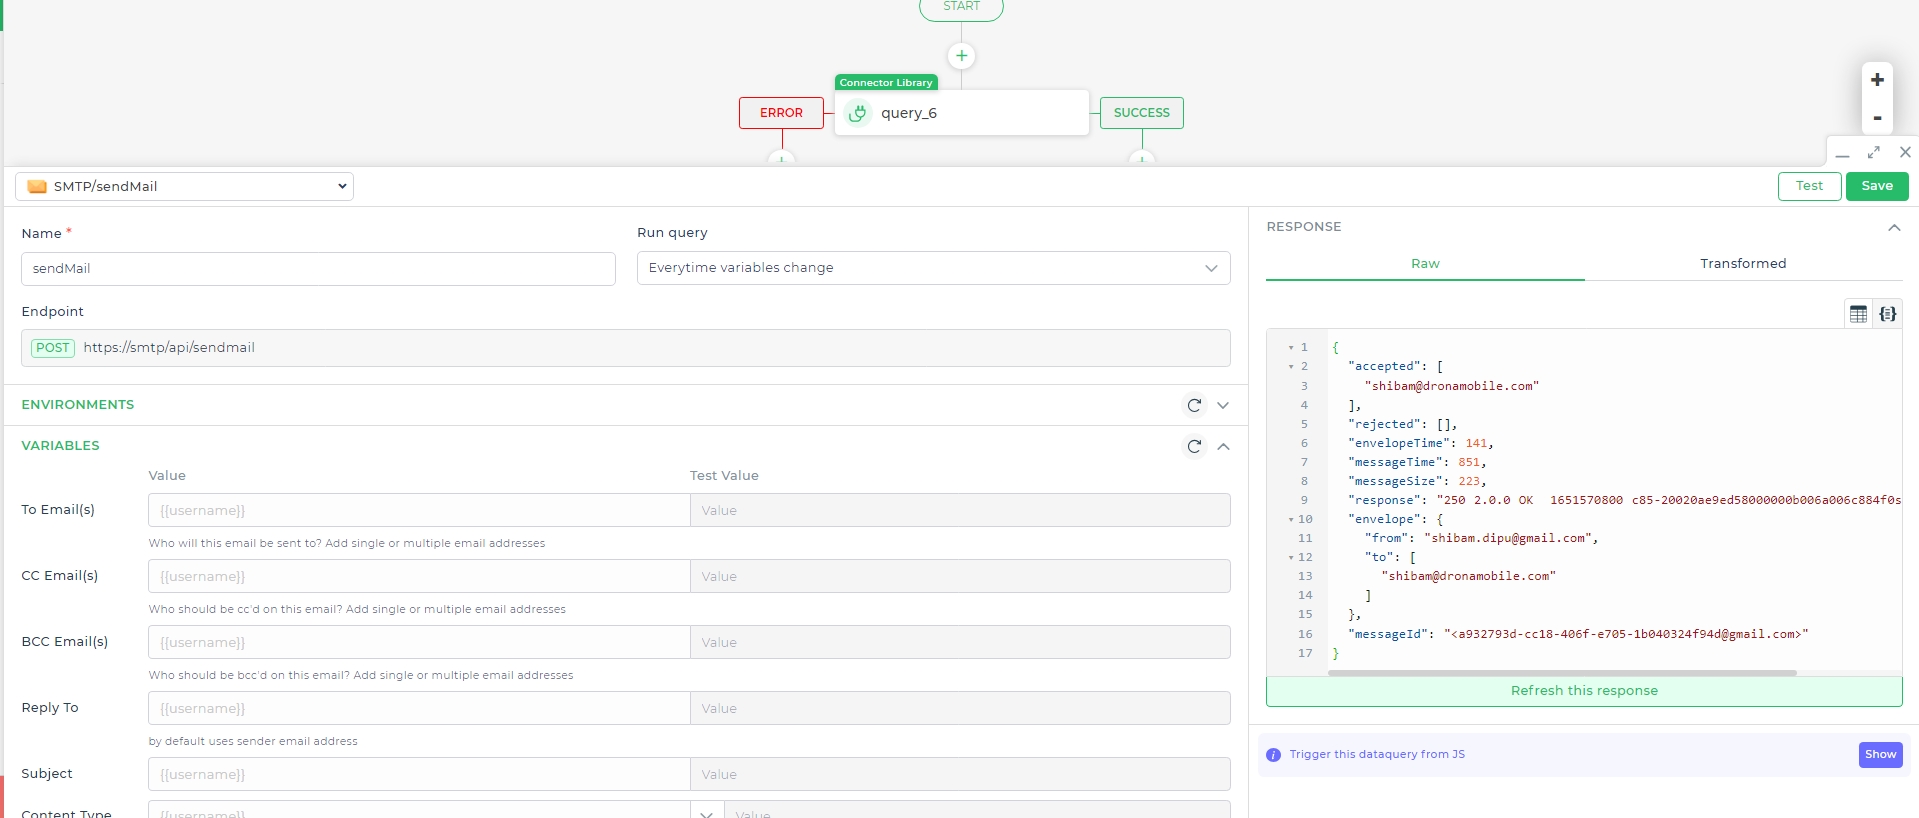
In the subsequent step, you'll encounter various predefined input fields, allowing you to define key details for your email transmission.
Sender and Receiver: Specify the email addresses of the sender and receiver. You can also include BCC (Blind Carbon Copy) and CC (Carbon Copy) emails as needed.
Reply To: Designate the email address where replies will be directed when the recipient responds to the email.
Subject: Provide a subject line for system-generated emails that are intended to be sent.
Content Type: Choose between two content types:
HTML: This option enables you to incorporate formatted text, URLs, images, and styling components into the email content using HTML tags.
Text: This option is suitable for plain text without any additional styling or formatting.
Message Body: Enter the body content for the email, including the main message you wish to convey.
Attachments: Include images or files to be sent alongside the email. You can add files using File Upload or Text Input controls and bind their keywords to the attachments' input section. Multiple URLs and files can also be added.
infoThe user can select keywords to fill up the input fields. These input fields can contain an array of strings and objects.
Finalize Configuration: Once you have defined all the required input fields, click
Continueto proceed.Complete Setup: After reviewing your configurations, click
Finishto complete the setup process.
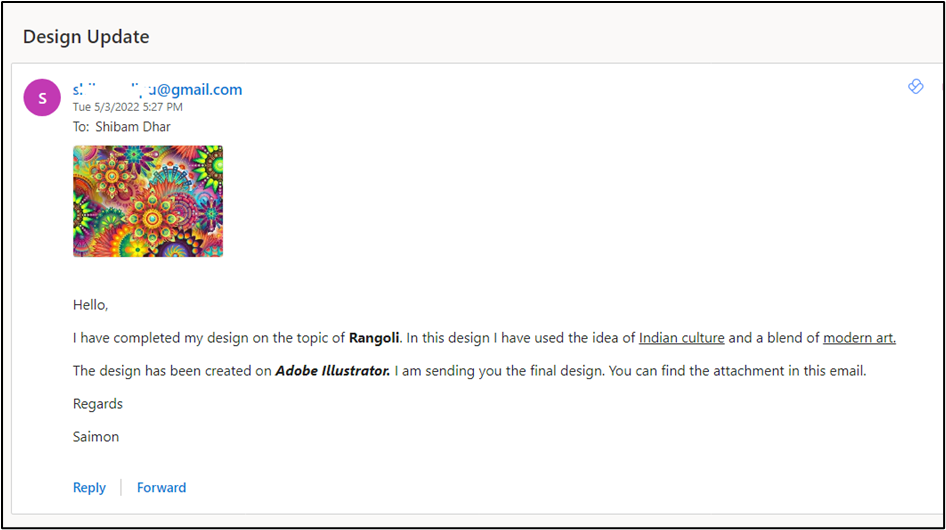
Email Sent and Received
With the SMTP connector now in action, your email has been successfully sent to the receiver's address, complete with the attached image. The email body showcases styled and formatted text, achieved by utilizing the HTML message type.