Slack
Integrate Slack and DronaHQ to achieve the flexibility to connect with your customer and teams members easily from your micro-app
Configuring API Connector in DronaHQ
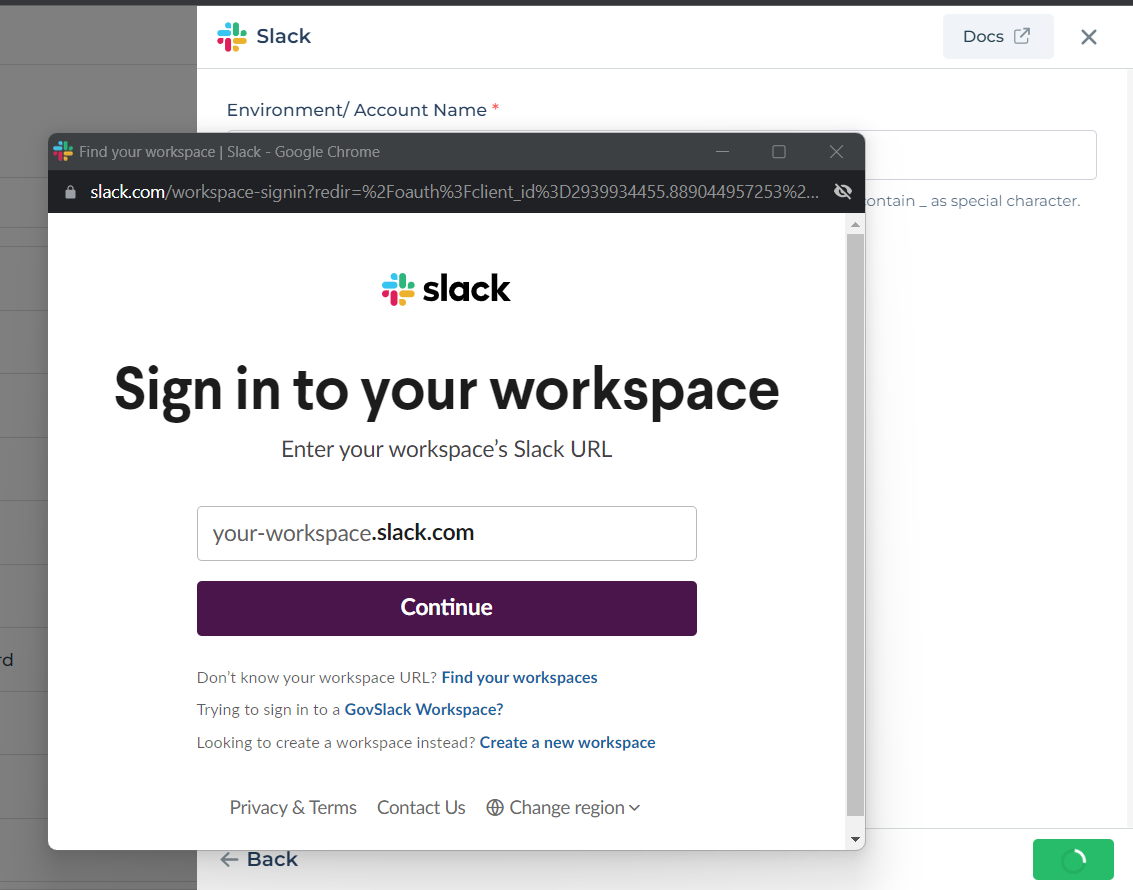
Add a Account name. Then click Save, it will open a pop-up window asking you to sign-in into your Slack account. Continue with the steps and give access to DronaHQ to connect with your Slack ID and its information.
After successfully configuring and saving the connector settings, you can easily access your newly connected account by navigating to the connected accounts list. You can find this option from the Connector -> Manage Account section. This centralized location allows you to conveniently monitor and manage your connected accounts.
Supported API endpoints
| Action | Description |
|---|---|
| GetChannelList | Retrieve a list of channels in your Slack workspace. |
| SendMessageToChannel | Send a message to a specific channel in your Slack workspace. |
| GetUserList | Retrieve a list of users in your Slack workspace. |
| SendMessage | Send a direct message to a specific user in your Slack workspace. |
| SendMessageWithBlocks | Send a message with interactive blocks to a specific user or channel in your Slack workspace. |
Using Slack Connector
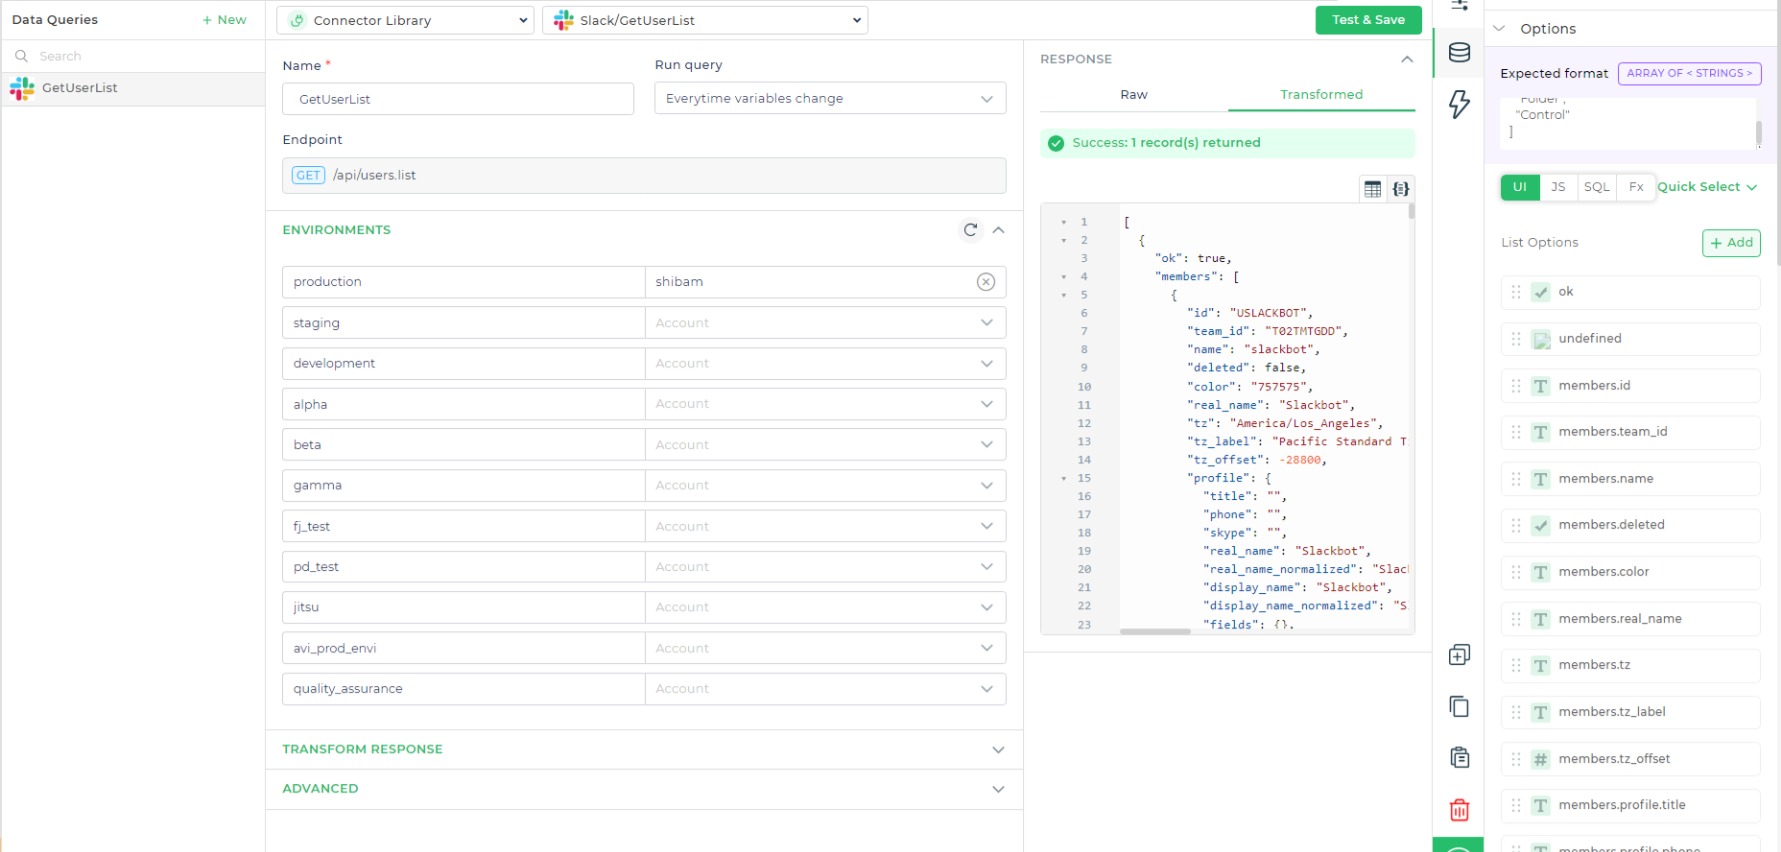
Get a list of users
Let us consider a very simple example to fetch a list of users of Slack.
Add a Table grid control and go to
Data Bind Options -> Quick Select -> Connector Library- Select
Slack -> GetUserListaction and clickContinue. - Select the Account to authenticate Slack.
- Select
Add the connector name. Now if you want to transform response or add transform keys you can make the necessary changes and updates here and click
Finish.
You can also use the GetChannelList action in a similar manner.
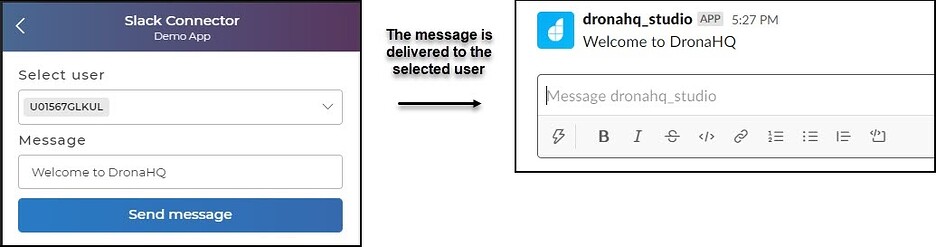
Sending a message
A very simple example to send a message to a specific user of Slack. Add a Text input control to your form to accept the message to send and a dropdown control to list out the Slack users. Also, add an Action button that would trigger the action to send the message. So now you need to use the Connector action from the Action flow.
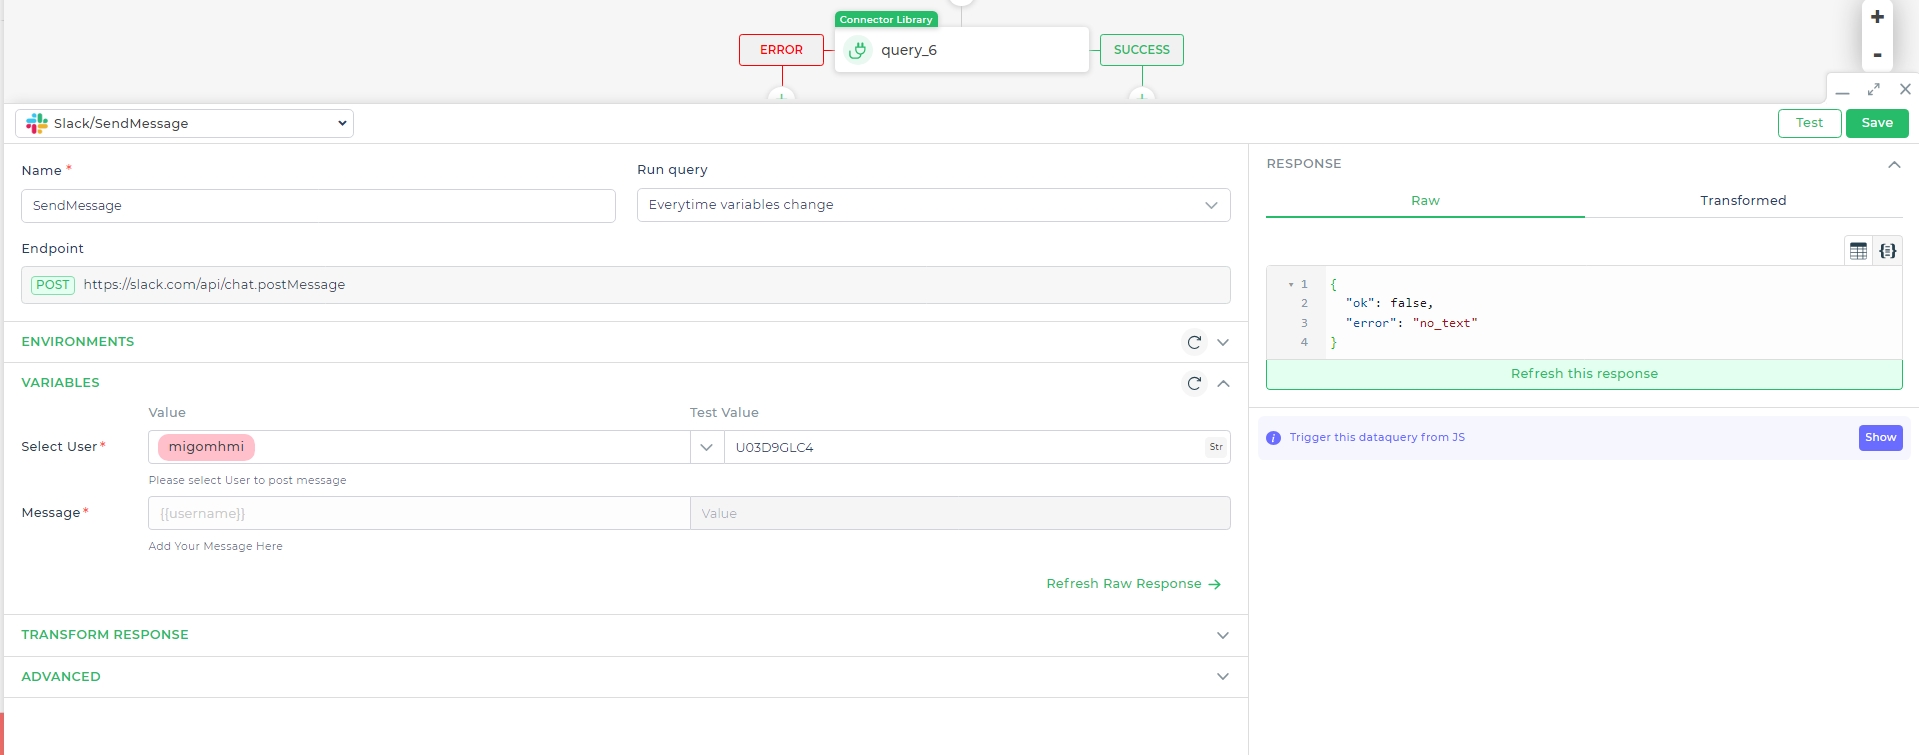
- Select the button and configure its action flow on
on_clicktrigger. - From the
Connector > Libraryselect the Slack Connector and click Continue.- From the list of actions select
SendMessageAction. - Select the Account to authenticate Slack.
- From the list of actions select
You need to configure the Connector fields. so, select the user from the list or you can also accept it from the form as input control. In this example, we will make use of the same action GetUserList to fetch the data for the dropdown. Here the dropdown will have to be two columns so that the Id is visible. We will fetch the id and the name as you need the ID as input for the SendMessage action.
Click the Action button to Send Message and the selected user would receive the message on Slack.