Amazon Redshift
Amazon Redshift: AWS's managed data warehouse for fast, scalable data analysis. Utilizing SQL and parallel processing, it efficiently stores and queries large datasets, making it a reliable choice for generating valuable insights and informed decisions.
Prerequisite
Authentication Requirements: To establish a connection with your Amazon Redshift instance, you will need specific authentication credentials. You have the option to use either of the following authentication methods:
- Amazon Redshift database username and password.
- IAM user credentials (AWS Identity and Access Management).
Connection Details:
- Endpoint (hostname) of your Amazon Redshift cluster.
- Port number for database communication (usually 5439).
- Database name within the Amazon Redshift cluster.
Network Configuration:
- Configure your network settings to allow access from DronaHQ's IP addresses to your Amazon Redshift cluster. This ensures secure and authorized communication.
By ensuring these prerequisites are met, you can seamlessly integrate Amazon Redshift with DronaHQ, enabling effective data management and utilization while maintaining the required security measures.
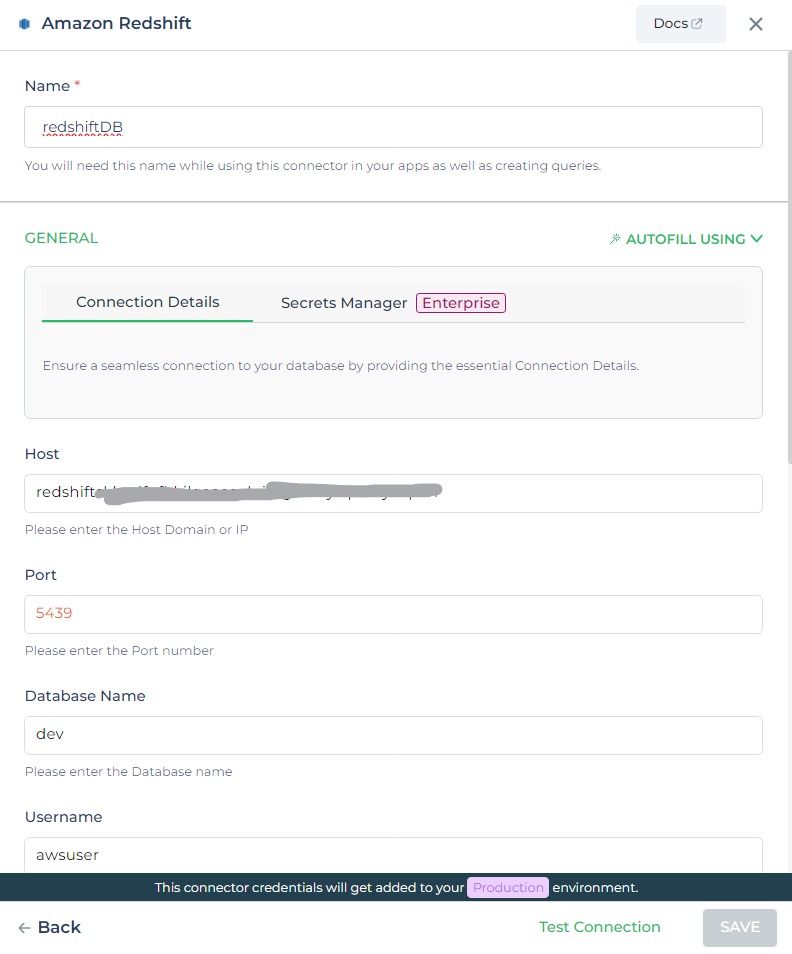
Configuring Connector in DronaHQ
Configure your database category using the provided details. Validate connection with Test connection and Save
settings for secure database setup.
General
| Field | Description |
|---|---|
| Host | Enter the Host Domain or IP |
| Port | Enter the Port number |
| Database Name | Enter the Database name |
| Username | Enter the Username |
| Password | Enter the Password |
Admin
| Advanced Option | Description |
|---|---|
| Connection Options | The key and value connection options in database configuration refer to specific settings (keys) and their corresponding values that dictate how the application connects to the database |
| Use Dynamic Database Host | Dynamically determine the host for the database connection. |
| Use Dynamic Database Name | Set the database name dynamically, allowing easy switching between databases. |
| Use Dynamic Database Credentials | Enable dynamic database credentials for secure and convenient management. |
| Whitelist IP | Enhance security by restricting database access to specific whitelisted IP addresses. |
Adding Database Queries
After configuring the connector, access it in your Connector Library.
Click Add query once the connection is established. Create queries, run them, and view responses.
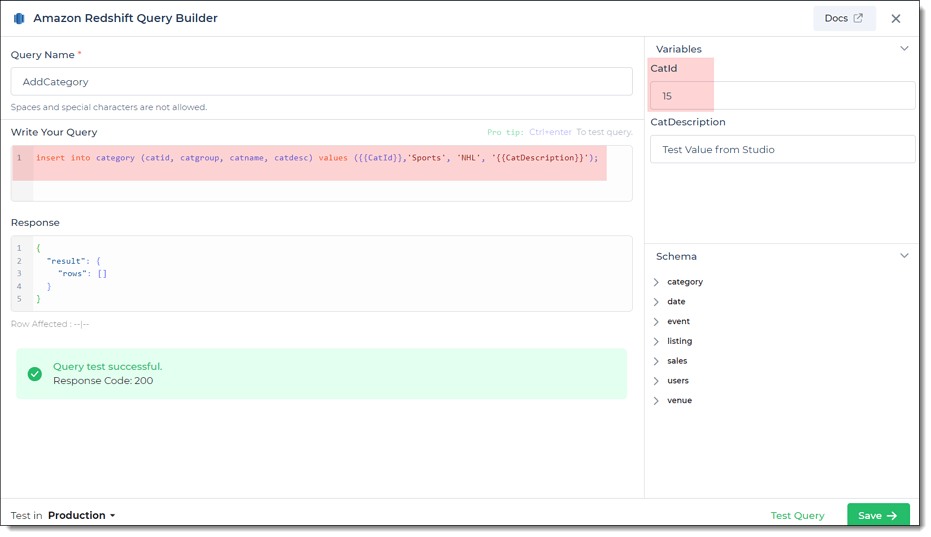
Use double curly brackets for dynamic variables. Test with sample values before saving. Link dynamic variables to controls/actions for runtime use.
Saved queries appear under your connector in Connector Library.
Supported Query Operations
| Operations | Description |
|---|---|
| Raw SQL Query | Execute various SQL operations directly, e.g., SELECT * FROM TableName; |
| Stored Procedure Call | Call stored procedures, e.g., EXEC usp_GetInfo; to perform specific tasks or retrieve data from the database. |
Using Amazon Redshift Connector
Data Bind using Data Query
Read/Display Data Query for Amazon Redshift:
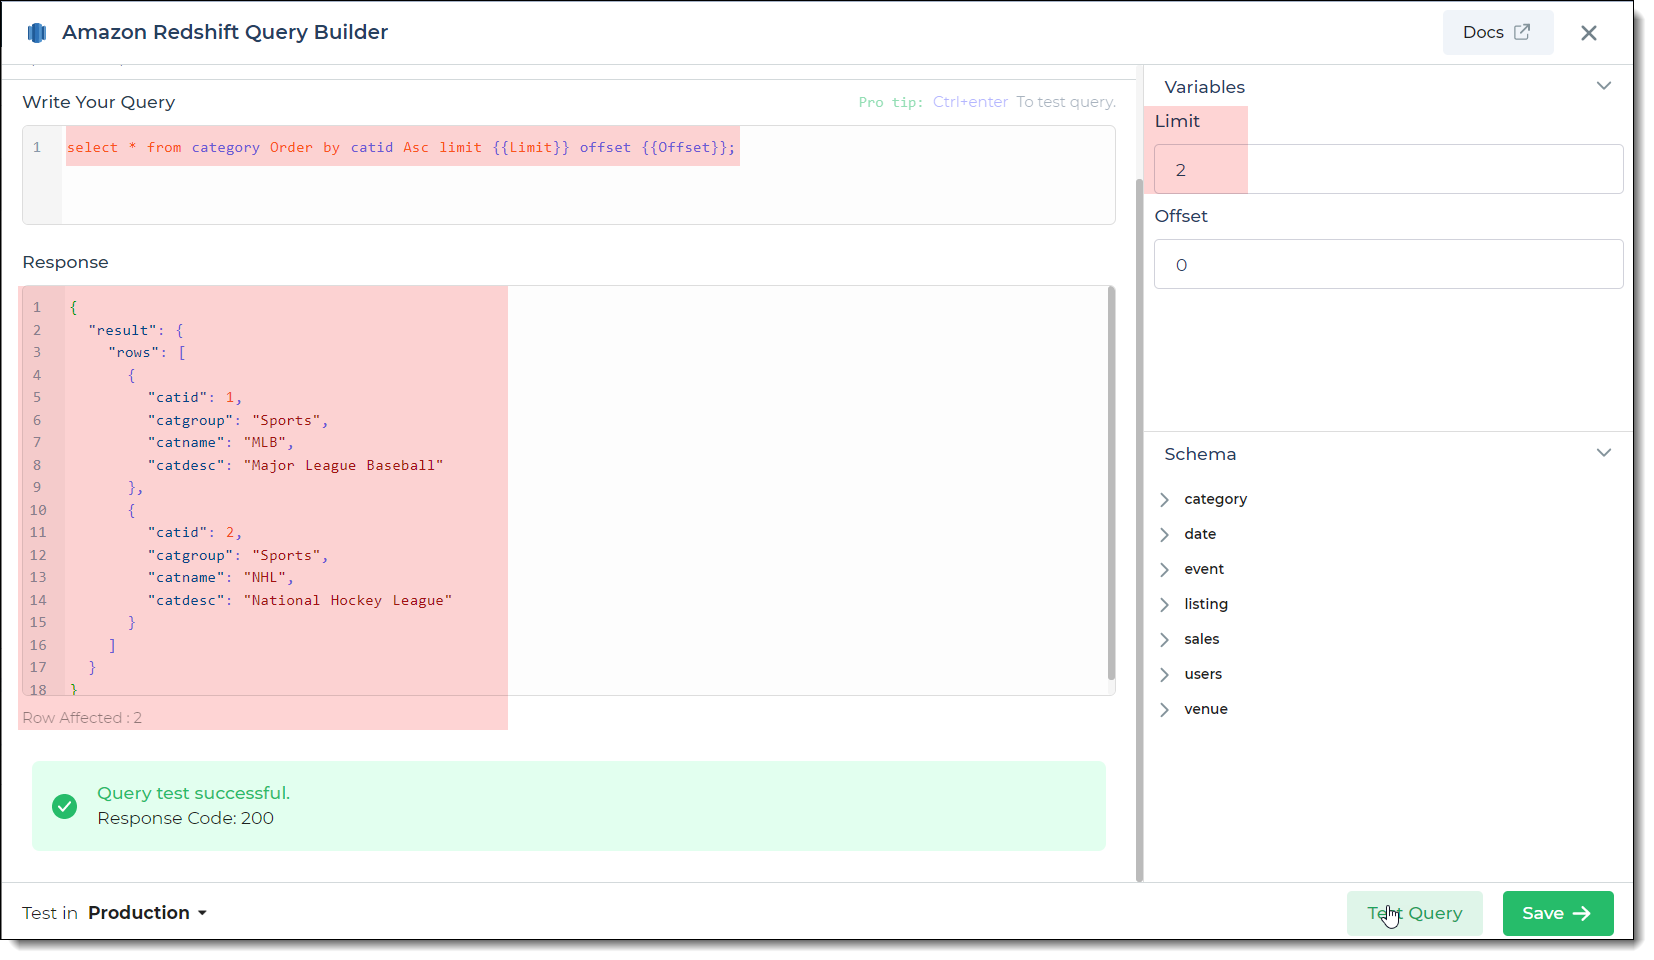
Start by crafting an SQL query to extract data from your Amazon Redshift database. Consider a scenario where you want to
retrieve data from the category table, ordering it by catid in ascending order, and applying pagination. The SQL
query is:
Query used:
SELECT * FROM category ORDER BY catid ASC LIMIT {{limit}} OFFSET {{Offset}};
Query explanation:
This SQL query retrieves all rows and columns from the category table. It orders the results by catid in ascending
order. The pagination is achieved using the LIMIT and OFFSET clauses, with dynamic variables {{limit}} and
{{Offset}}.
Integrate the fetched data into your application's interface.
a. Access the Controls section and introduce the Table grid control.
b. Navigate to Data Bind Options -> Quick Select -> Connector Library.
c. Opt for the Amazon Redshift connector and choose the query that aligns with your data presentation goals.
By following these steps, you can seamlessly retrieve and display data from the category table using the Amazon
Redshift Connector. The data is ordered and paginated based on your specified criteria, enhancing your application's
functionality and user experience.
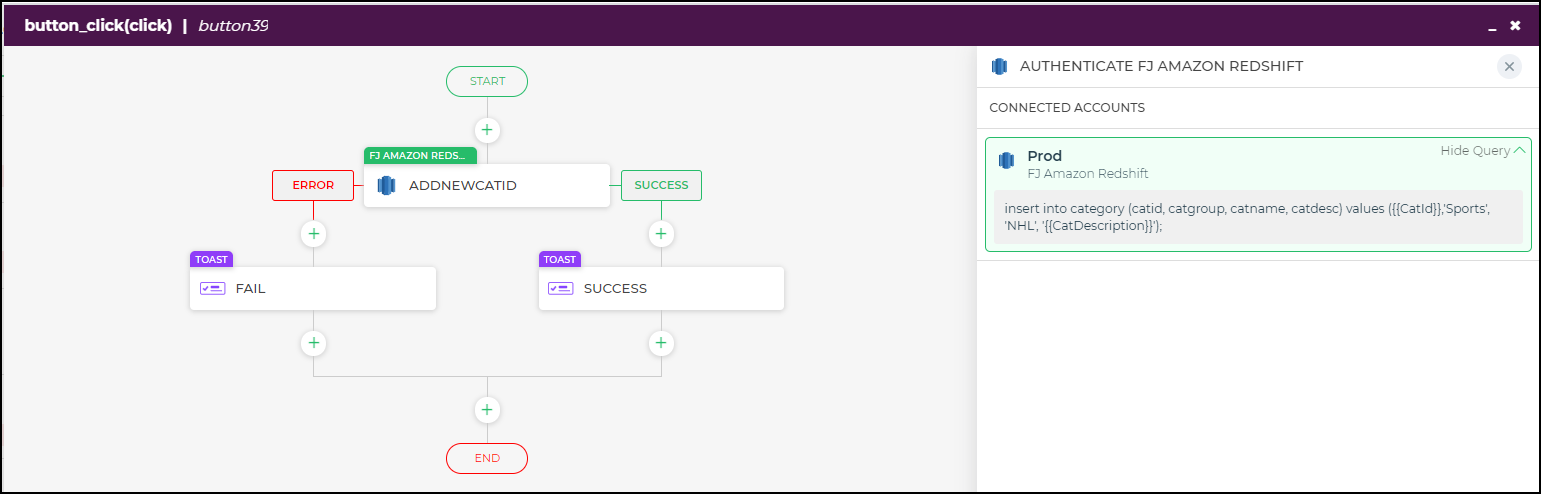
Using in Actionflow Blocks
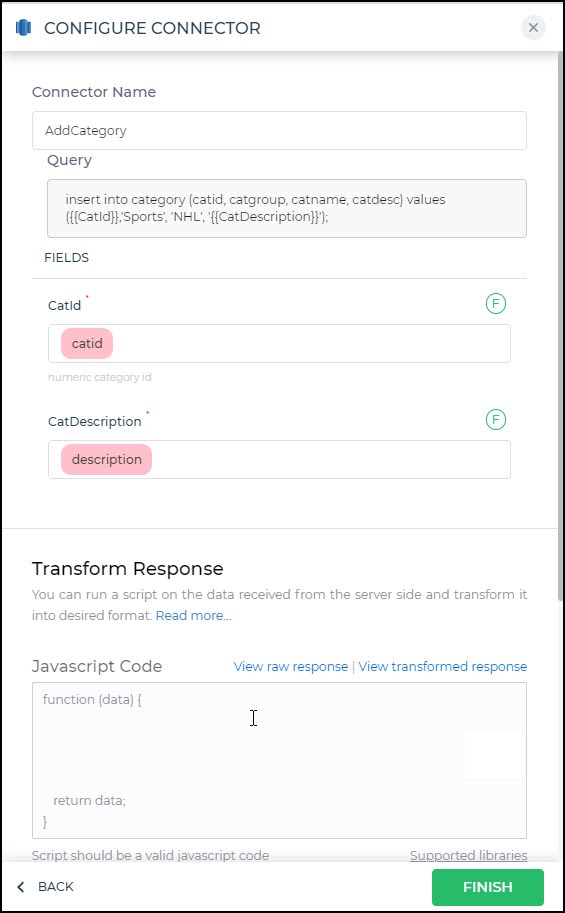
Insert Data Query:
To add a new category to your Amazon Redshift database, follow these steps:
Query used:
INSERT INTO category (catid, catgroup, catname, catdesc)
VALUES ({{catid}}, 'Sports', 'NHL', '{{CatDescription}}');
Query explanation:
This query performs an insert action on the category table, using dynamic values for the catid and CatDescription
fields.
After saving your query after successful configuration testing.
In your application's user interface, create an action-triggering element, such as a button.
Build the action flow:
- Capture necessary data from user inputs (e.g.,
catidandCatDescription). - Initiate a server-side action that includes the insert data query from your Amazon Redshift connector.
- Capture necessary data from user inputs (e.g.,
Configure controls:
- Link the form controls capturing user input to the corresponding variables in the Insert query.
Upon button click, execute the action flow.
The query will add a new record to the
categorytable using the provided dynamic values.