InfluxDB
InfluxDB is a high-performance Time Series Database that can store data ranging from hundreds of thousands of points per second. The InfluxDB is a SQL-kind of query language which was built specifically for time series data.
Prerequisite
Authentication Credentials: To establish a connection with your InfluxDB instance, you will need the necessary authentication credentials:
- InfluxDB username and password (if applicable).
Connection Details:
- Obtain the hostname or IP address of your InfluxDB server.
- Identify the port number used by InfluxDB for communication (usually 8086).
Database Configuration:
- If you are connecting to a specific database within your InfluxDB instance, ensure you have the database name.
Security and Network Configuration:
- Configure any required security features, such as SSL/TLS, to ensure secure communication.
- Adjust your firewall settings to permit communication between your application and the InfluxDB server.
Configuring Connector in DronaHQ
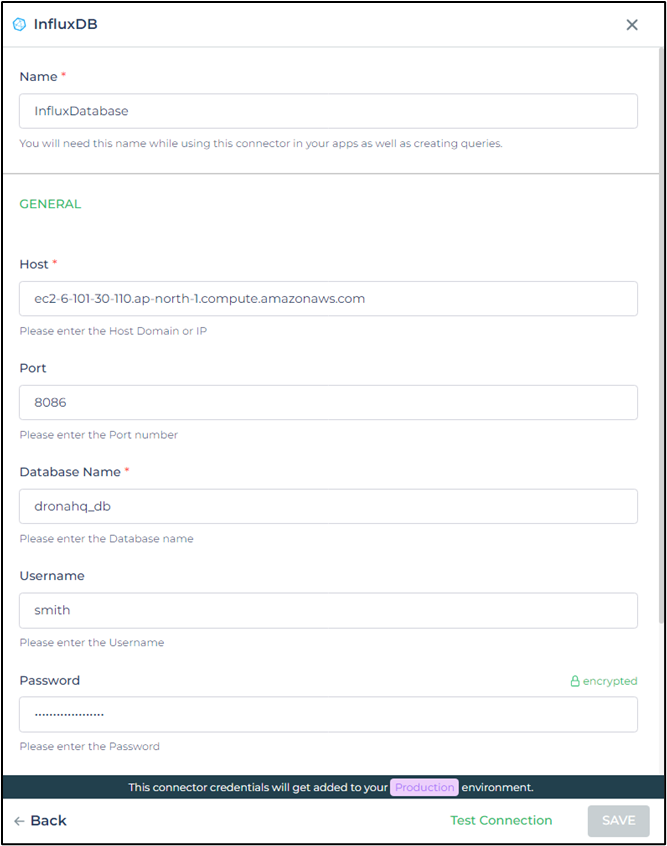
Configure your database category using the provided details. Validate connection with Test connection and Save
settings for secure database setup.
General
| Field | Description |
|---|---|
| Host | Enter the Host Domain or IP |
| Port | Enter the Port number |
| Username | Enter the Username |
| Password | Enter the Password |
| Database Name | Enter the Database name |
Admin
| Advanced Option | Description |
|---|---|
| Connection Options | The key and value connection options in database configuration refer to specific settings (keys) and their corresponding values that dictate how the application connects to the database |
| Whitelist IP | Enhance security by restricting database access to specific whitelisted IP addresses. |
Adding Queries
Once you have successfully configured the InfluxDB connector, follow these steps to add queries and interact with your data:
Accessing the Connector: After configuring the connector, you'll find it listed under the Custom Database connectors section.
Adding a Query: Click the "Add query" option next to your established connection to begin creating queries.
Query Details: Provide the necessary details for your query:
- Query Name: Assign a descriptive name to your query for easy reference.
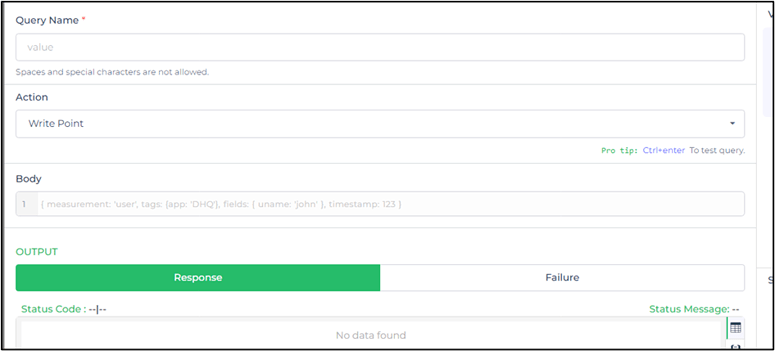
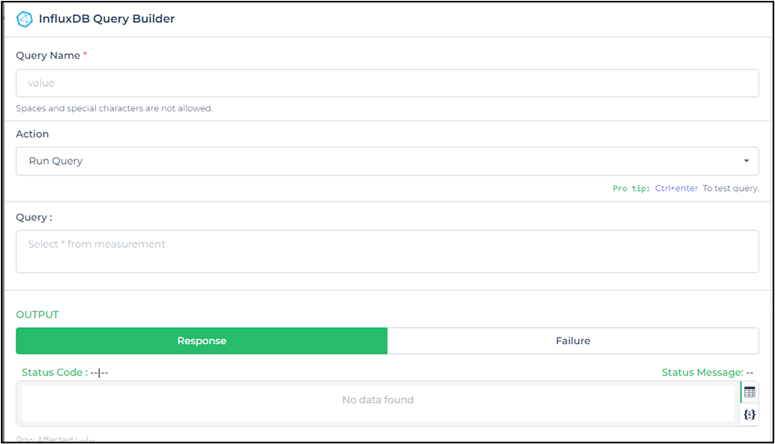
- Action: Choose from the available actions, which are "Write Point" or "Run Query."
Write Point Action: If you choose "Write Point," you're enabling writing data to the database. Utilize the JSON editor to define the content you want to insert into InfluxDB.
- Run Query Action: Opting for "Run Query" means you'll retrieve data from the database. Use the query field (text area) to craft your query, including aggregate functions, transpositions, retention policies, and continuous queries.
Dynamic Variables: Incorporate dynamic variables into your query by enclosing them in double curly brackets. Test your query with sample values to ensure its functionality. When using connector queries, link dynamic variables to respective controls for runtime flexibility.
Saving Queries: Save your configured queries, which will be accessible for future use within your specific connector under Custom Database connectors.
Using InfluxDB Connector
Writing Data
To write data points to InfluxDB using the InfluxDB Connector's "Write Point" action, follow these steps:
Access Data Management Section or Control Action:
- Navigate to the data management section or control action where you want to write data points to InfluxDB.
Select InfluxDB Connector from
Data Bind Options -> Quick Select -> Data Queries:- Choose InfluxDB Connector from the available options.
- Select the
Write Pointaction to write data points to InfluxDB. - Click on
Continueto proceed.
Configure Body :
- In the Body section, provide the JSON code for the data point you want to write. This JSON code should follow the InfluxDB line protocol format.
[
  {
    "measurement": "{{table}}",
    "tags": {
      "host": "studio.dronahq.com",
      "app": "DHQ",
      "Instance": "Node1",
      "username": "pawan"
    },
    "fields": {
      "uname": "pawan"
    },
    "timestamp": 1609746029444
  }
]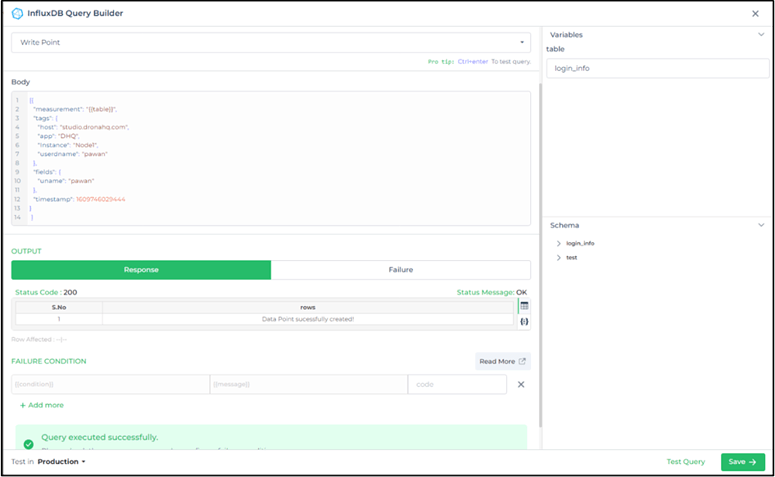
Write action Replace the values in the JSON code with your specific data. You can use dynamic values within double curly brackets (
{{}}) to inject variables.Integrate with Controls and Actions:
- Integrate this query into your application by adding controls like input fields or dropdowns to capture dynamic values.
- Create an action flow that triggers the InfluxDB Connector action to write data points.
- Configure the connector to use the values from the controls within the Body JSON.
Running a Query to Fetch Data
To execute a query and fetch data from InfluxDB using the InfluxDB Connector, follow these steps:
Select InfluxDB Connector from
Data Management Options -> Quick Select -> Data Queries:- Choose InfluxDB Connector from the available options.
- Select the
Run Queryaction to execute a query and fetch data from InfluxDB. - Click on
Continueto proceed.
Configure Query Parameters:
In the Query Parameters section, provide the query you want to execute to fetch data. For example:
SELECT COUNT(*) FROM login_info WHERE time >= '2021-01-04T00:00:00Z' AND time <= '2021-02-03T00:00:00Z' GROUP BY time(1d)
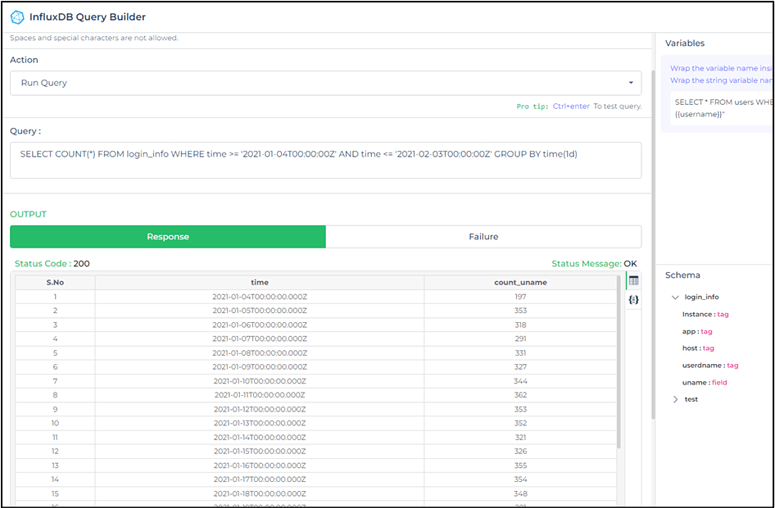
InfluxDB Run Query Action Integrate with Controls and Actions:
- Integrate this query into your application by adding controls like input fields or dropdowns to capture dynamic values for the query.
- Create an action flow that triggers the InfluxDB Connector action to run the query and fetch data.
- Configure the connector to use the values from the controls within the query.