AWS S3
Amazon S3 (Simple Storage Service) is a service from Amazon Web Services offering object storage through a web service interface. Amazon S3 can be used to store and retrieve any amount of data from anywhere.
Prerequisite
Before configuring the AWS S3 Connector to interact with your Amazon S3 storage resources, ensure you have the following:
Amazon Web Services (AWS) Account: Have an active AWS account and access to the AWS Management Console.
Access and Secret Access Keys: Obtain your AWS Access Key ID and Secret Access Key from the AWS IAM (Identity and Access Management) service. These credentials will be used to authenticate the connector with your AWS account.
Bucket and Object Information: Identify the specific Amazon S3 bucket(s) and object(s) you intend to work with using the connector. Gather the bucket names and object paths you plan to use during configuration.
Region: Be aware of the AWS region where your Amazon S3 resources are located. Different regions might have distinct endpoint URLs.
IAM Role and Permissions: If generating IAM (Identity and Access Management) role keys, ensure that the IAM role associated with the AWS account has necessary permissions to access Amazon S3 resources. Permission can be granted through the AWS IAM console by creating a new group or modifying an existing group's permissions.
EC2 Instance Access (Optional): For EC2 instances, you can provide the IAM role access to the instance, allowing it to interact with S3 buckets without requiring explicit access keys. This can be accomplished by using EC2 Instance Profile and selecting "Use EC2 IAM Access Role" during configuration.
S3 URLs and Custom Endpoints (Optional): If needed, be aware that you have the option to provide S3 URLs to enable path-style access or use custom endpoint base URLs. This is particularly useful for connecting to S3-compatible services like DigitalOcean Spaces or Wasabi.
Configuring API Connector in DronaHQ
Enter an identifiable
Account name.Provide your
Access KeyandSecret Keyfrom your AWS IAM account. Alternatively, you can choose to enableUse EC2 IAM Access Roleif you want to grant an EC2 instance permission to access S3 resources without explicit credentials.Specify the appropriate
AWS regionwhere your S3 resources are located.If needed, you can include
S3 URLsfor path style and custom endpoint base URLs, which is useful for connecting to S3-compatible services like Digital Ocean Spaces or Wasabi.After entering all the required information, click
Saveto complete the connector configuration.
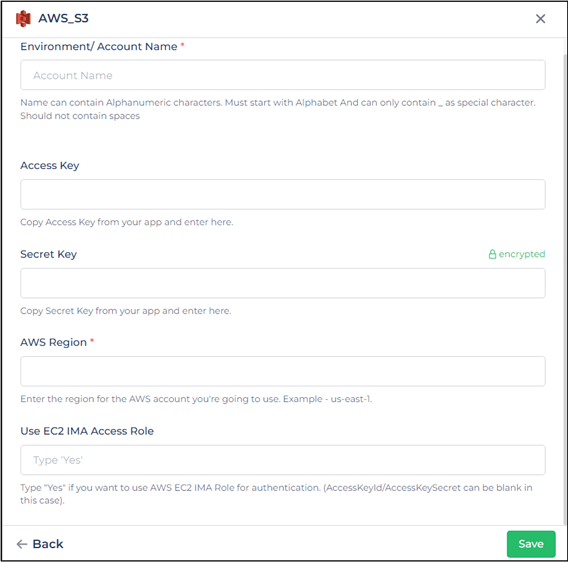
After successfully configuring and saving the connector settings, you can easily access your newly connected account by navigating to the connected accounts list. You can find this option from the Connector -> Manage Account section. This centralized location allows you to conveniently monitor and manage your connected accounts.
Supported API endpoints
| Action | Description |
|---|---|
| ReadFile | Read the contents of a file stored in a specific S3 bucket. |
| GetPreSignedUrl | Generate a pre-signed URL for a specified S3 object, providing temporary access to the object. |
| UploadFile | Upload a file to a specific S3 bucket, allowing you to store files within your S3 storage. |
| ListBuckets | Retrieve a list of all S3 buckets associated with your AWS account. |
| ListObjects | List objects (files) within a specified S3 bucket, along with their details. |
| DeleteObjects | Delete multiple objects from an S3 bucket using their keys. |
| CopyObject | Copy an object from one S3 bucket or location to another, retaining metadata and access permissions. |
| ReadFile | Read contents from specified file from s3 bucket using their key. For binary file it returns base64 value. |
| DownloadFile (Deprecated) | Downloads the specified file from s3 bucket using their key to your local system. This works in actionflow only by keeping Download as File toggle on. For Alternative check note below |
Using AWS S3 connector
List Objects in a Bucket
Add a
Tablegridcontrol and then Bind Data. after adding a connector, select the action asListObjectsfrom theConnector Library. Select the Configured account.Provide the Bucket name and other details from where you would list out the objects.
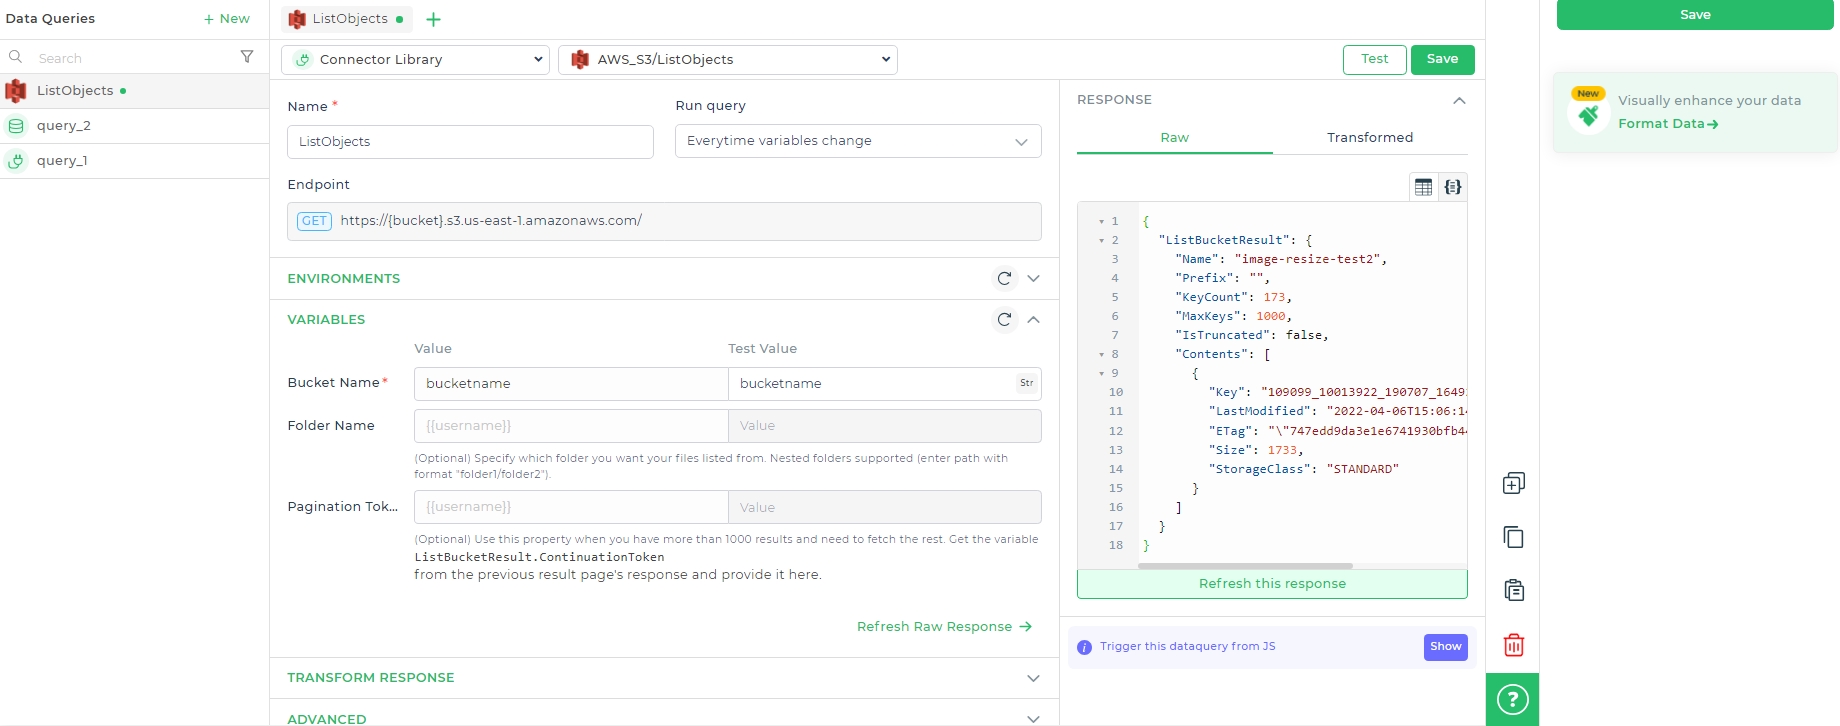
Test the connection and click
Finish.Select the Keys to get the data from the connector.
Uploading files to the bucket
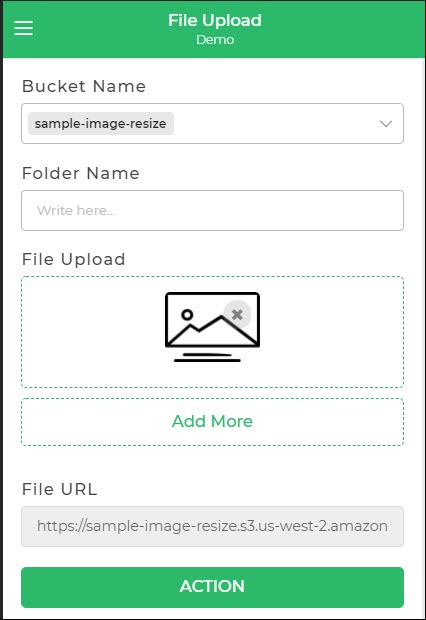
Let us assume that we have a form where we select the Bucket name, the folder name to upload the files to, and the File upload control to enable uploading of the file/s. Let us add an action button that triggers the action flow to upload files.
On the
button_clickevent of the action button, add theConnector > Library > AWS S3 connectorand choose the actionUploadFile.Select the Connected account and click Continue.
Provide Bucket name, add the folder name (which is optional), and provide the Files using the
Fileuploadcontrol’s name from the Use keywords. ClickContinue.
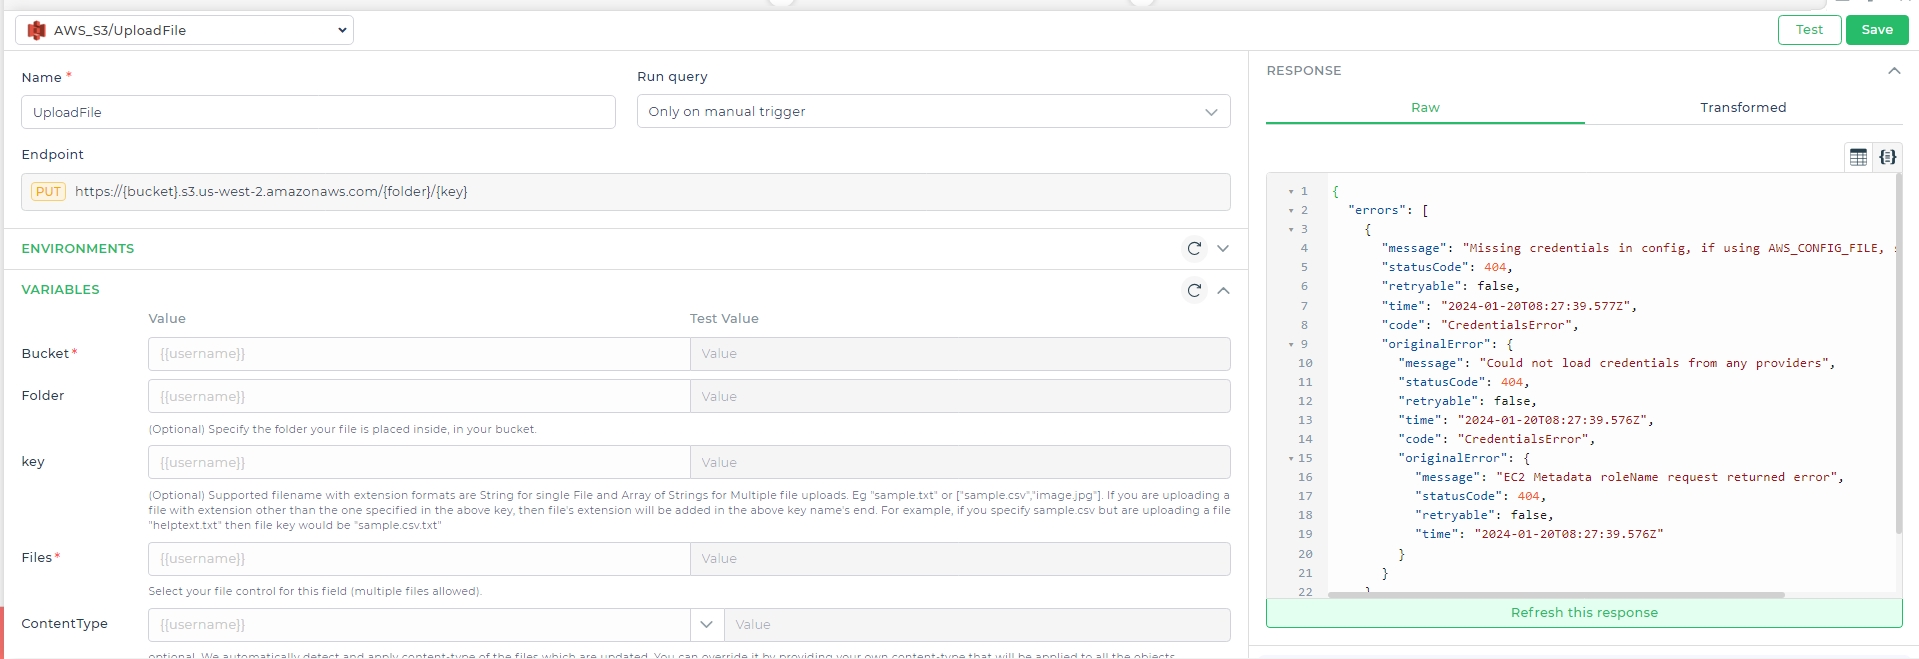
- Add the action name and provide the variable that returns the URL
Downloading file from the bucket (Deprecated)
Since, DownloadFile is deprecated, you can use GetPresignedURL Api to get the Url Link for your File from S3 bucket. And, provide this URL to Download Files Action available under Utility in ActionFlow. Also, in your S3 bucket policy, you will have to provide CORS permission to be able to download file from your Browser. Below is sample CORS configuration for your bucket -
[
    {
        "AllowedHeaders": [],
        "AllowedMethods": [
            "GET"
        ],
        "AllowedOrigins": [
            "*"
        ],
        "ExposeHeaders": []
    }
]
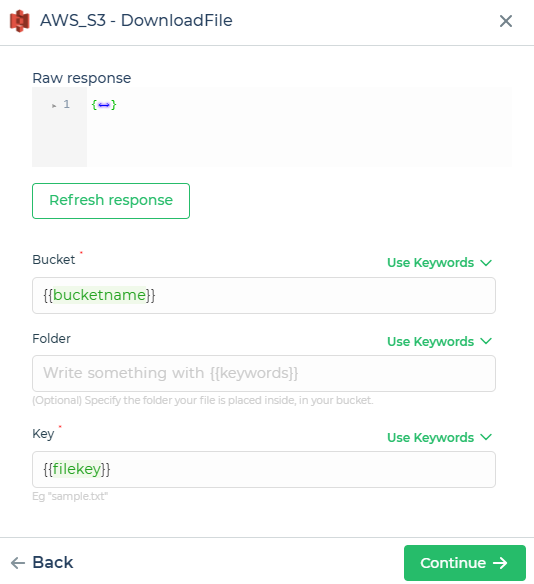
Let us assume that we have a form where we specify the Bucket name, file key. Let us add an action button that triggers the action flow to download file.
On the
button_clickevent of the action button, add theServer-side action > AWS S3 connectorand choose the actionDownloadFile.Select the Connected account and click Continue.
Provide Bucket name, add the folder name (which is optional), and file key. Click
Continue.
Self-Hosted Installation
To use the AWS S3 Connector on the on-prem version, follow these steps:
Select the Connector: Choose the AWS S3 Connector from the list.
Provide the Necessary Details: Enter the required information, including the Environment/Account Name (alphanumeric, must start with an alphabet, and can include
_but no spaces), Access Key, Secret Key, AWS Region (e.g.,us-east-1), and additional optional settings.
Fields
Environment/Account Name: The name can contain alphanumeric characters, must start with an alphabet, and can include
_but no spaces.Access Key: Copy the Access Key from your AWS account and enter it here.
Secret Key: Copy the Secret Key from your AWS account and enter it here.
AWS Region: Enter the region for the AWS account you're going to use (e.g.,
us-east-1).Use EC2 IAM Access Role: Type "Yes" if you want to use an AWS EC2 IAM Role for authentication. If this option is selected, the Access Key and Secret Key fields can be left blank.
Role to Assume (ARN): Enter the role to be used while accessing the API.
Force S3 URLs to Use Path Style: Type "yes" if you want to force S3 URLs to use the path style.
API Base URL: Ensure the URL is a valid domain name followed by the http/https protocol.