Azure Storage
Azure Storage is Microsoft's cloud storage solution offering a variety of services for storing different types of data, including blobs, files, queues, and tables. It provides a secure, scalable, and durable platform for building cloud-native and hybrid applications.
Prerequisite
- Authentication Requirements: Before establishing a connection with Azure Storage, ensure you have the necessary authentication credentials, including:
- Environment/Account Name
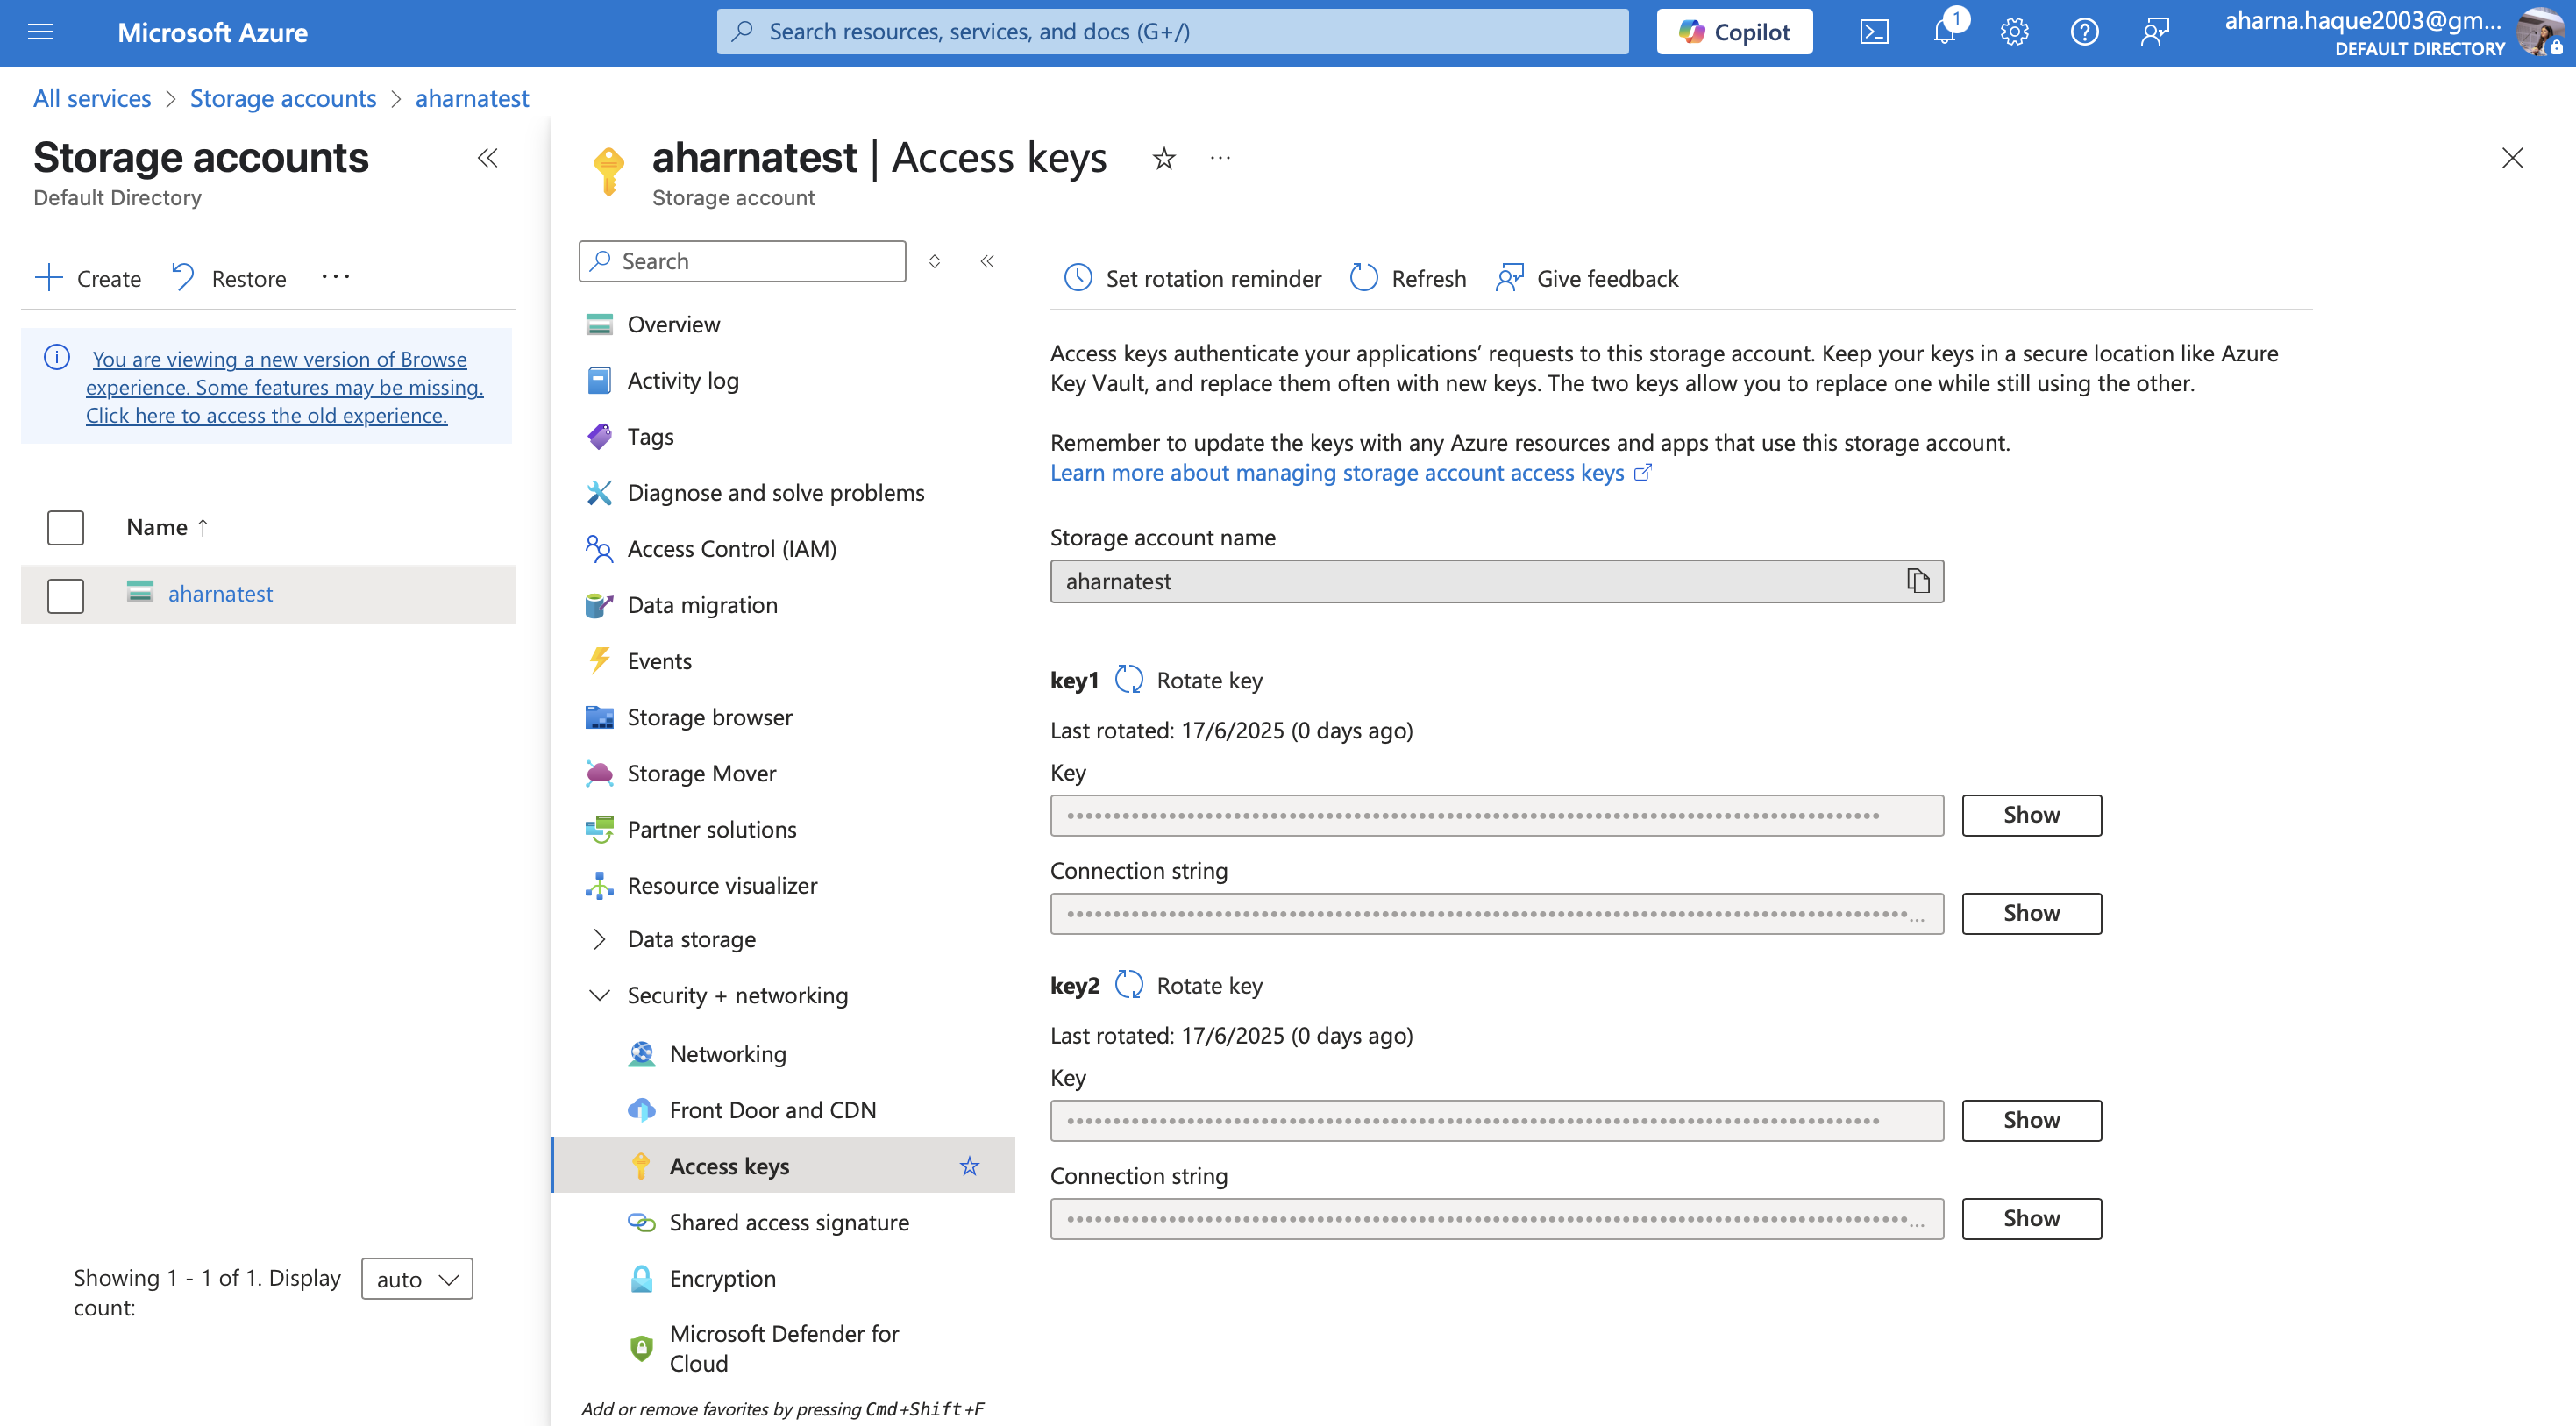
- Access Key: To obtain an access key for your Azure Storage account, navigate to your storage account in the Azure portal. Under the Security + networking section, select Access keys. Click Show keys to reveal the keys, then copy either key1 or key2 as needed.
Azure Storage Account
Configuring API Connector in DronaHQ
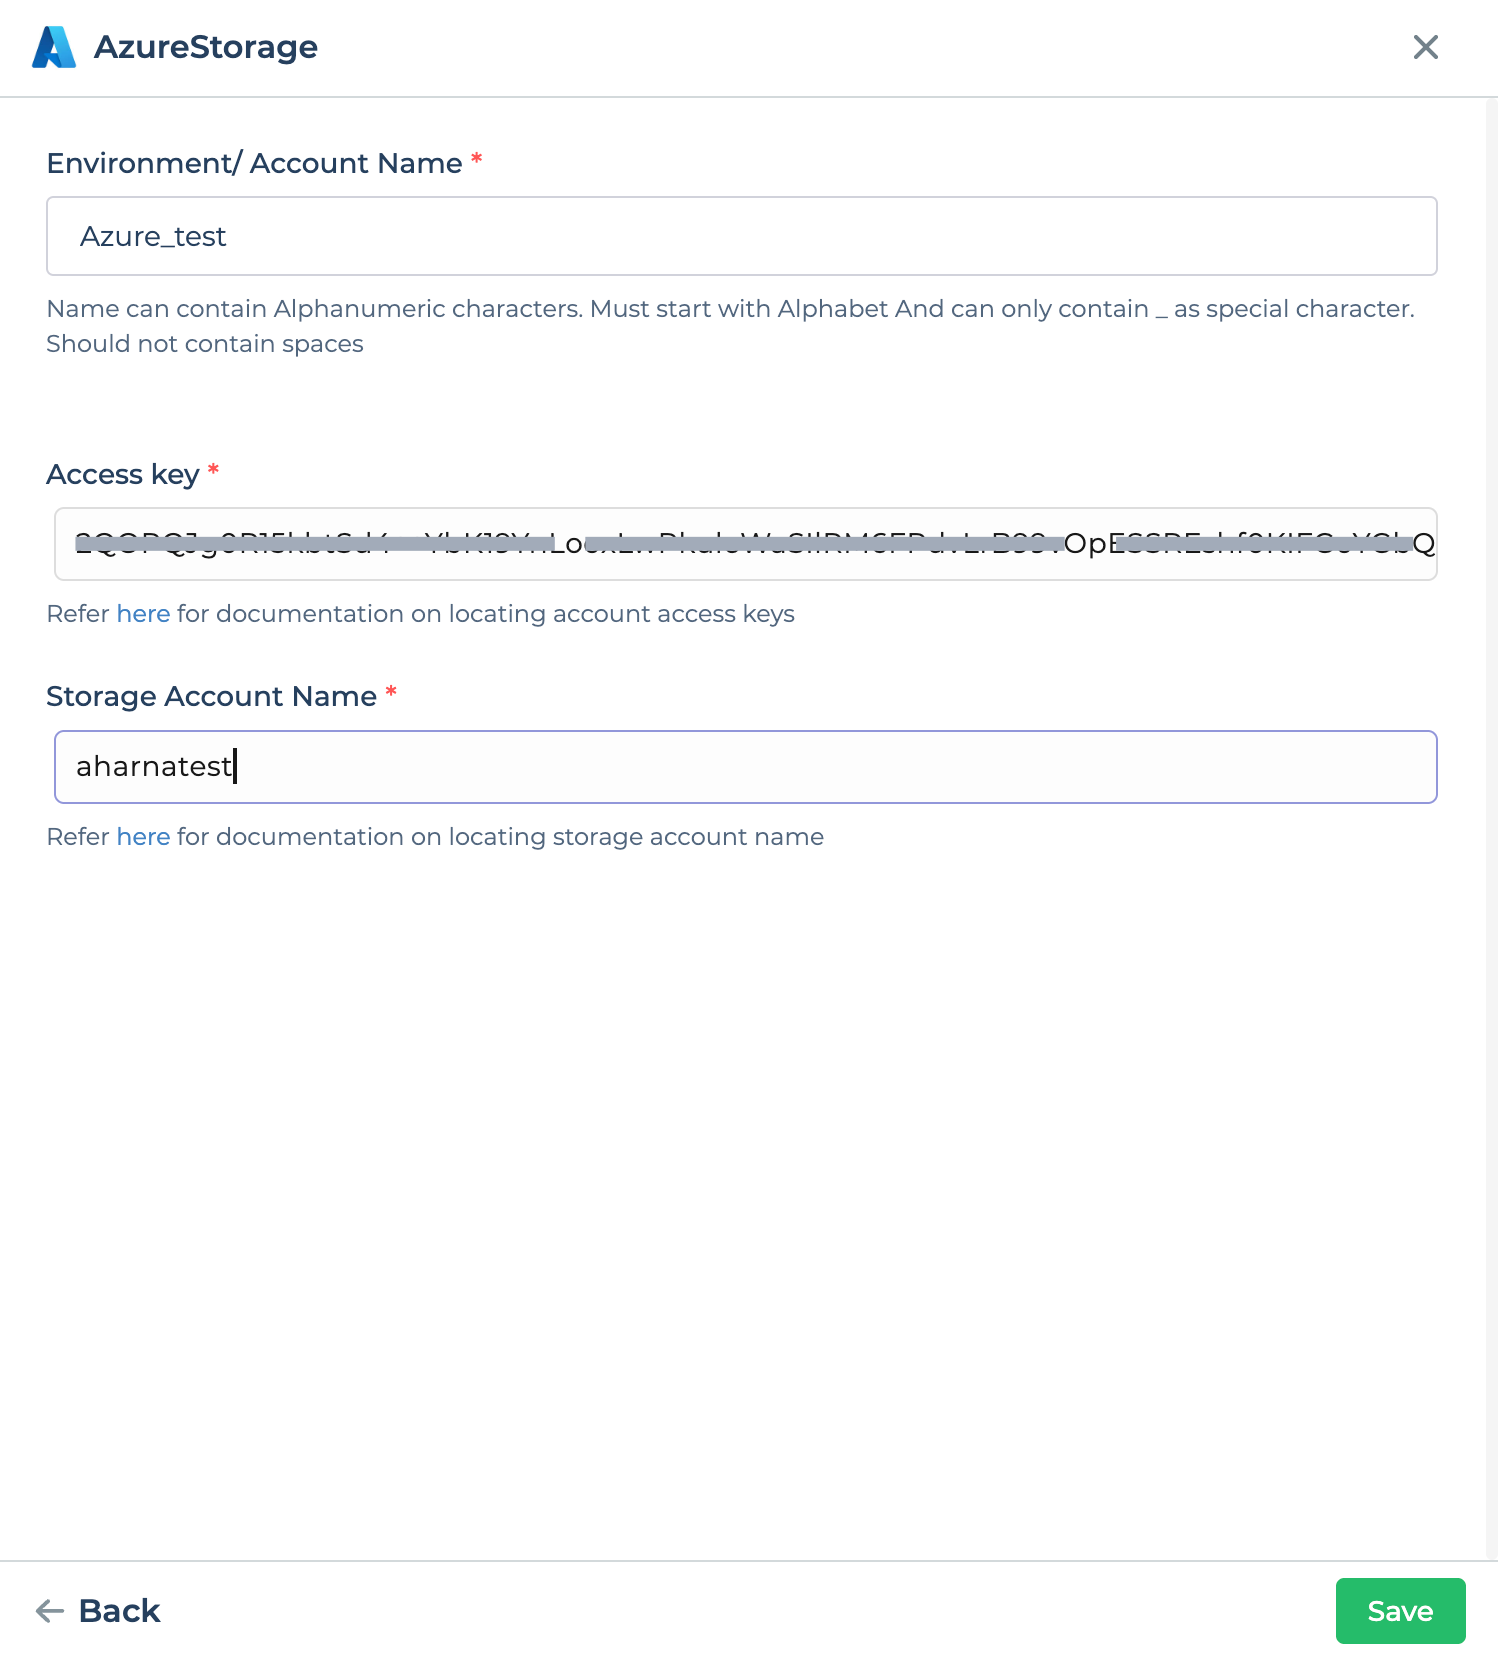
Add a Environment/Account name. Then add the Access Key and Storage Account Name for the connector account. Once all details are added, click Save. Your connector configuration is now done.
After successfully configuring and saving the connector settings, you can easily access your newly connected account by navigating to the connected accounts list. You can find this option from the Connector -> Manage Account section. This centralized location allows you to conveniently monitor and manage your connected accounts.
Using Azure Storage Connector
Retrieve Files
Utilizing the Azure Storage connector, you can easily interact with your storage resources. To retrieve information about files, follow these steps:
Include the necessary controls in your application interface, such as buttons or input fields, to trigger actions related to Azure Storage.
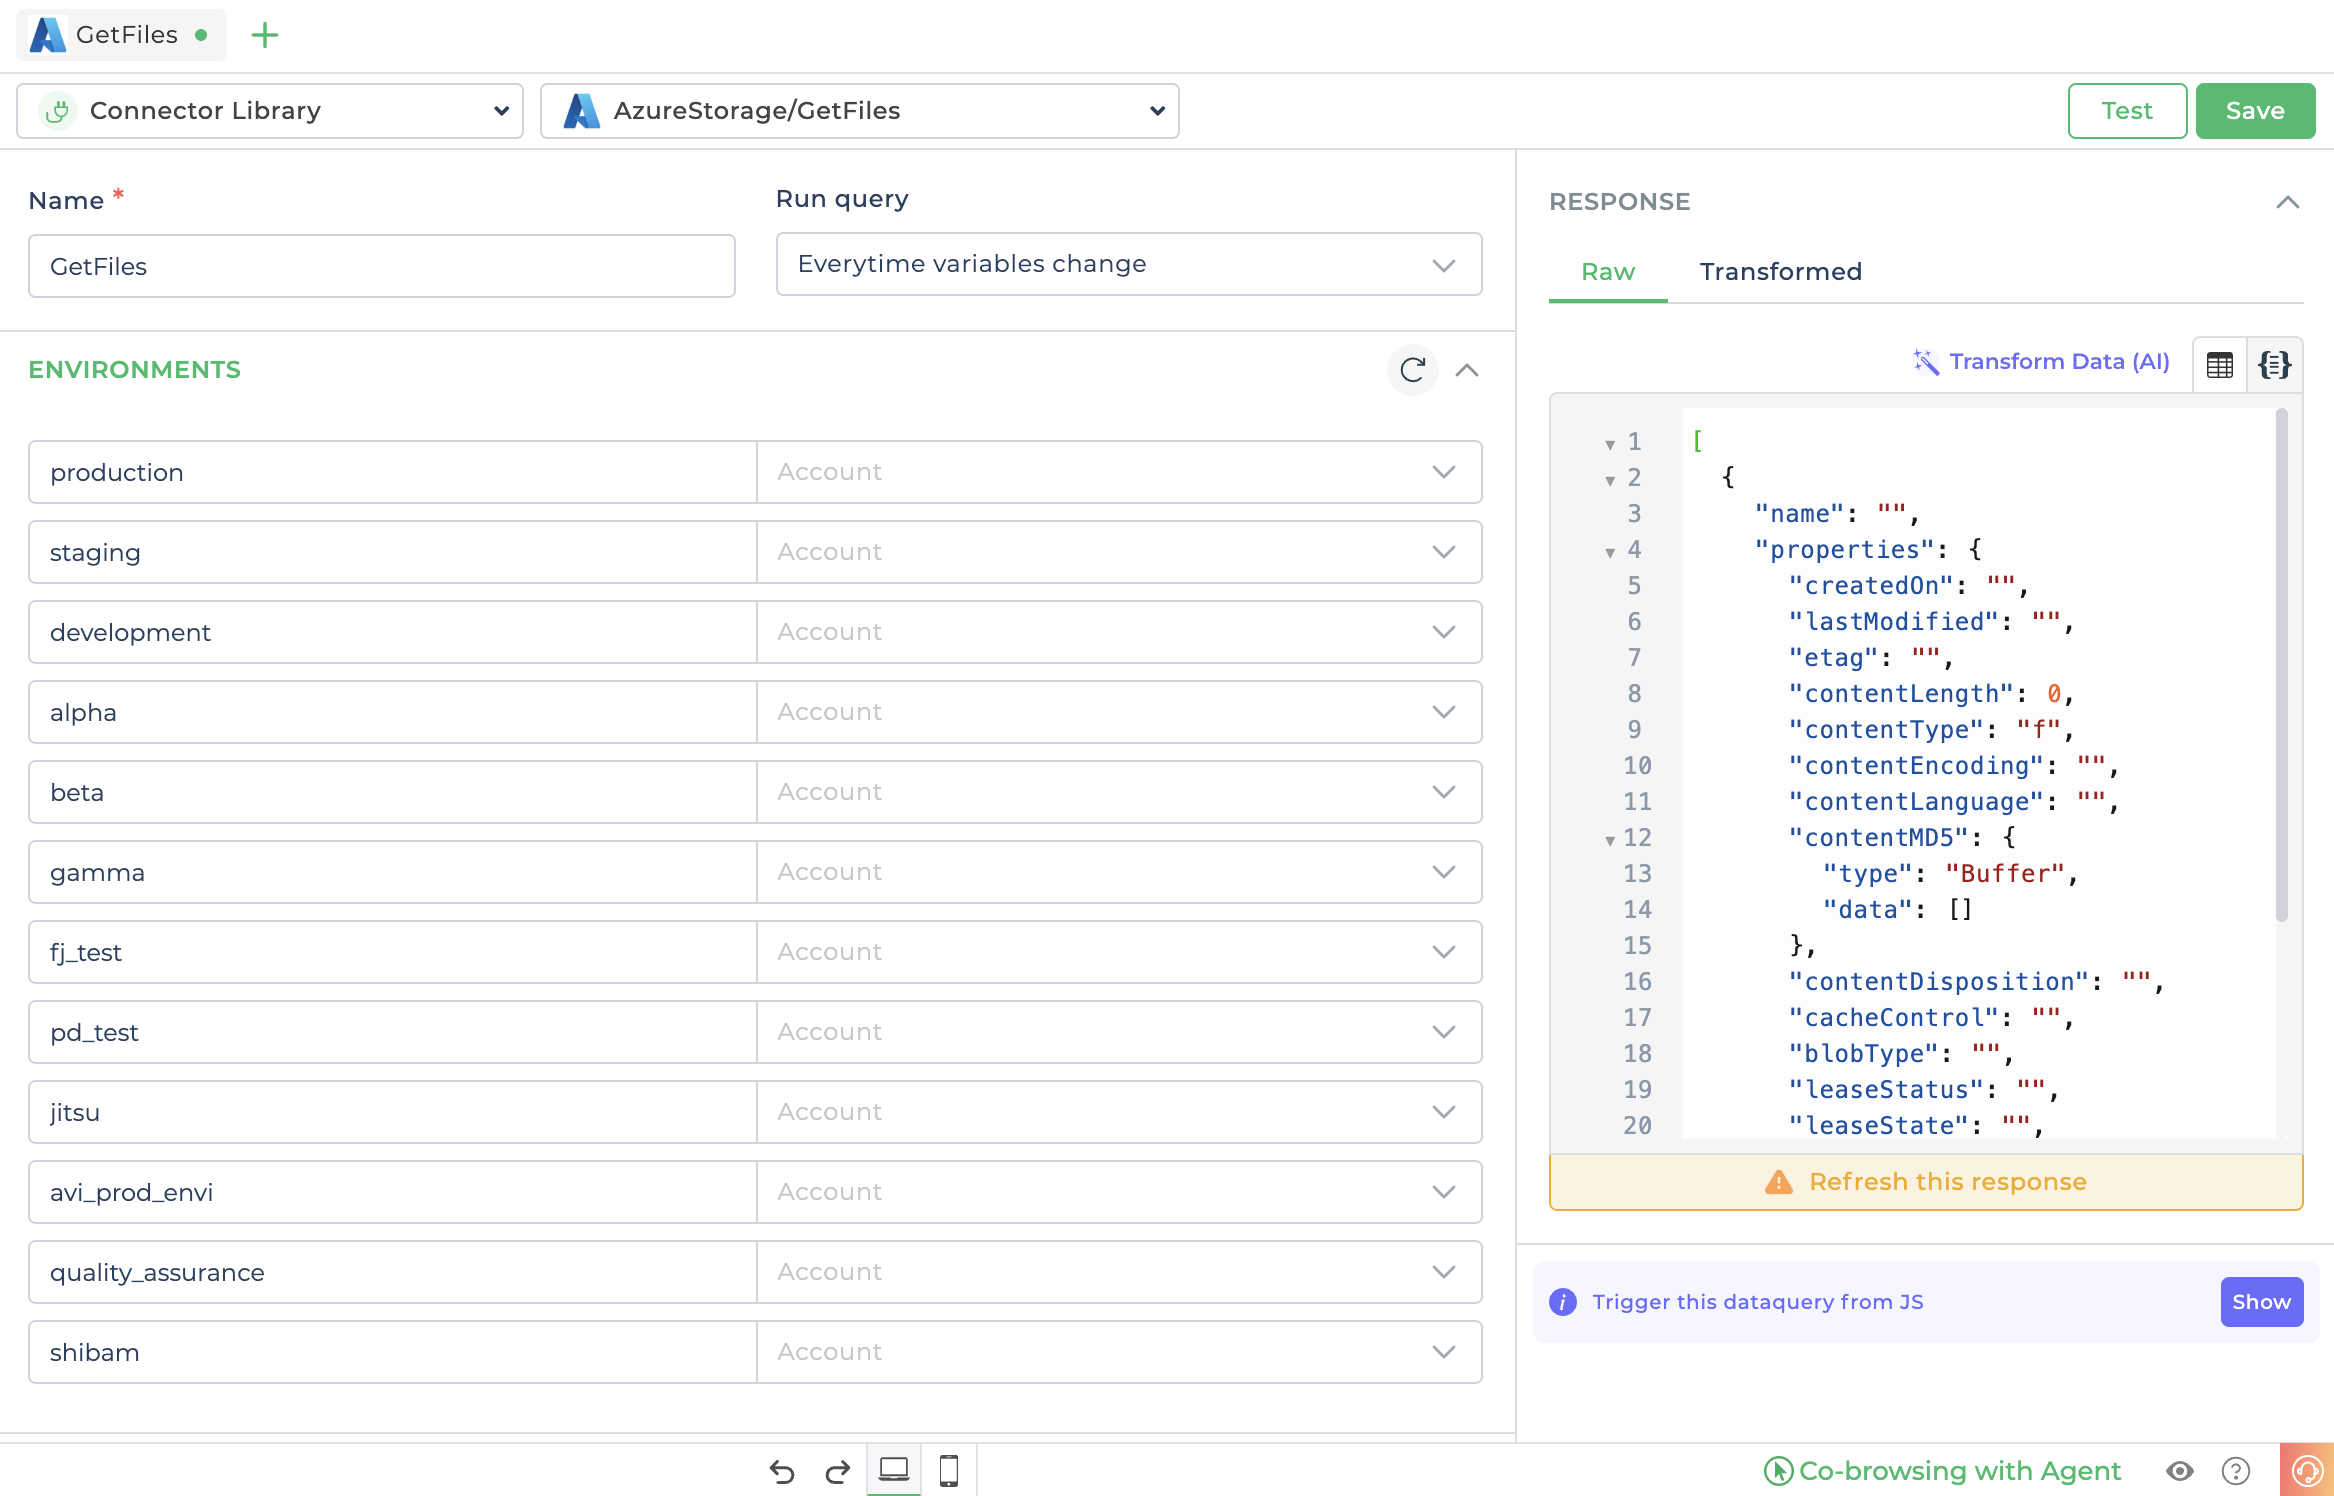
Access the
Bind Data Option -> Quick Select -> Connector Library.Choose the desired endpoint, such as
GetFiles, based on your requirements, and select the appropriate environment.Configure any required parameters or inputs for the chosen endpoint. For example, if using
GetFiles, you might specify a folder name to fetch files from that Container.Perform a Refresh Response to populate the response fields from the connector.
Click on Test & Finish to finalize the connector configuration.
Uploading Files to Azure Storage Bucket
The Azure Storage connector provides a convenient way to upload files to your storage buckets. This feature can be especially useful for scenarios such as archiving supporting documents, storing images or PDFs, or creating backups.
Set up your application interface with relevant controls, such as a dropdown for selecting the container name (and optionally, a folder name) and a file upload control to facilitate file uploading.
Create an action button in your app that triggers the upload process when clicked. Configure the
button_clickevent to initiate a Server-side Connector action.Within the
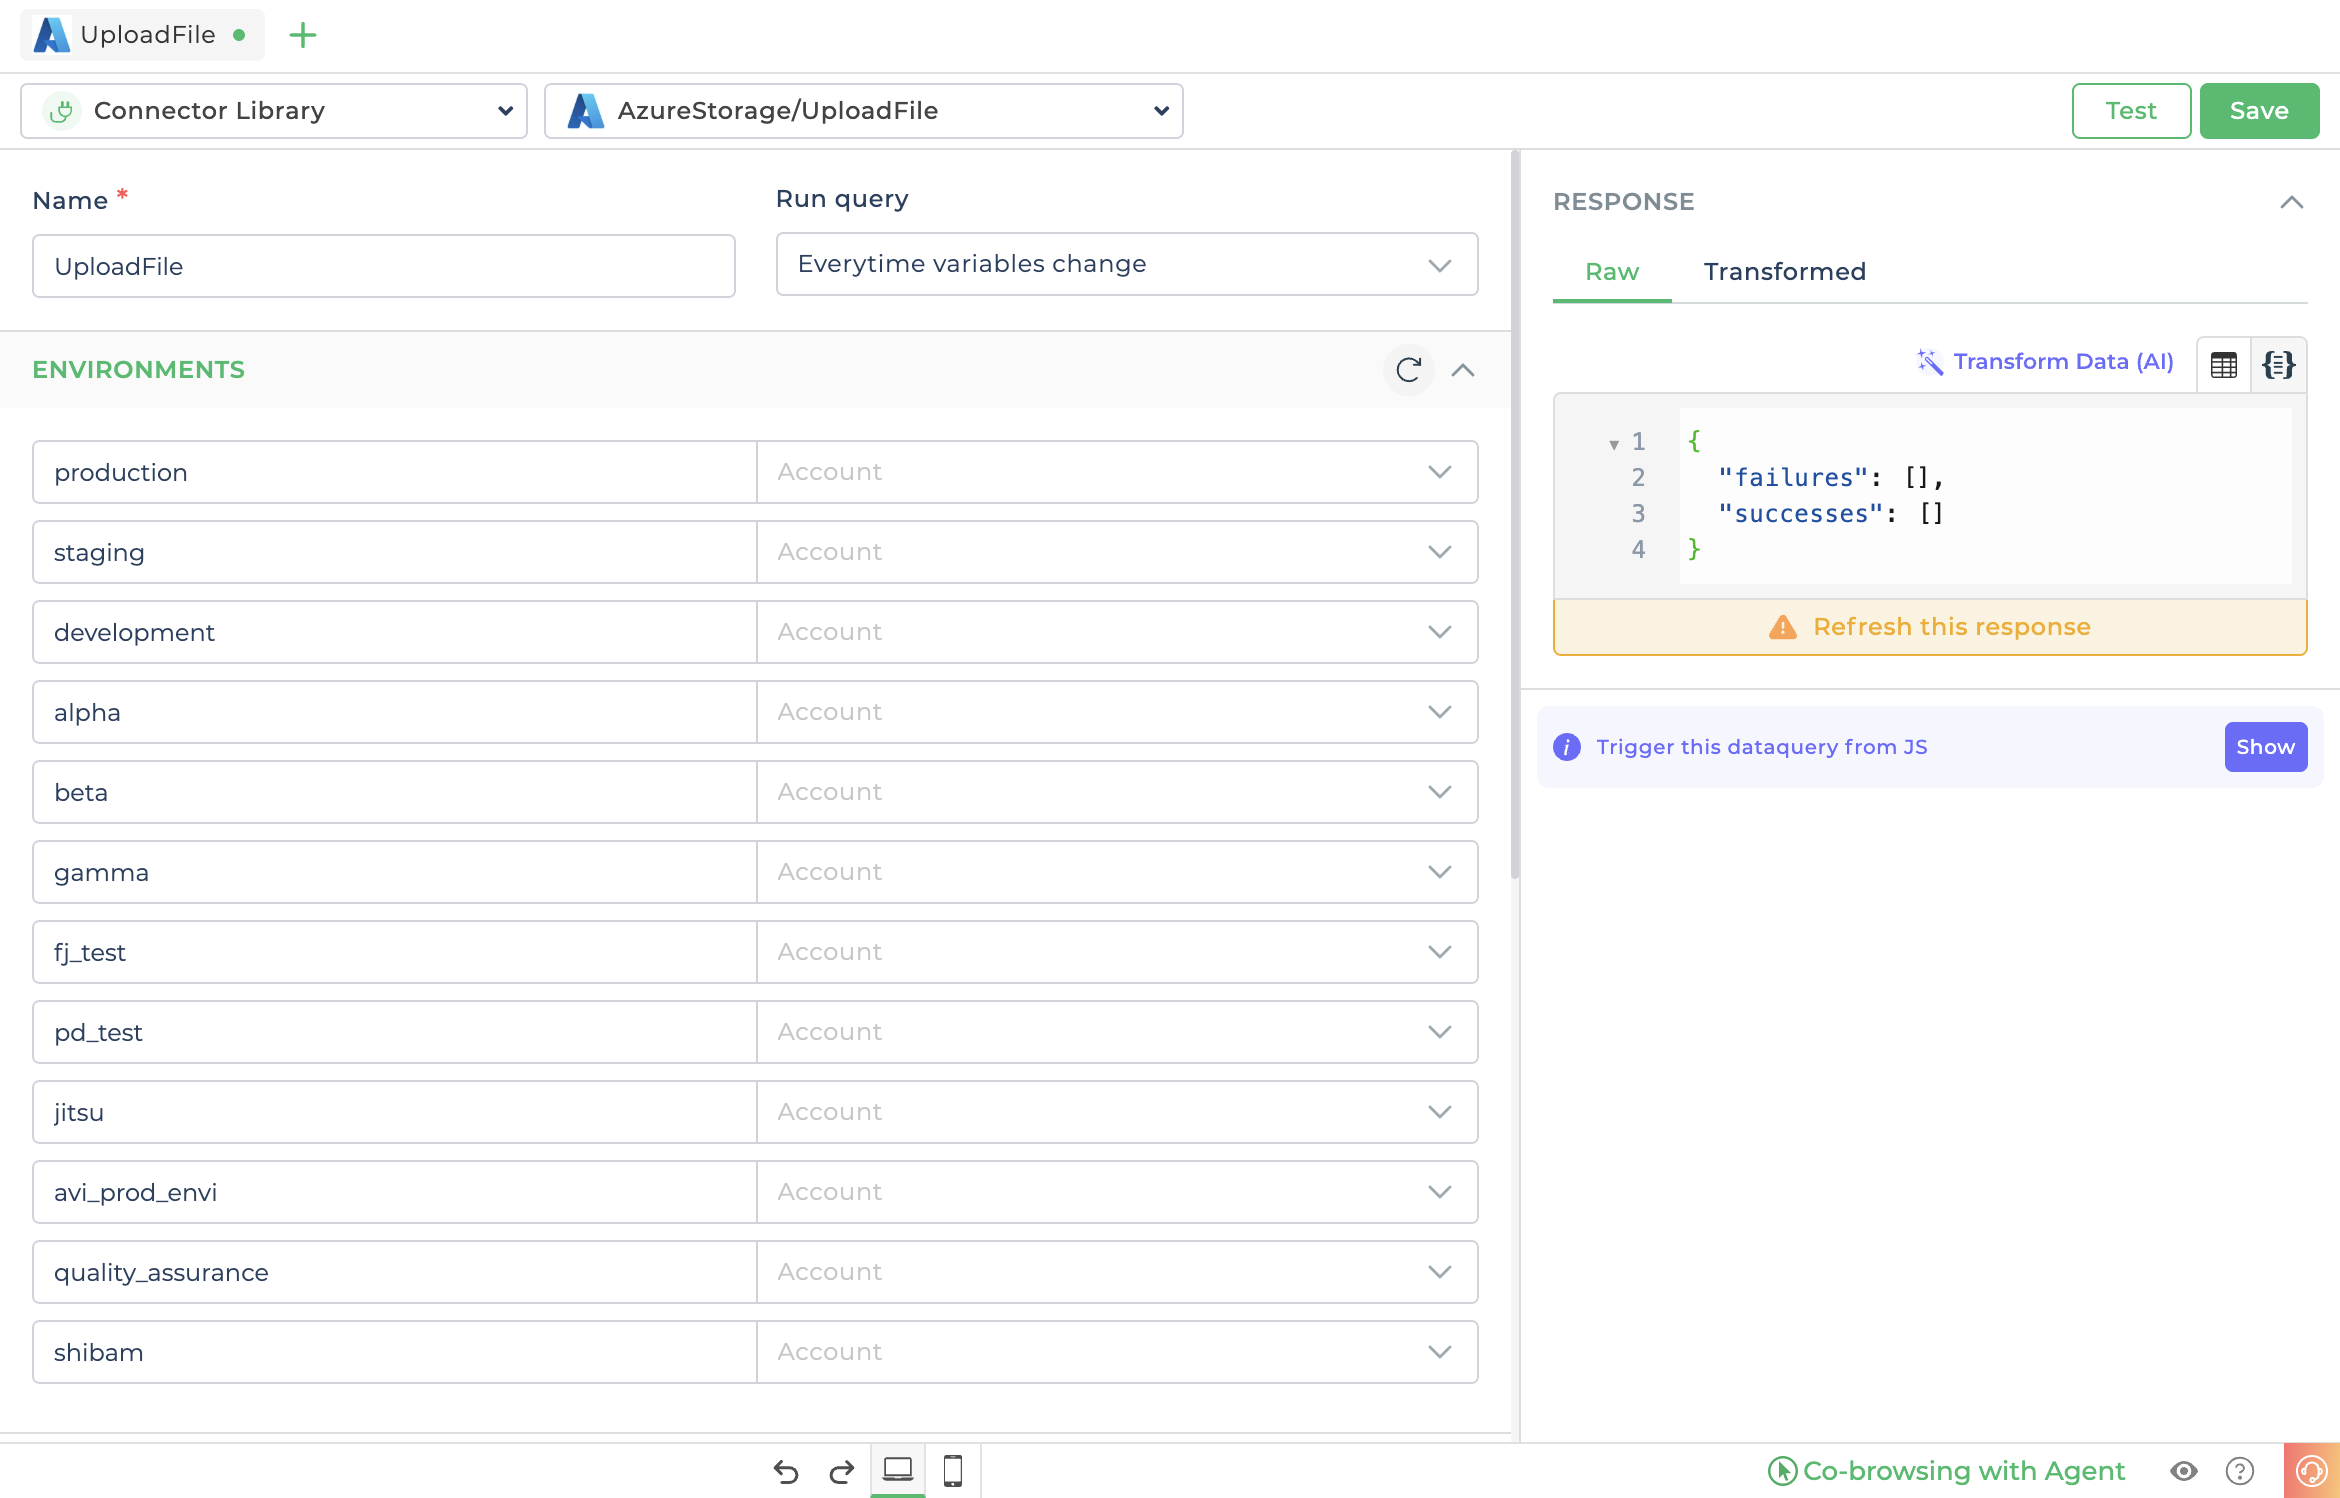
Connector > Library, select the Azure Storage connector and choose theUploadFileaction. Proceed by clickingContinue.Select the connected Azure Storage account associated with your application and proceed by clicking
Continue.Utilize the
dropdowncontrol to obtain the Container name from the appropriate keyword. Optionally, provide the folder name for more organized file storage.Utilize the file upload control's name from the keyword to provide the files you intend to upload. Additionally, you can configure file permissions if required.
- If desired, you can display the URL in a text control for better understanding and visibility of the uploaded file's location within the selected bucket.