Notion
Notion is a commonly used workspace tool that allows teams to collaborate on notes, tasks, projects, and databases. DronaHQ supports integration very quickly with Notion, enabling users to automate workflows, fetch data, and interact with Notion databases, and much more, using multiple endpoints which users can apply directly within their apps built on DronaHQ.
Prerequisites
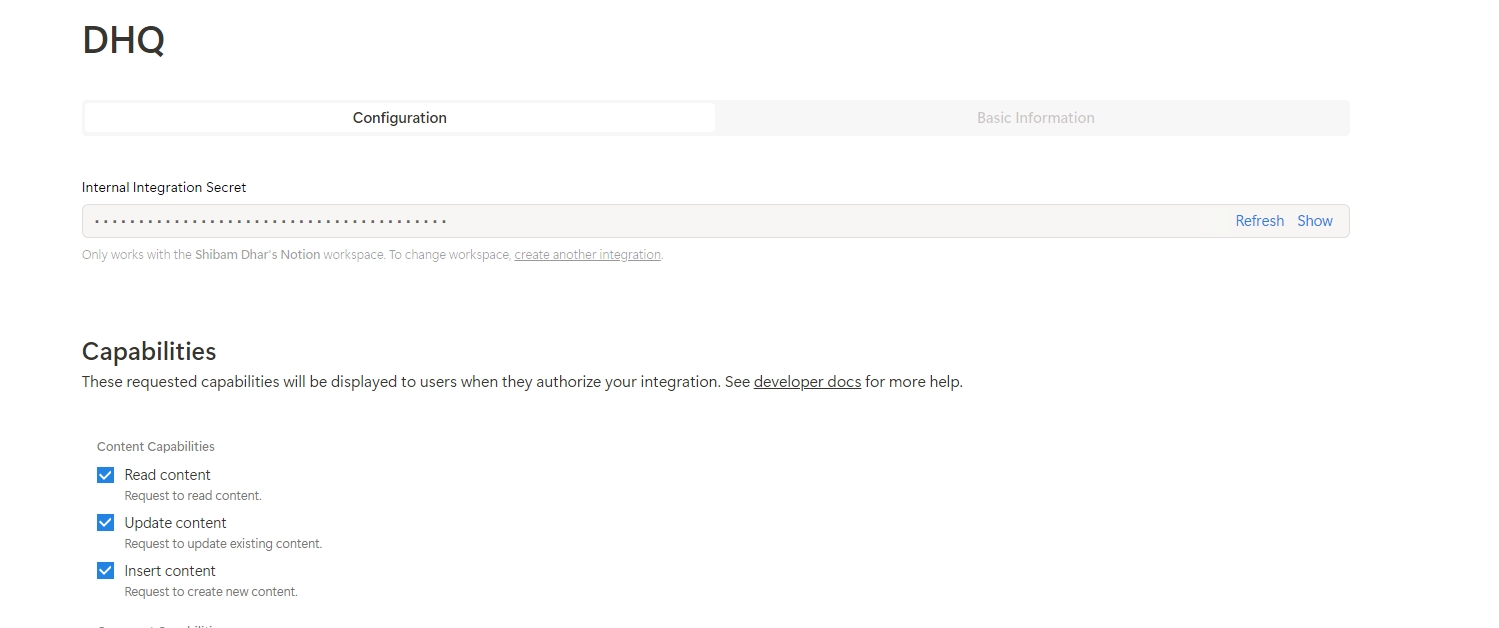
Notion API Key:
Obtain an API key by signing up for a Notion Developer account and creating an integration. This key is necessary to authenticate requests when using the Notion Connector.
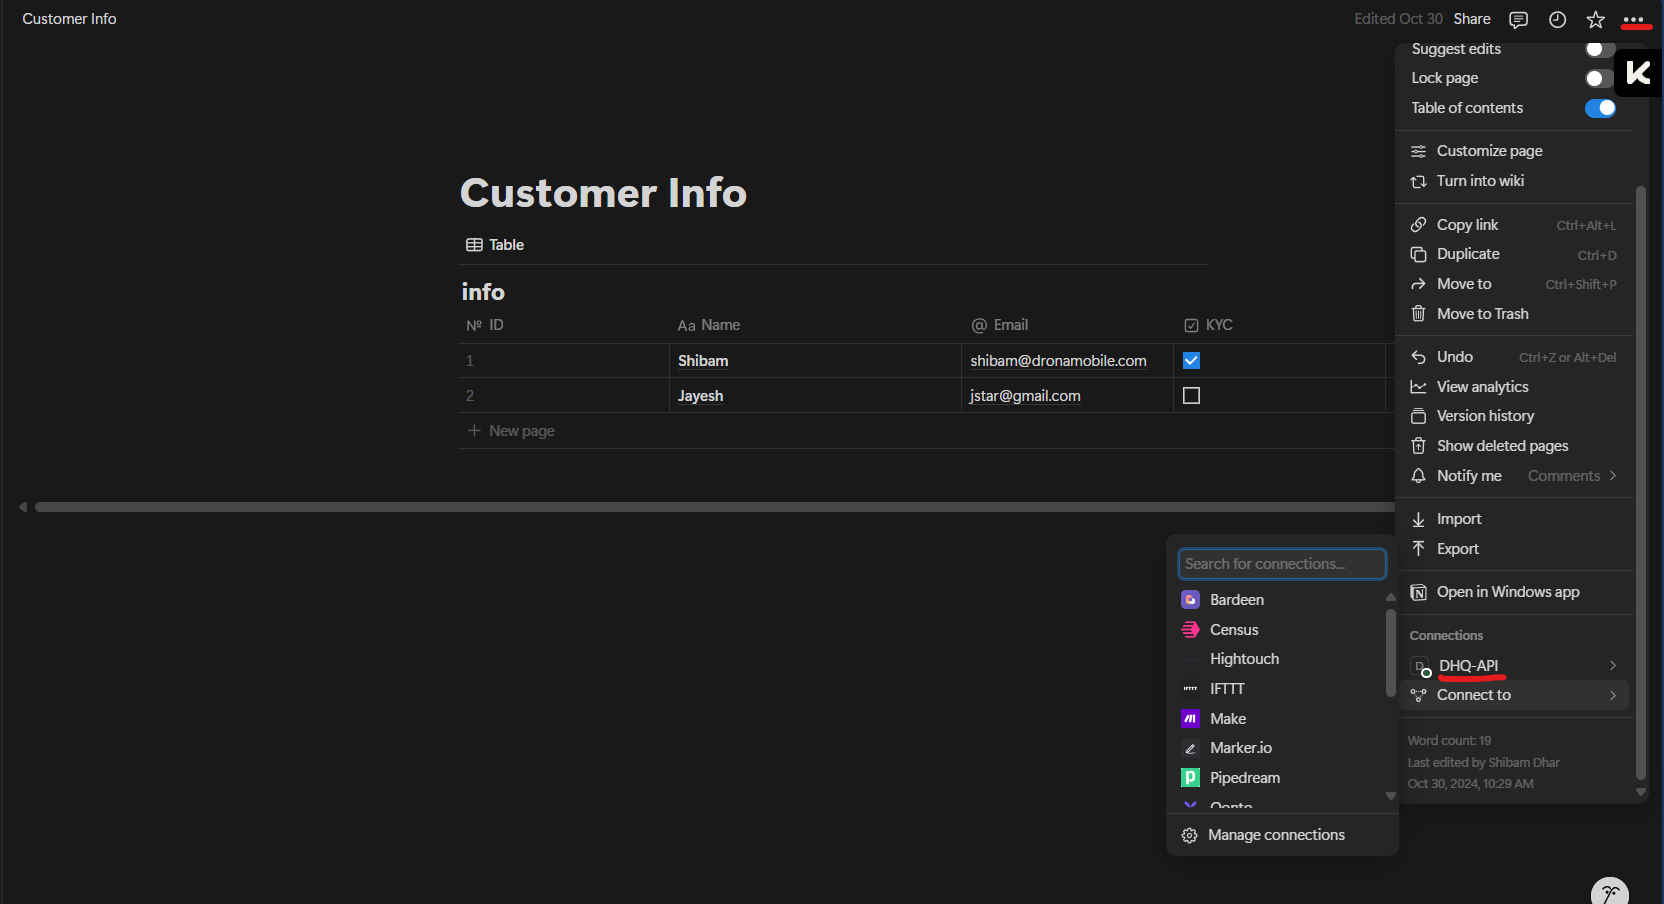
Integrate connection with Notion Page
Once the API key is obtained, after creating an integration, there is a need to connect the pages of Notion with the integration, whose API key will be used in DronaHQ.
Select the page and click on the three dots, from there under connection connect with the created integration.
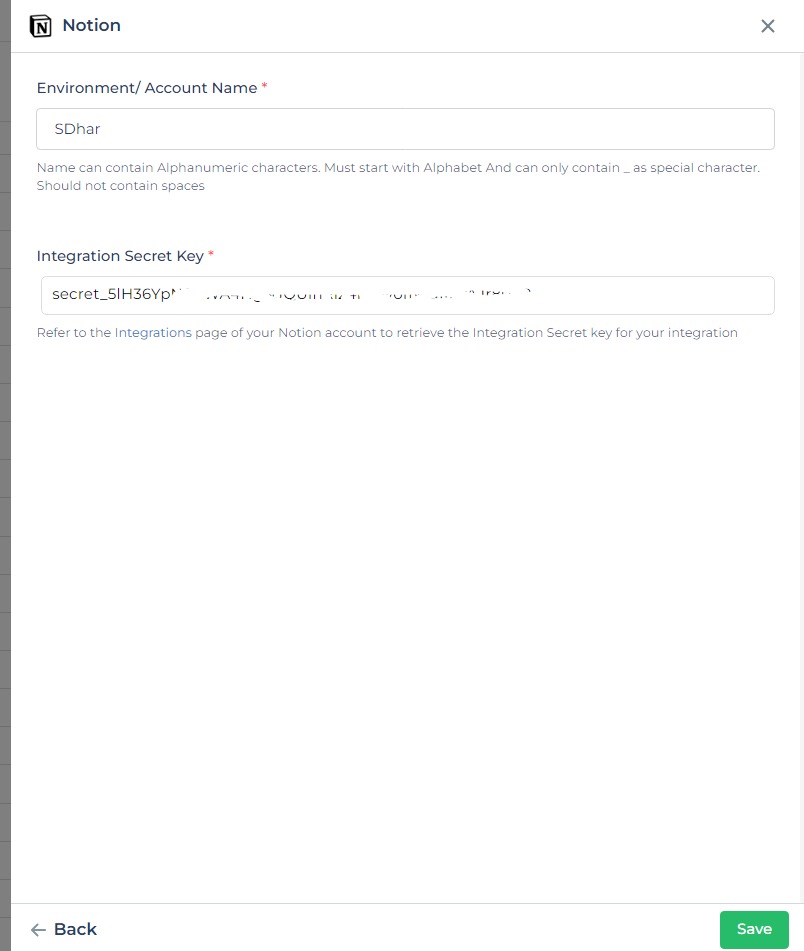
Configuring API Connector in DronaHQ
- Create a name for your Notion connector.
- Enter the API key generated from your Notion Developer account into the connector setup.
- Once all details are provided, click Save to complete the connector configuration.
Supported API endpoints
| Action | Description |
|---|---|
| RetrieveBotUserInfo | Retrieves information about the bot user in the workspace. |
| ListAllUsers | Lists all users in the Notion workspace. |
| RetrieveAUser | Retrieves details of a specific user by ID. |
| RetrieveADatabase | Fetches details of a specific database in Notion. |
| CreateADatabase | Creates a new database within the workspace. |
| UpdateADatabase | Updates the properties of an existing database. |
| QueryADatabase | Queries a Notion database to retrieve filtered data. |
| RetrieveAPage | Fetches information about a specific page by ID. |
| RetrieveAPagePropertyItem | Retrieves specific property values from a Notion page. |
| CreateAPage | Creates a new page in a database or as a standalone page. |
| UpdatePageProperties | Updates the properties of an existing page. |
| SearchByTitle | Searches for pages or databases by title. |
| RetrieveComments | Retrieves comments associated with a page or block. |
| CreateComment | Adds a comment to a page or block. |
| RetrieveABlock | Fetches a specific block (content item) by ID. |
| RetrieveBlockChildren | Retrieves children (nested blocks) within a parent block. |
| DeleteABlock | Deletes a specific block by ID. |
| UpdateABlock | Updates the content of a block. |
| AppendBlockChildren | Adds new children blocks to an existing parent block. |
Using Notion connector
Retrieving a Database
Let's explore how to use Notion connector endpoints to fetch details from a database or page in Notion. You can call the query from data queries or trigger it through an action flow initiated by an event. First, you will need to select the environment and account whose API will be called.
Next, provide the variable details:
Here's a table outlining the variables and their descriptions for retrieving a database from Notion:
| Variable | Description |
|---|---|
| Notion-Version | The version of the Notion API you are using (e.g., 2022-06-28). This ensures compatibility with the API endpoints. |
| Database ID | The unique identifier for the Notion database you want to retrieve. To find this, open the database as a full page in Notion and extract the {database_id} from the URL format: https://www.notion.so/{workspace_name}/{database_id}?v={view_id}. |
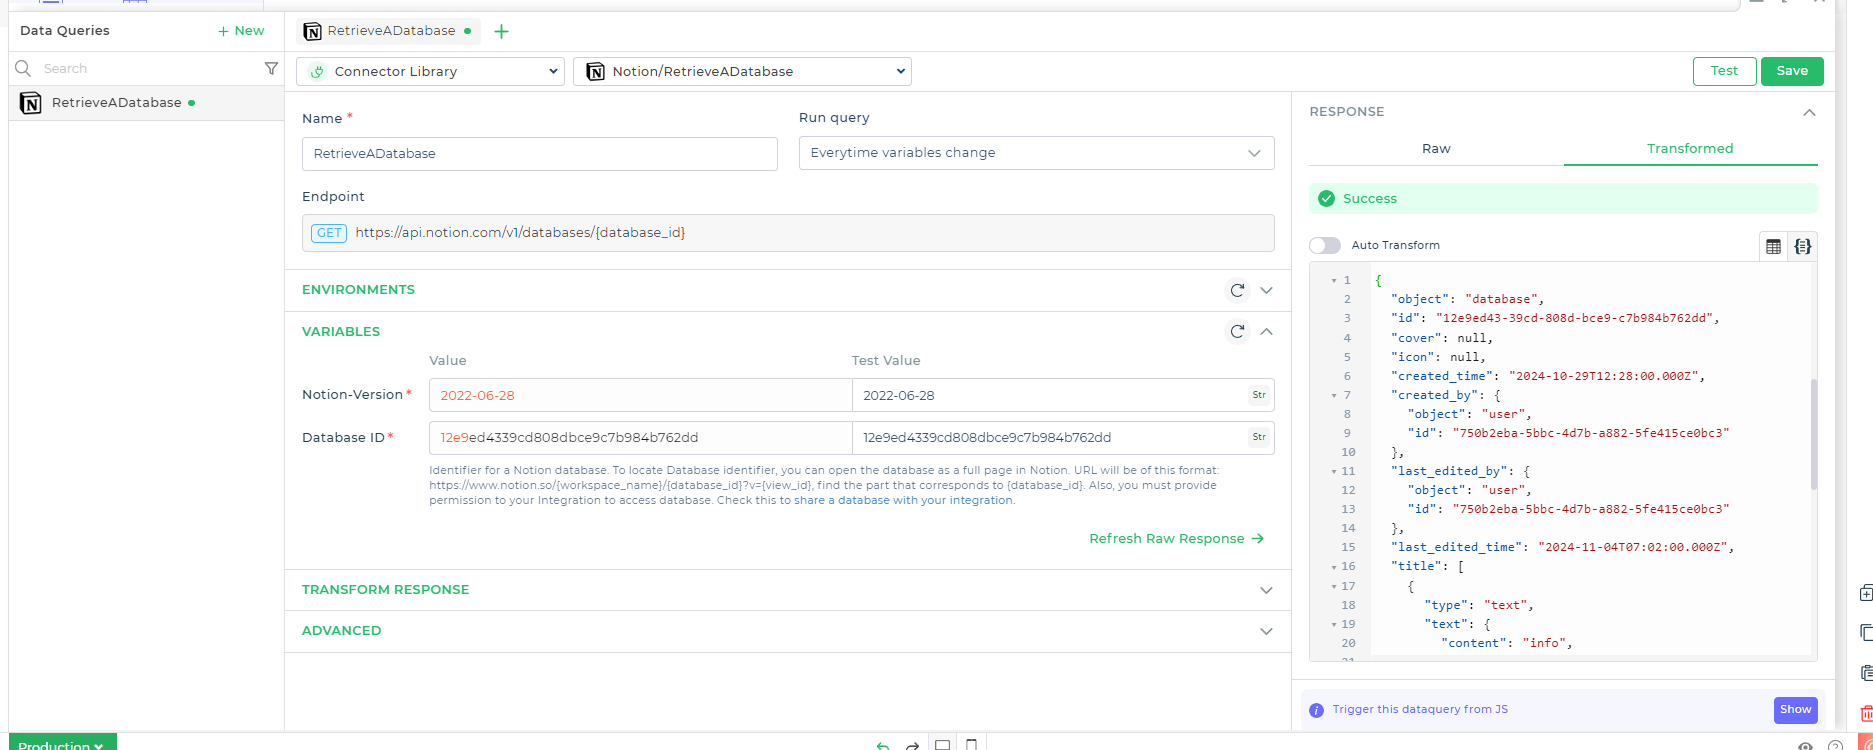
Additionally, you must provide permission for your integration to access the database. Ensure you share the database with your integration.
Finally, run a simple test, and this will fetch the data for the provided database ID from Notion.
Here's the revised table without the example values:
Create a Query
To create a query for a database, there are some basic components to consider, such as filtering, sorting, and the start cursor. To perform a query using the connector, select the endpoint and, after choosing the environment and account, fill in the necessary variable details.
| Variable | Description |
|---|---|
| Filter | When supplied, this limits the pages returned based on the specified filter conditions (see Notion API documentation for details). |
| Sorts | When supplied, this orders the results based on the provided sorting criteria (see Notion API documentation for details). |
| Start Cursor | When supplied, this returns a page of results starting after the provided cursor. If not supplied, this endpoint will return the first page of results. |
| Page Size | This indicates the number of items from the full list that you want in the response, with a maximum limit of 100. |
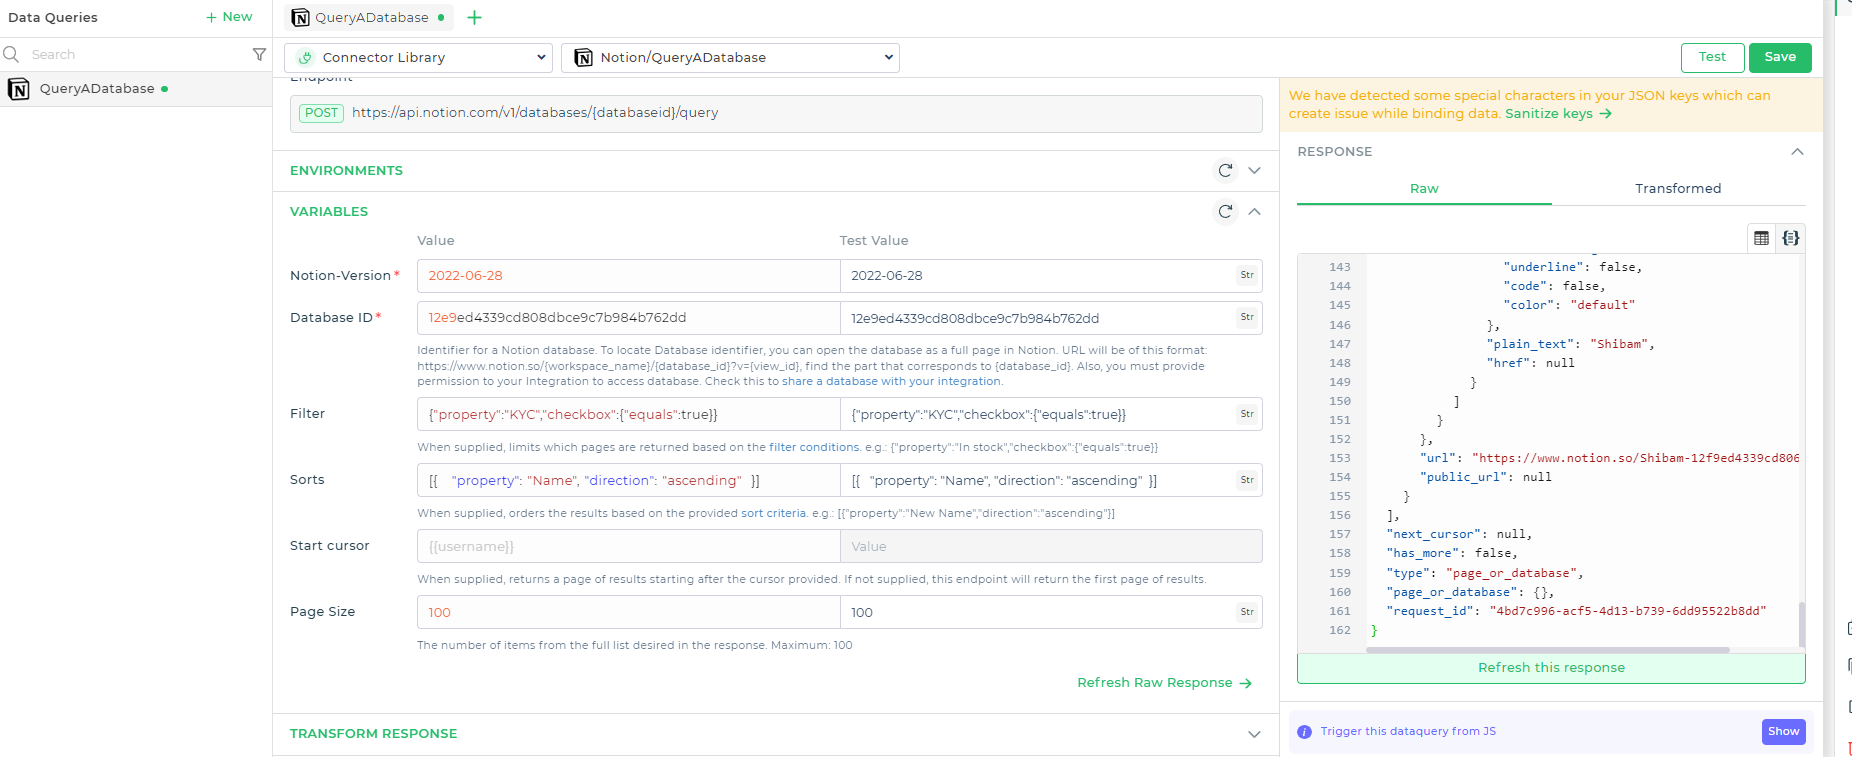
See below how the data changes based on the query we receive. The info with KYC checkboxes marked are fetched in an ascending order.
{
  "results": [
    {
      "id": "1349ed43-39cd-802f-8586-dbe2ffcfc9f2",
      "created_time": "2024-11-04T07:38:00.000Z",
      "last_edited_time": "2024-11-04T07:39:00.000Z",
      "created_by": {
        "id": "750b2eba-5bbc-4d7b-a882-5fe415ce0bc3"
      },
      "last_edited_by": {
        "id": "750b2eba-5bbc-4d7b-a882-5fe415ce0bc3"
      },
      "parent": {
        "database_id": "12e9ed43-39cd-808d-bce9-c7b984b762dd"
      },
      "properties": {
        "KYC": {
          "checkbox": true
        },
        "Registration Date": {
          "date": {
            "start": "2024-10-29"
          }
        },
        "ID": {
          "unique_id": {
            "number": 3
          }
        },
        "Email": {
          "email": "superstar@redif.com"
        },
        "Name": {
          "title": [
            {
              "text": {
                "content": "Puneet"
              }
            }
          ]
        }
      },
      "url": "https://www.notion.so/Puneet-1349ed4339cd802f8586dbe2ffcfc9f2"
    },
    {
      "id": "12f9ed43-39cd-8069-bf25-fd74e8f59c74",
      "created_time": "2024-10-30T04:57:00.000Z",
      "last_edited_time": "2024-11-04T07:39:00.000Z",
      "created_by": {
        "id": "750b2eba-5bbc-4d7b-a882-5fe415ce0bc3"
      },
      "last_edited_by": {
        "id": "750b2eba-5bbc-4d7b-a882-5fe415ce0bc3"
      },
      "parent": {
        "database_id": "12e9ed43-39cd-808d-bce9-c7b984b762dd"
      },
      "properties": {
        "KYC": {
          "checkbox": true
        },
        "Registration Date": {
          "date": {
            "start": "2024-10-02"
          }
        },
        "ID": {
          "unique_id": {
            "number": 1
          }
        },
        "Email": {
          "email": "shibam@dronamobile.com"
        },
        "Name": {
          "title": [
            {
              "text": {
                "content": "Shibam"
              }
            }
          ]
        }
      },
      "url": "https://www.notion.so/Shibam-12f9ed4339cd8069bf25fd74e8f59c74"
    }
  ]
}
Data Transformation on Notion response
The response we received from the API is technically correct but not formatted in a way that is easy to use within a user interface. To enhance usability, we can transform the data. This can be accomplished using the Transform Response feature in a data query or by applying JavaScript code to refine the existing data.
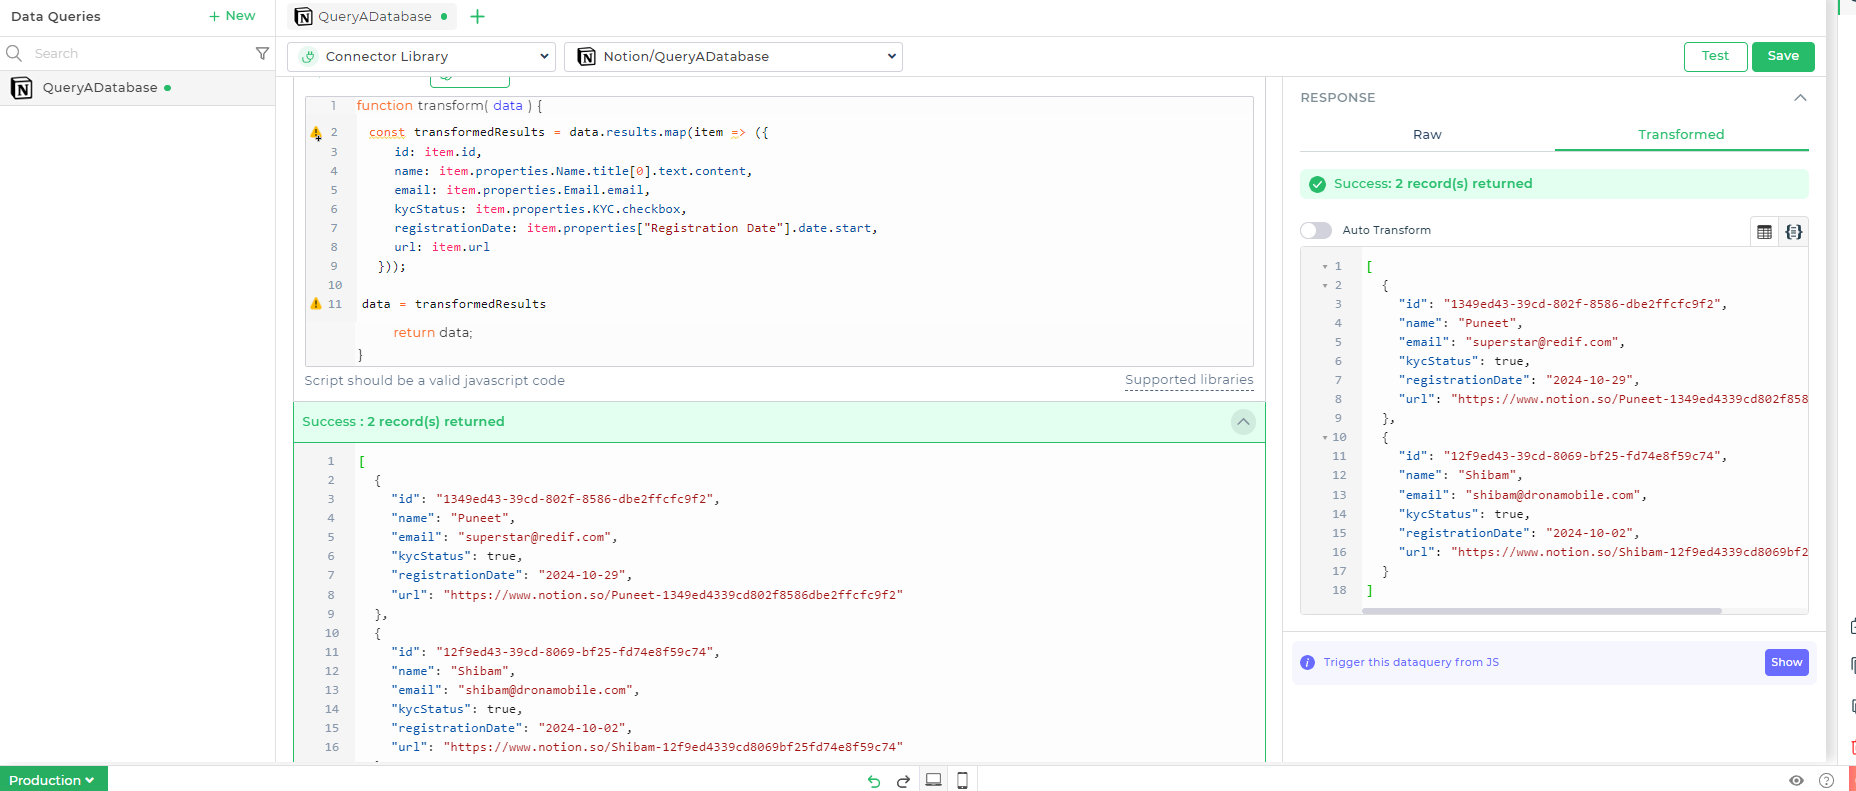
JavaScript Code Example
Below is a JavaScript code snippet that takes the initial response data and transforms it into a more accessible format:
 const transformedResults = data.results.map(item => ({
    id: item.id,
    name: item.properties.Name.title[0].text.content,
    email: item.properties.Email.email,
    kycStatus: item.properties.KYC.checkbox,
    registrationDate: item.properties["Registration Date"].date.start,
    url: item.url
  }));

data = transformedResults
Explanation of the Code:
- Mapping: The map function is used to iterate over each item in the results array from the original data.
- Object Construction: For each item, a new object is created that contains the relevant fields (ID, name, email, KYC status, registration date, and URL).
- Return Value: Finally, the transformed array of objects is returned, making it easier to integrate and use in other parts of your application.