Twilio
Integrate Twilio to set up communication strategies and interact with your customers. Connect Twilio to the low-code apps with ready connectors to send and receive text messages, and perform other communication functions and engage with your customers.
Prerequisite
Obtain a Twilio phone number. This is necessary for sending and receiving messages and calls.
Generate your Twilio API credentials, which include your Account SID and Auth Token. You'll need these credentials to authenticate API requests.
Depending on the services you intend to use (SMS, Voice, etc.), ensure your application's environment supports the necessary libraries and tools for Twilio integration.
Configuring API Connector in DronaHQ
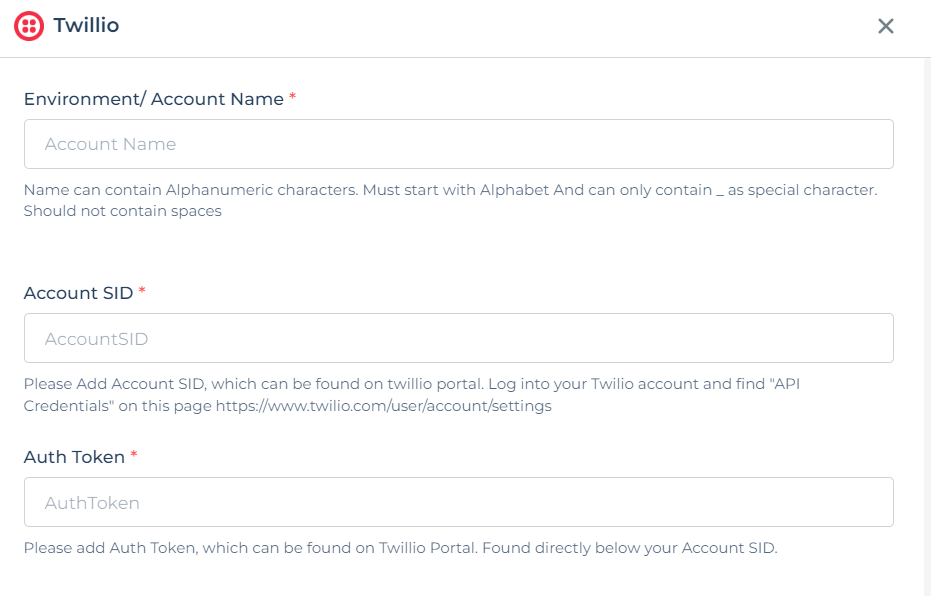
Add a Account name. Then add the Account SID and Auth Token for the connector account. Once all details are added, click Save. Your connector configuration is now done.
Getting the API Key
Account SID and Auth Token- You can find the Account SID and Auth Token under the Twilio account dashboard > Developers > API Keys.

After successfully configuring and saving the connector settings, you can easily access your newly connected account by navigating to the connected accounts list. You can find this option from the Connector -> Manage Account section. This centralized location allows you to conveniently monitor and manage your connected accounts.
Supported API endpoints
| Action | Description |
|---|---|
| SendMessage | Send a text message to a specified recipient via Twilio's SMS service. |
| SendWhatsappTextMessage | Send a text message to a recipient using Twilio's WhatsApp integration. |
| SendWhatsappMediaMessage | Send media (images, videos, etc.) to a recipient using Twilio's WhatsApp integration. |
| SendVerify | Send a verification code to a user for account verification or authentication. |
| SendVerifyWithConfiguration | Send a verification code with customized configuration, such as expiration time and usage limits. |
| VerifyCode | Verify a provided verification code to confirm the authenticity of a user. |
Using Twilio Connector
Send Text Message
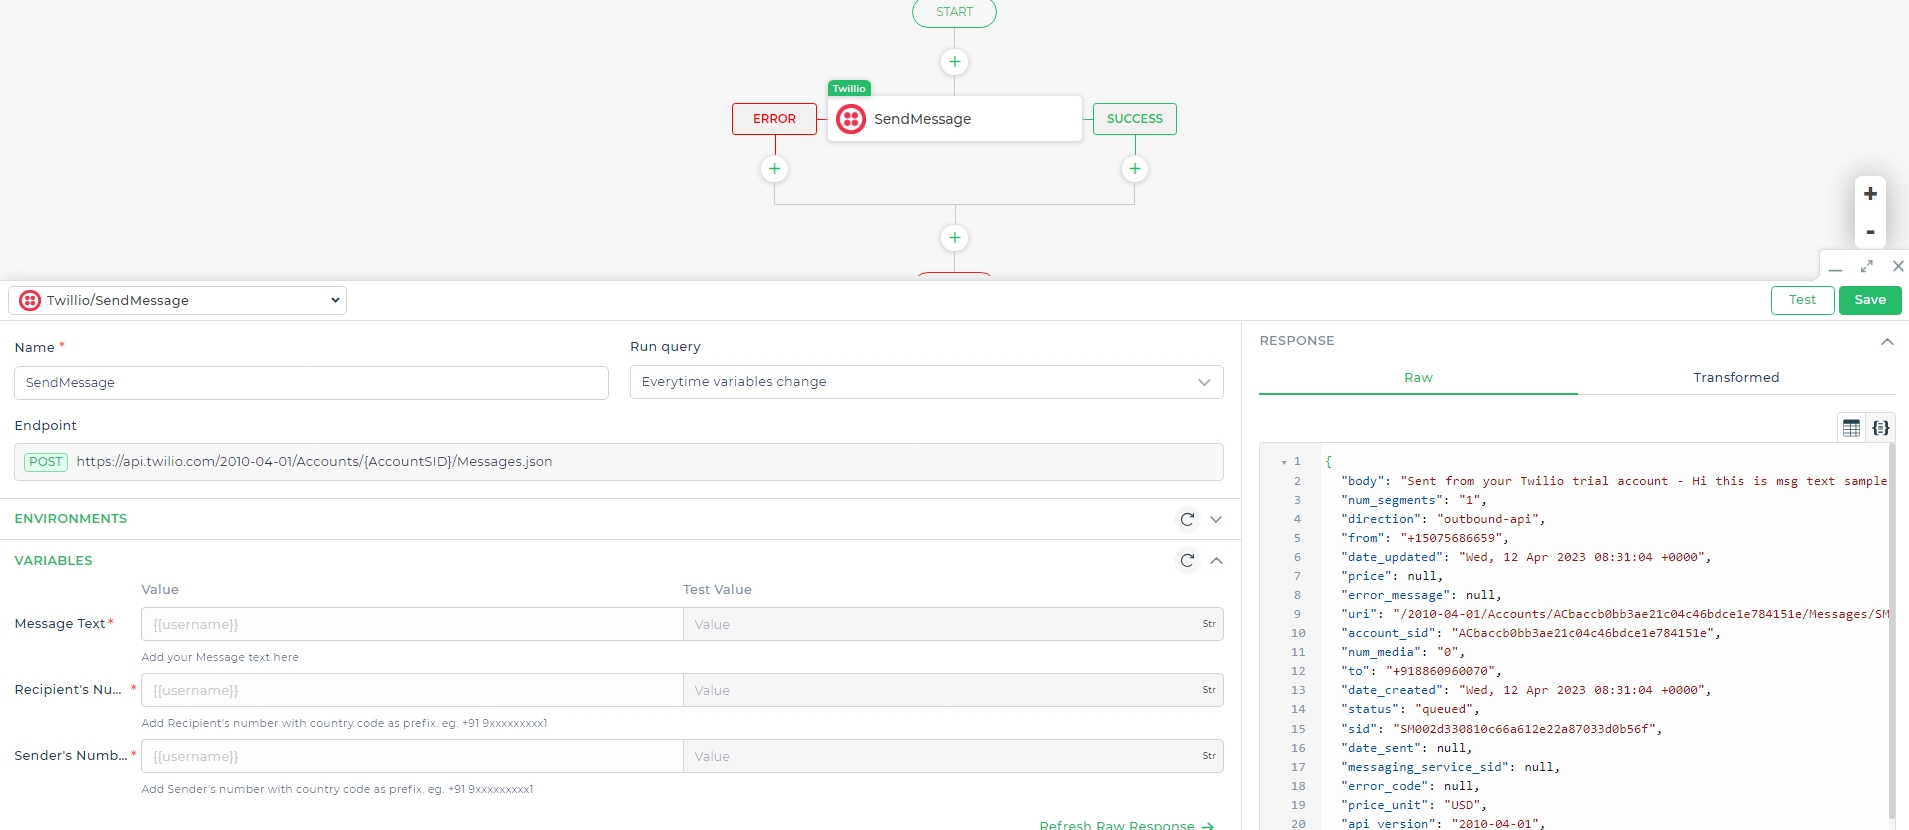
The Twilio connector provides the SendMessage action to enable you to send a text message from your app using your Twilio account.
Send text messages to a recipient’s phone number from your app. Add the Message text using keywords to enable dynamic inputs.
- When adding the recipient’s and sender’s
numbersyou need to make sure that you have added thecountry codeas a prefix.
- When adding the recipient’s and sender’s
The Sender’s number would be the Twilio number that would be purchased by you. The Twilio number can be purchased from the Twilio Dashboard here.
Your number needs to be approved by Twilio before you can use it. Till that time you can use the Trial Number that can be purchased from Twilio for testing your app.

Once your business number is approved by Twilio, you can then make use of the same for your further actions to send messages to your customers.
You can then send messages to the Verified numbers. You can see and add the caller IDs at this link here for verified numbers.
Send WhatsApp Message
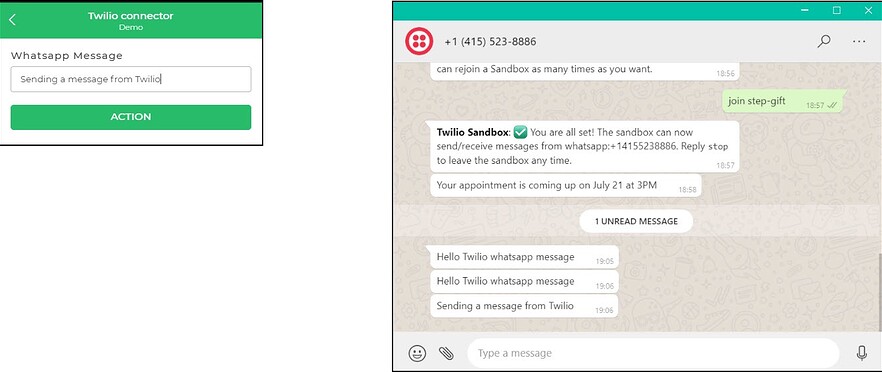
Send WhatsApp Messages or even Media messages using the Twilio integration.
Whatsapp needs to approve your account. After approval, your business number needs to receive a message from the end-user so that you can start sending them Whatsapp messages. If you are sending the Templated messages you can send them anytime. However, if dynamic messages are to be sent, they can be sent a maximum of 24 hours from receipt of the last message from the end-user.
Till your number is approved you can use the Twilio sandbox to test your app. You can refer to the Twilio process by Trying out the configuration of Whatsapp as mentioned here.
Add the
text controlto send Whatsapp messages. So we would add the respective keywords in the Message field. Once done clickFinish.Add
whatsapp:before adding the sender’s and recipient’s numbers.

When any user sends your business a message you can send them a freeform outbound message within the 24-hour session/ window. Beyond that, you would have to use the pre-configured templates for outbound messaging.
Using Twilio for Verification
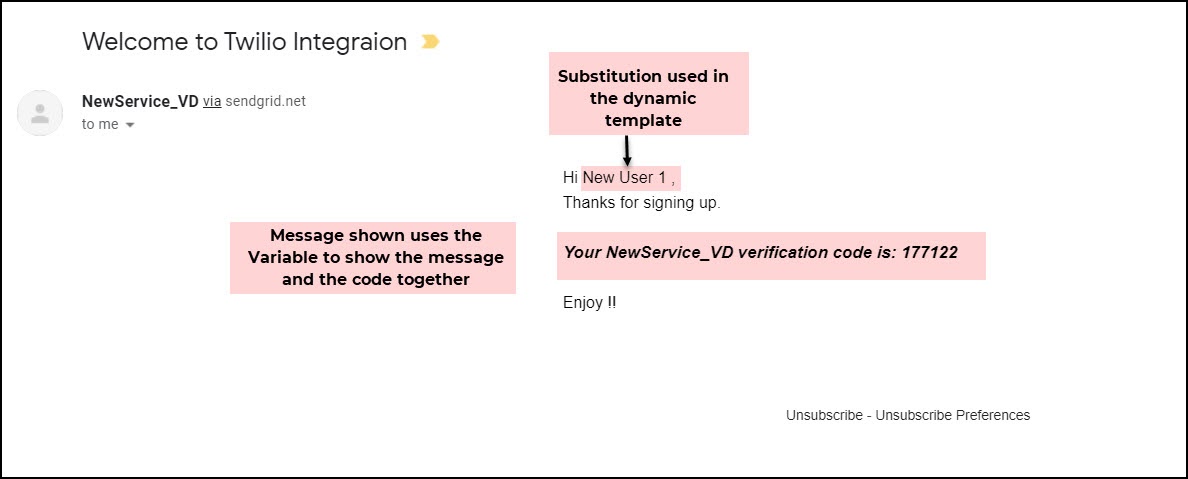
DronaHQ enables integration with Twilio through ready-made connectors to send WhatsApp text and media messages to your customers and prospects. The Twilio integration also supports user verification using one-time passcodes or verification codes via SMS or Email. For email verification, Twilio integrates effectively with SendGrid, allowing you to harness its power for substitution. With the Twilio Connector, you can easily set up a secure authentication system to protect user identity and site access.
Sending Verification Code via SMS
To send a verification code via SMS, you’ll need to set up the Twilio Connector:
- In
Connector > Libraryof Action, select Twilio Connector and, - Choose
SendVerifyfrom the Twilio Actions and click Continue. - Select the authenticated account.
- Configure the Connector fields:
- Copy the Service ID from your Twilio Verify Service and paste it in the connector field.
- Select SMS as the channel.
- Add the recipient’s phone number with the correct country code.
- Use the CONCATENATE(control.countrycode, control.mobilenumber) function for dynamic values.
- Add the Action Unique Name and any response variables from the output values.

Verifying the Code
Now to verify the code you may have a OTP Control where the user enters the code and sends it for verification.
- Use the
VerifyCodeaction from the Twilio Integration. - Select the authenticated account.
- Configure the connector with the Service ID, recipient’s phone number, and the received code.
- Add the Action Unique Name and any response variables. Use the
output.statusresponse, which returnsapprovedorpendingstatus.
Email Verification Using Twilio SendGrid
Twilio's integration with SendGrid allows you to send OTP via email. Here’s how to set it up:
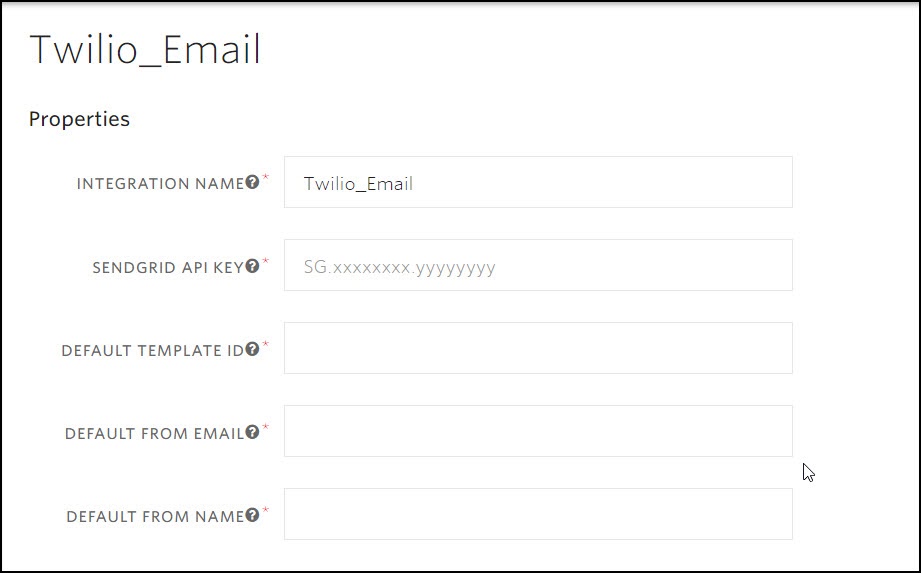
- In your Twilio Account, under Verify Service, select Email Integration.
- Click Create Email Integration, name the service, and click Continue.
- Configure the properties:
- SendGrid API Key: Obtain this from your SendGrid account.
- Default Template ID: Create a new template in SendGrid and include necessary variables like
{{twilio_code}}. - Default From Email and Name: Set these as per your requirement.
- Save the configuration.
Sending Verification Code via Email
- Choose
SendVerifyfrom the Twilio Actions and click Continue. - Select the authenticated account.
- Copy the Service ID from your Twilio Verify Service and paste it in the connector field.
- Select
Emailas the channel and add the recipient’s email address. - Add the Action Unique Name and any response variables.
Sending Code via Email with Substitution
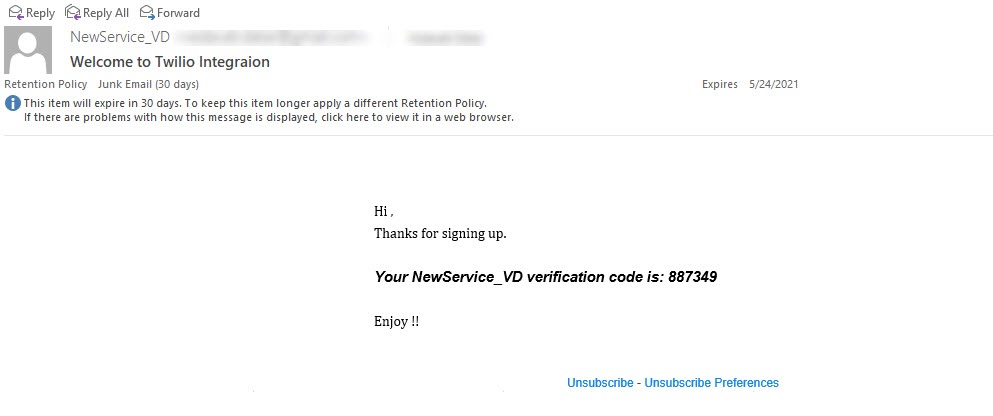
For dynamic email content:
- Select
SendVerifyWithConfigurationfrom the Twilio Actions. - Choose the authenticated account.
- Copy the Service ID from your Verify Service and paste it in the connector field.
- Under Channel, select
Email. - Enter the recipient’s email address.
- Add Channel Configuration with
JSON Key-Value pairsfor substitution. - Add the Action Unique Name and click
Finish.

