AlloyDB
AlloyDB is a fully managed, PostgreSQL-compatible database by Google Cloud, optimized for high performance, scalability, and AI integration.
Configuring Connector
Prerequisites
Authentication Credentials: Obtain the required credentials to connect to your AlloyDB instance. Choose from the following options:
- AlloyDB database username and password.
- AlloyDB IAM authentication (for Google Cloud-hosted AlloyDB databases).
Connection Details:
- Hostname of the AlloyDB database.
- Port number for database access.
- Database name within the AlloyDB host.
Firewall Rules:
- Set up firewall settings to allow DronaHQ (IP whitelist) access to your AlloyDB host.
Ensuring these prerequisites are in place will ensure a seamless integration of AlloyDB with DronaHQ, facilitating effective data management and utilization.
Connector Setup in DronaHQ
Configure your database category by providing the details below. Choose between User and Password Authentication. Validate the connection using Test connection and Save settings for a secure and efficient database
setup.
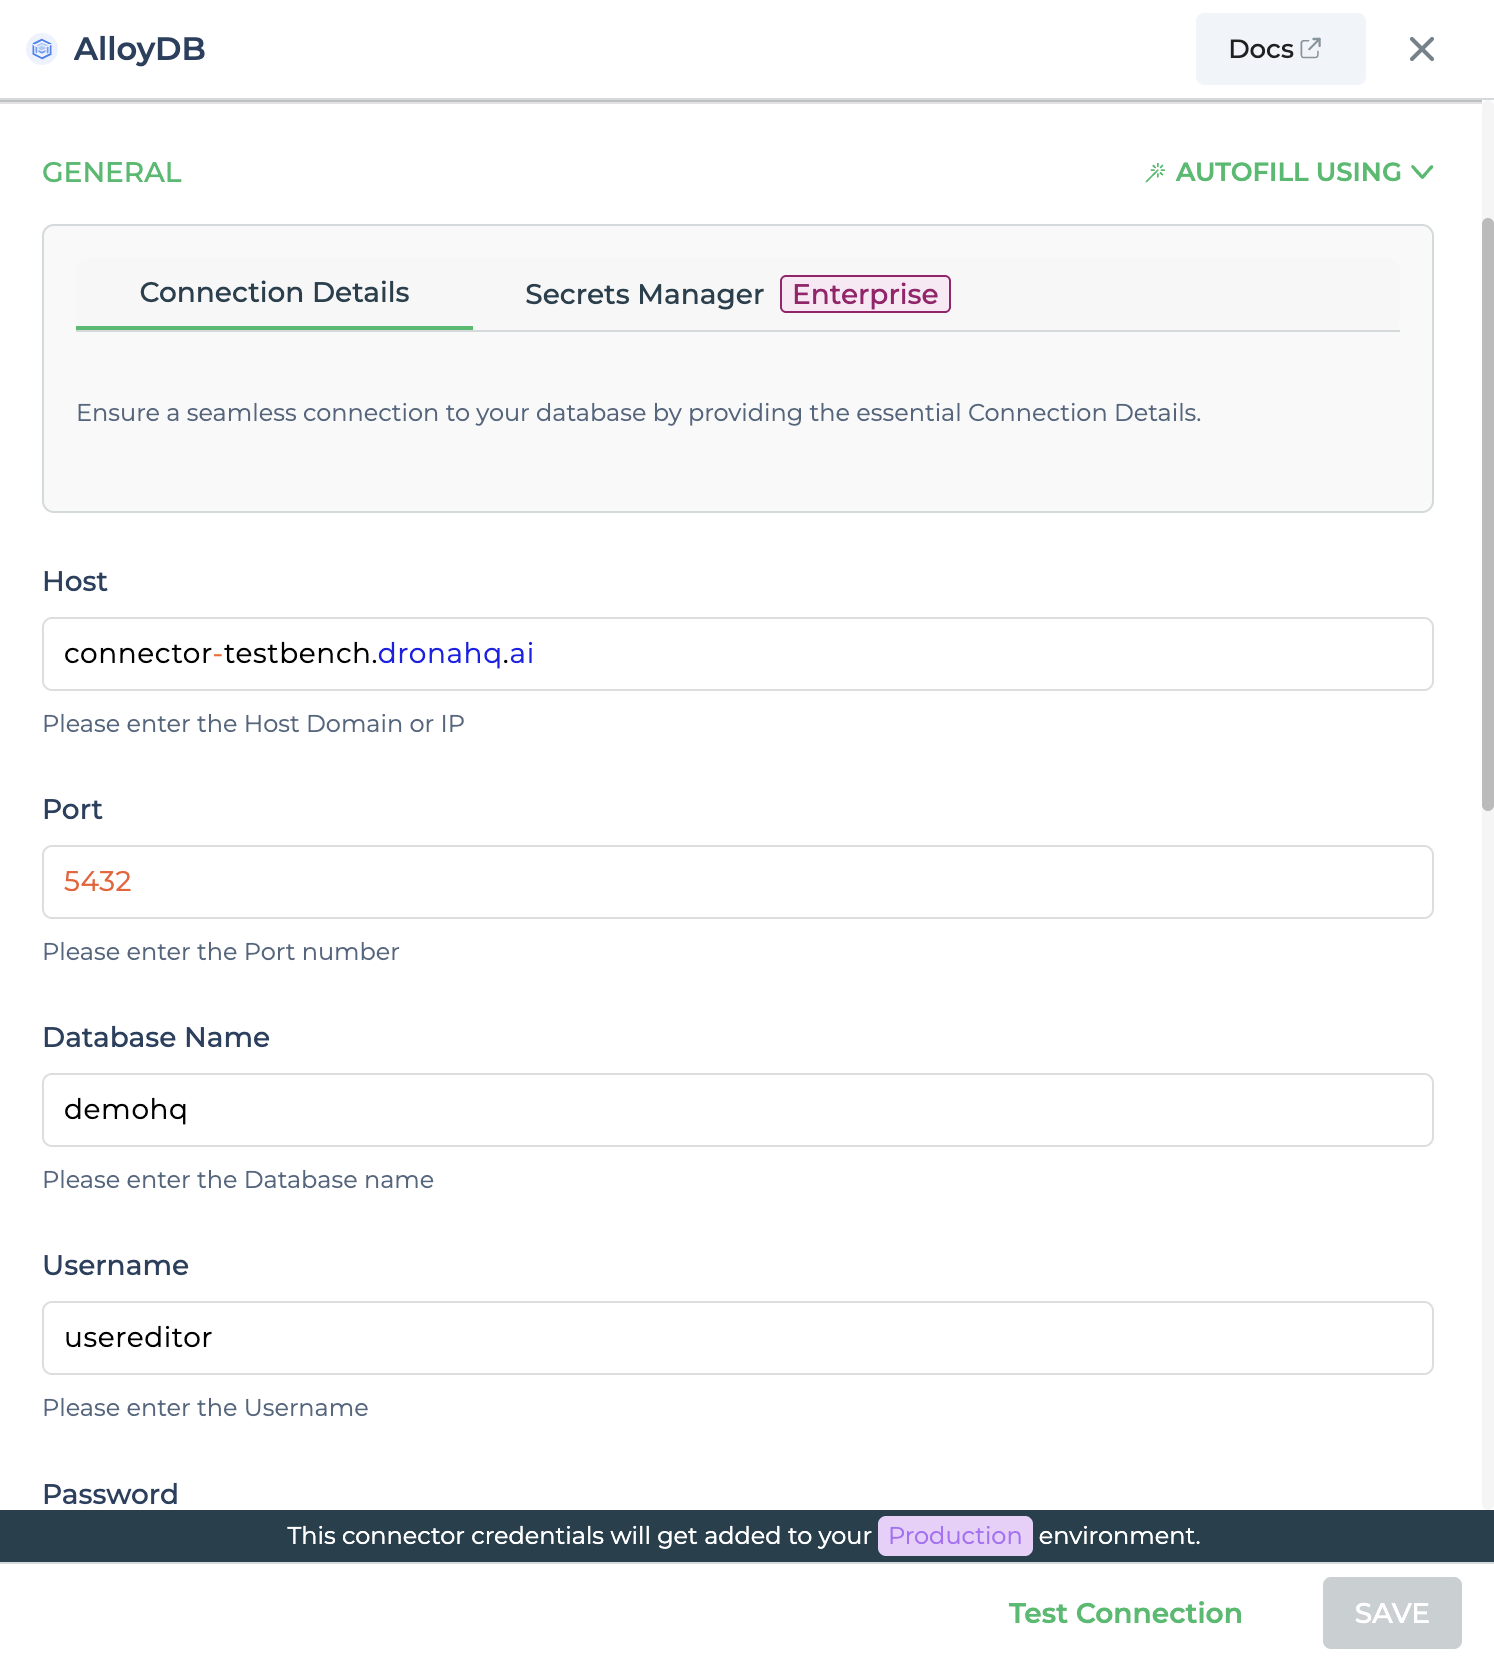
General
| Field | Description |
|---|---|
| Host | Enter the Host Domain or IP |
| Port | Enter the Port number |
| Database Name | Enter the Database name |
| Authentication Type | Choose from User and Password or IAM |
| Username | Enter the Username |
| Password | Enter the Password |
Admin
| Advanced Option | Description |
|---|---|
| Connection Options | The key and value connection options in database configuration refer to specific settings (keys) and their corresponding values that dictate how the application connects to the database |
| Use Dynamic Database Host | Dynamically determine the host for the database connection. |
| Use Dynamic Database Name | Set the database name dynamically, allowing easy switching between databases. |
| Use Dynamic Database Credentials | Enable dynamic database credentials for secure and convenient management. |
| Enable Converting Queries to Prepared Statement | Opt for prepared statements to enhance database performance and security. |
| Connect using SSL | Securely access the database using an encrypted SSL connection, ensuring data integrity and confidentiality. |
| Enable SSH Tunneling | Securely access the database through encrypted SSH tunneling. |
| Whitelist IP | Enhance security by restricting database access to specific whitelisted IP addresses. |
Adding Database Queries
Once the connector is configured, access it in your Connector Library. Click Add query after connection setup. Create
queries, run them, and view responses.

Use double curly brackets for dynamic variables. Test with sample values before saving. Link dynamic variables to controls/actions for runtime use.
Saved queries appear under your connector in Connector Library.

Supported Query Operations
| Operations | Description |
|---|---|
| Raw SQL Query | Various select, insert, delete, update, join operations which are supported by AlloyDB query. e.g. - select * from UserInfo; |
| Stored Procedure Call | You can call store procedure similar to that we call from workbench. e.g. - `CALL getUserInfo; |
Using AlloyDB Connector
Data Bind using Data Query
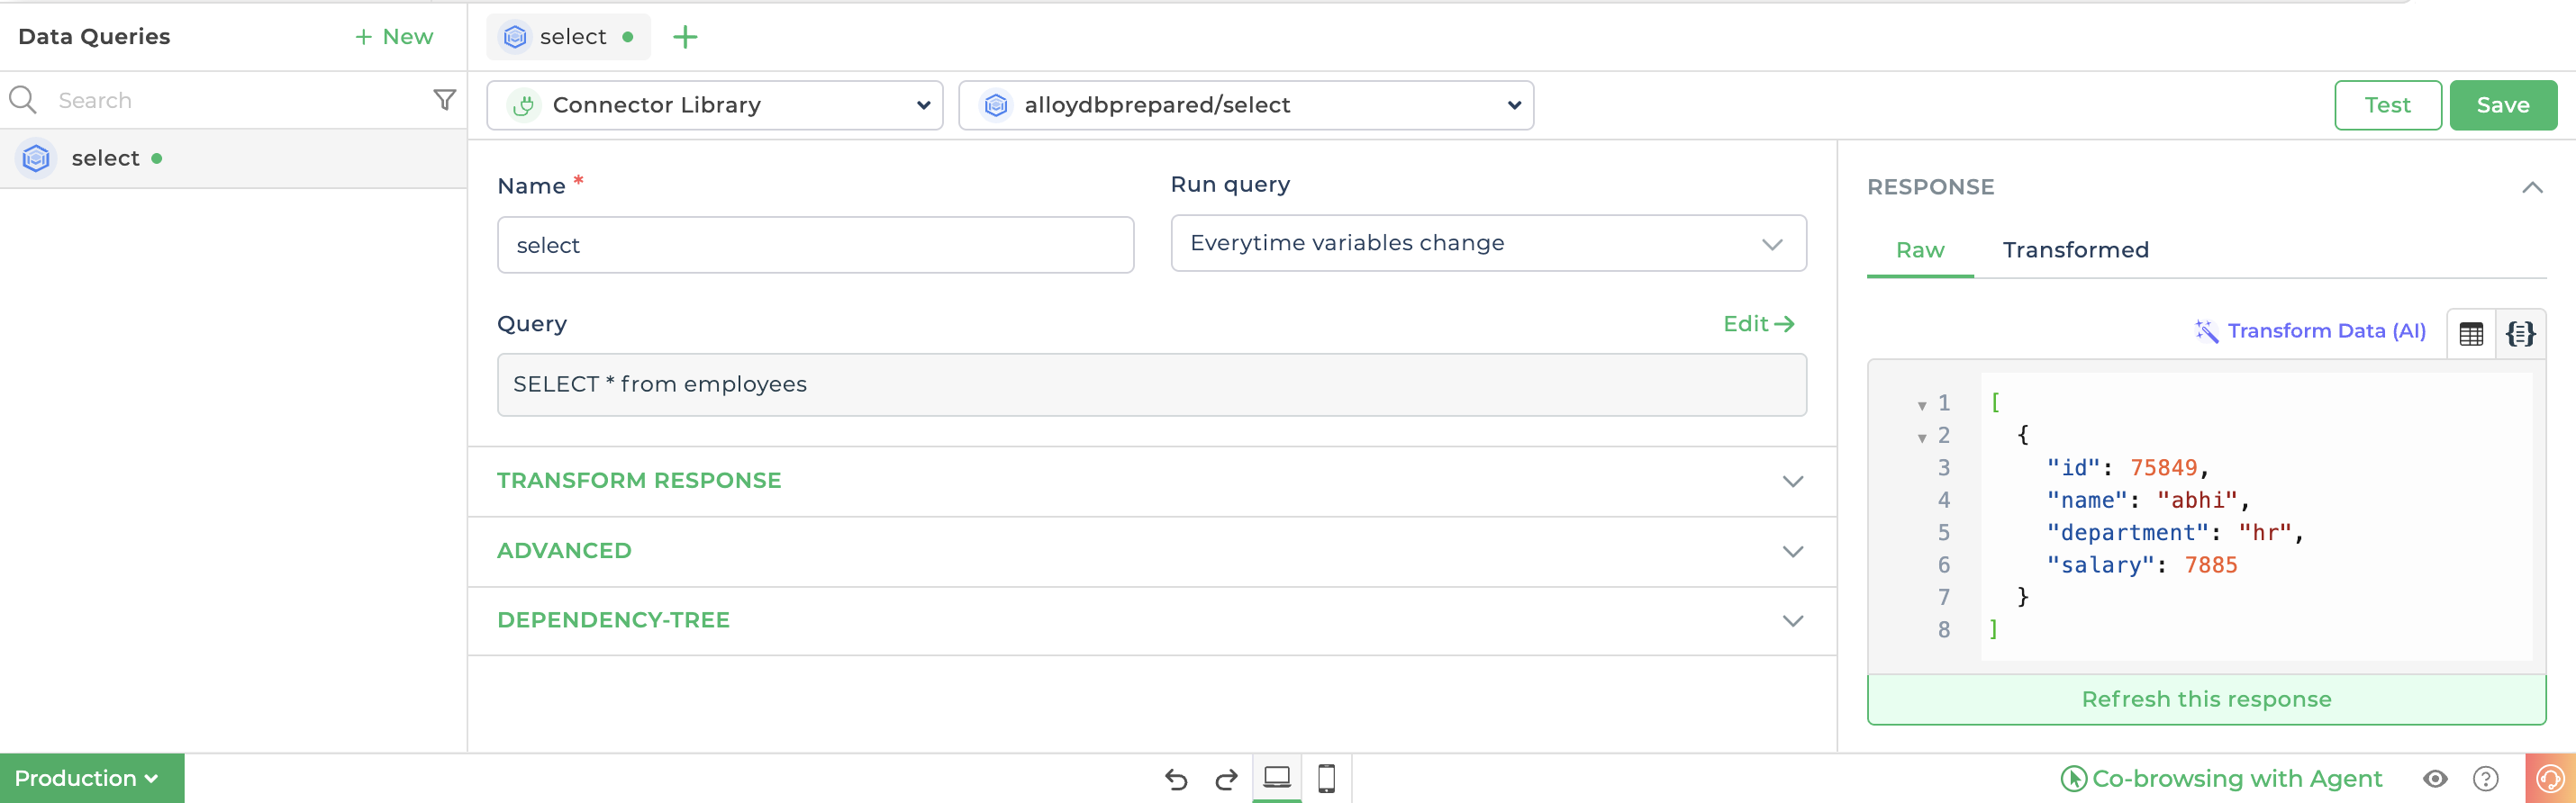
Read/Display Data Query for AlloyDB:
After configuring the AlloyDB connector, locate it in Connector Library. To retrieve data from the AlloyDB database, add a query to read the data.
Query used:
select * from employees
Query explanation:
This query selects all details from the employees schema's table, allowing you to display the data.
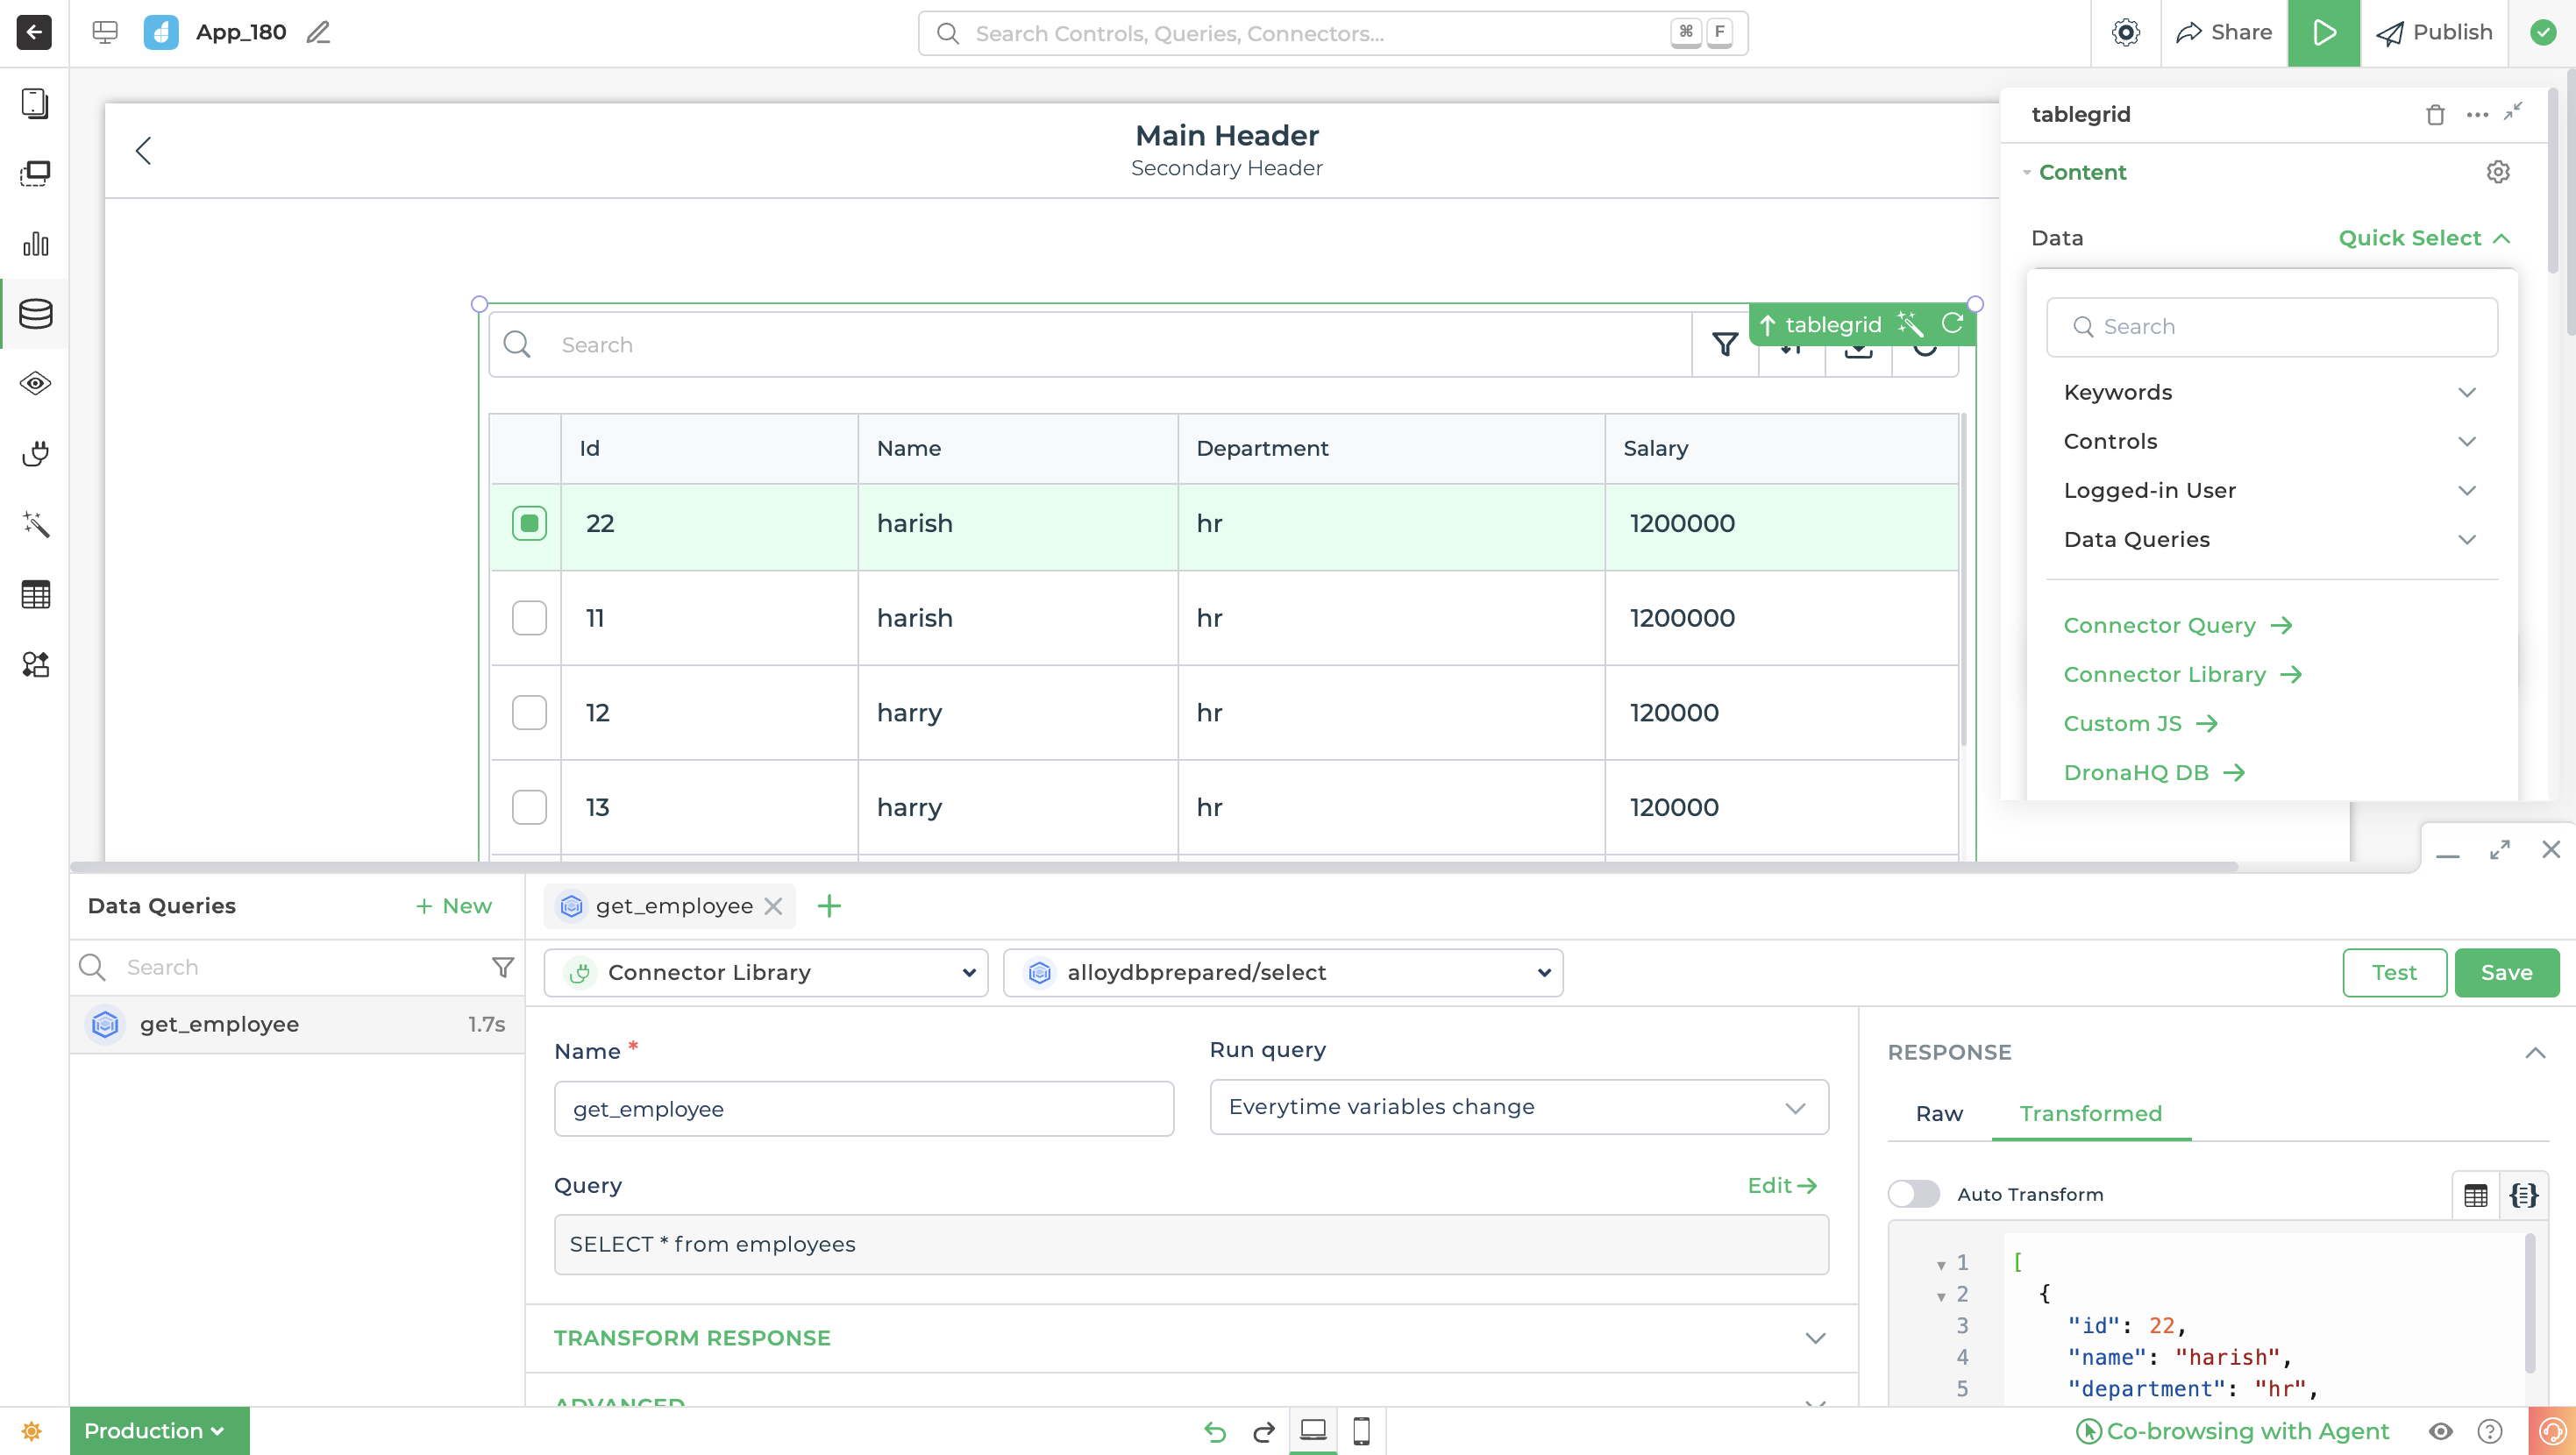
Place the Table grid control from the Controls section. Bind data by selecting the AlloyDB connector from
Data Bind Options -> Quick Select -> Connector Library. Choose the relevant query for displaying data and bind the
preferred columns.
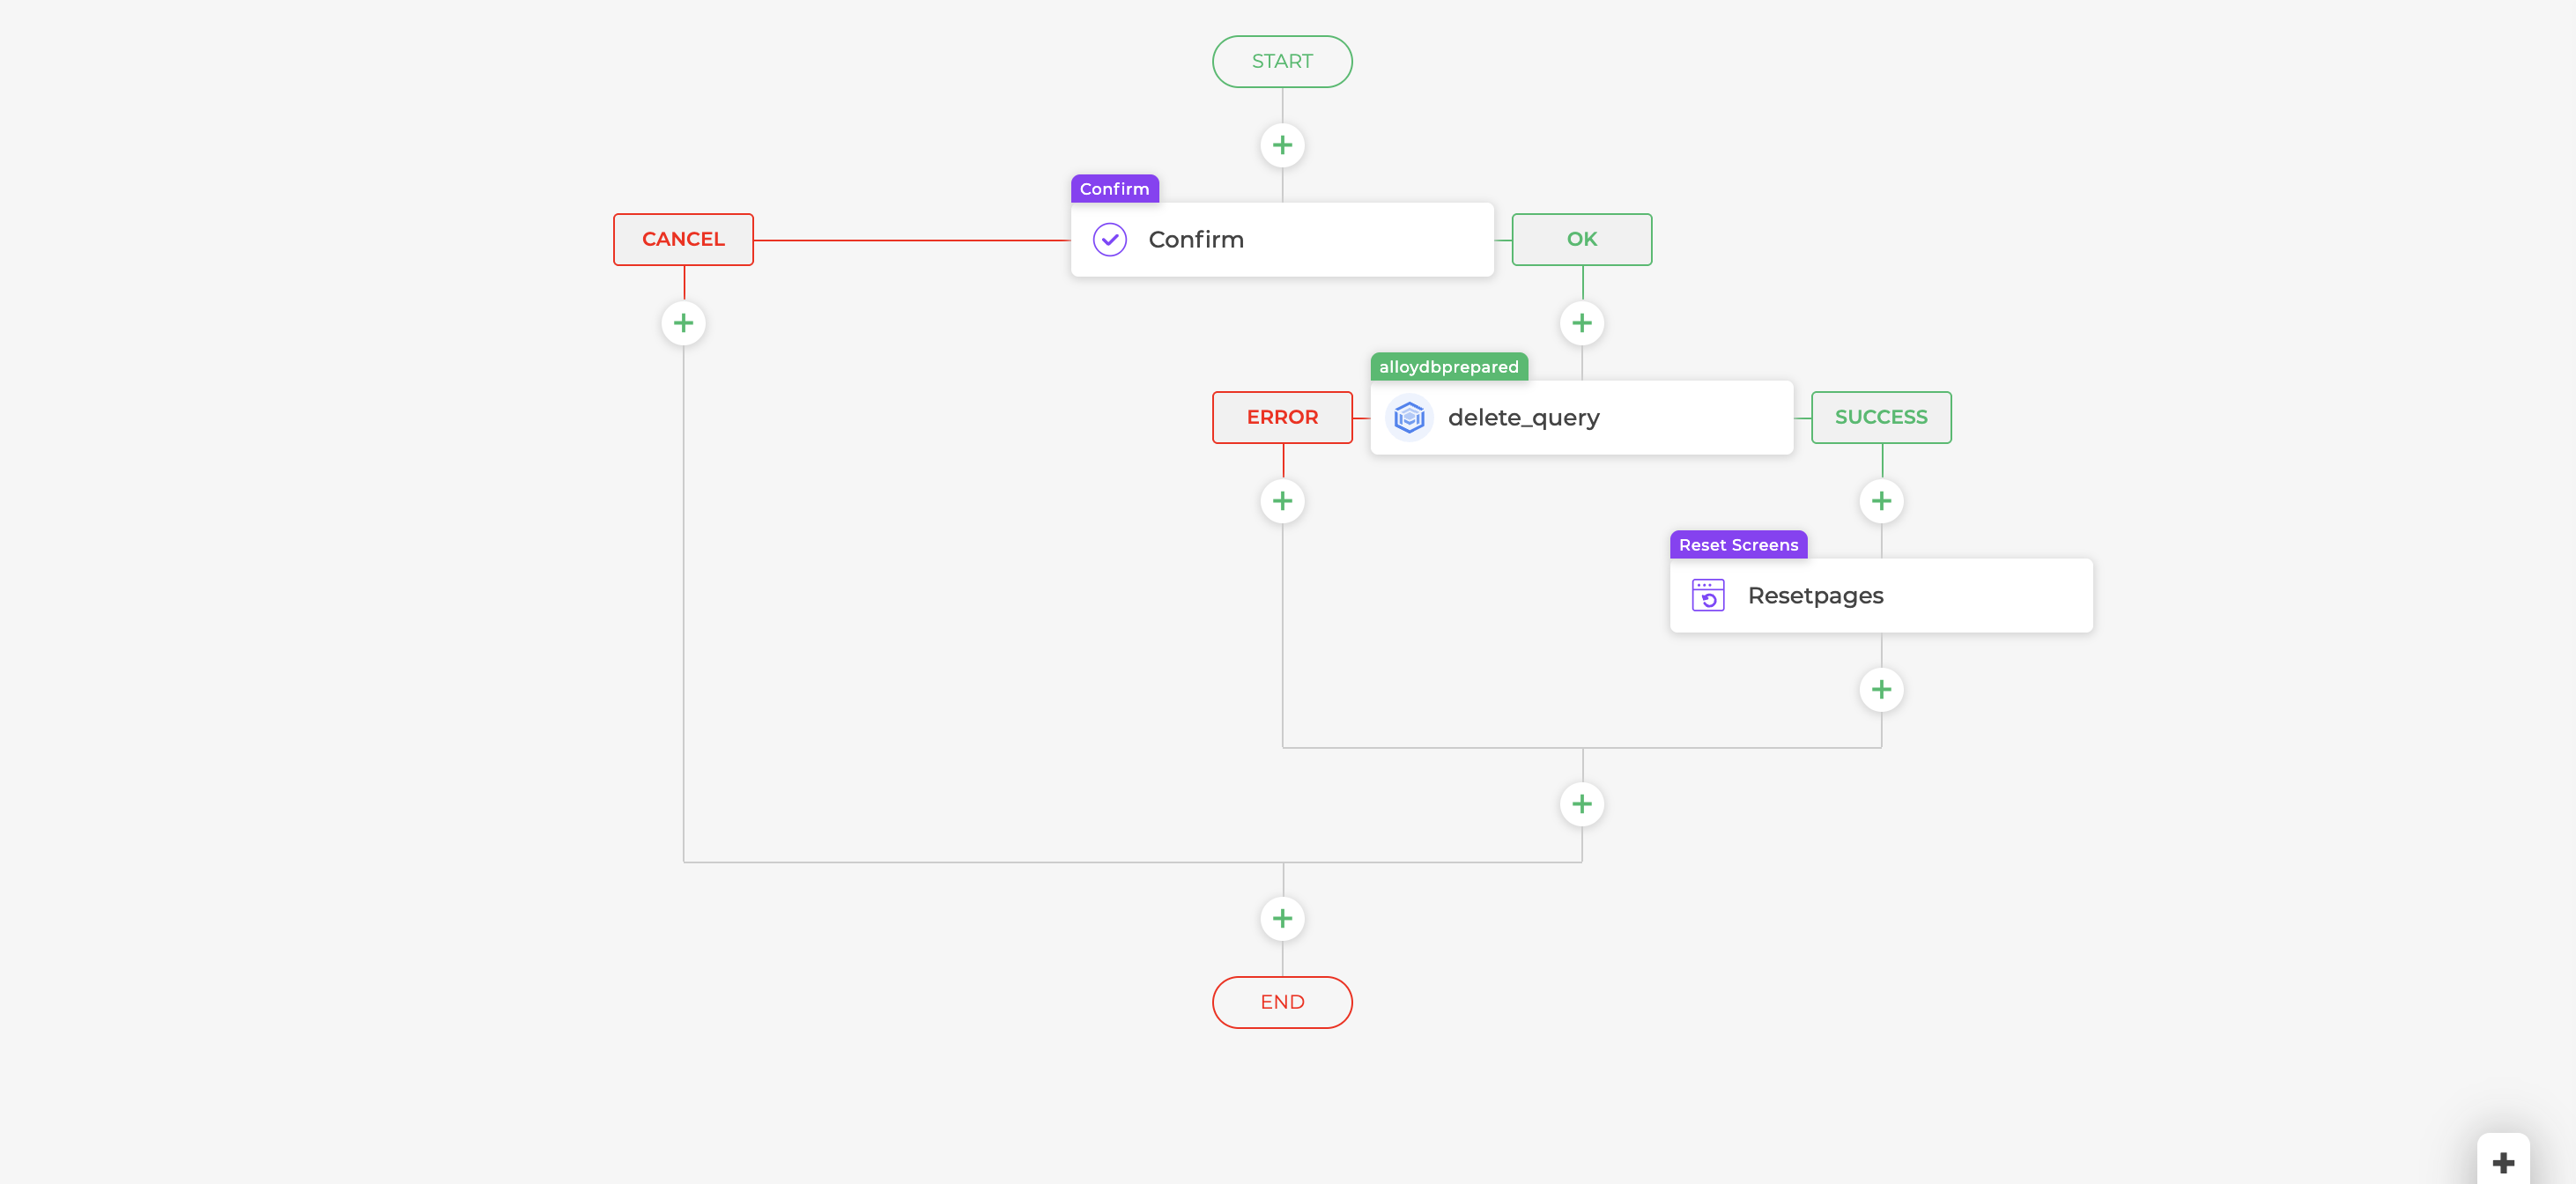
Using in Actionflow blocks
Delete Data Query:
For data deletion, create a query to remove details related to selected data.
Query used:
DELETE FROM employees WHERE id = {{id}};
Query explanation:
This query operates a delete action on the employees table, targeting the user-selected ID (primary key) for
removal.
After saving your query after successful configuration testing.
In the table grid's Actions, choose
delete_click.Build the action flow:
- Confirm task for user delete confirmation.
- Server-side action with the delete data query.
- Bind the id connector key to capture selected row's id.
Access id using Use Keywords for smooth action flow.