ClickHouse
ClickHouse is a fast open source OLAP DBMS that can come to use for such applications. So let’s see how we can integrate ClickhouseDB in DronaHQ.
Of course, here's the prerequisite information for connecting to ClickHouse in the requested format:
Prerequisite
Authentication Requirements: Before establishing a connection with your ClickHouse instance, ensure you have the necessary authentication credentials, which include:
- ClickHouse database URL.
- Username for accessing the ClickHouse database.
- Password associated with the provided username for authentication.
Connection Details:
- Obtain the ClickHouse database URL, including the protocol (e.g.,
https) and port number. - Enter the username required to access the ClickHouse database.
- Provide the password associated with the specified username.
- Obtain the ClickHouse database URL, including the protocol (e.g.,
Firewall and Network Configuration:
- Configure your firewall to allow communication between your application and the ClickHouse server.
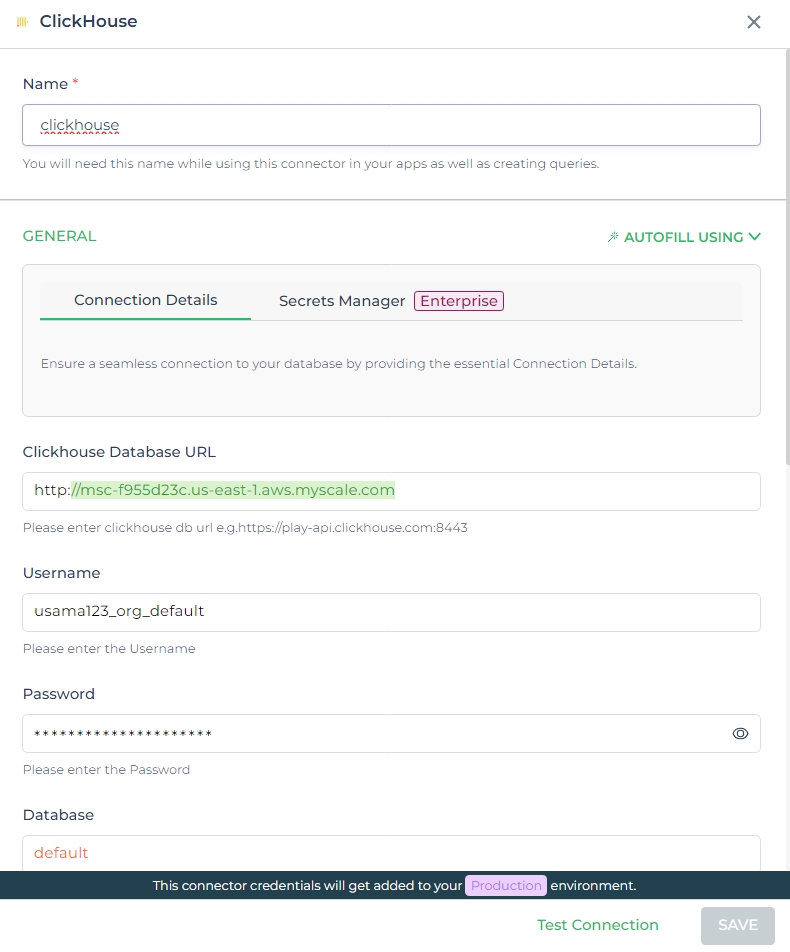
Configuring Connector in DronaHQ
Configure your database category using the provided details. Validate connection with Test connection and Save
settings for secure database setup.
General
| Field | Description |
|---|---|
| ClickHouse database URL | Please enter clickhouse db url e.g.https://play-api.clickhouse.com:8443 |
| Username | Enter the Username |
| Password | Enter the Password |
| Database | Database name will help in populating schema in query editor |

Admin
| Advanced Option | Description |
|---|---|
| Connection Options | The key and value connection options in database configuration refer to specific settings (keys) and their corresponding values that dictate how the application connects to the database |
| Use Dynamic Database Host | Dynamically determine the host for the database connection. |
| Use Dynamic Database Name | Set the database name dynamically, allowing easy switching between databases. |
| Use Dynamic Database Credentials | Enable dynamic database credentials for secure and convenient management. |
| Connect using SSL | Securely access the database using an encrypted SSL connection, ensuring data integrity and confidentiality. |
| Whitelist IP | Enhance security by restricting database access to specific whitelisted IP addresses. |
Adding Database Queries
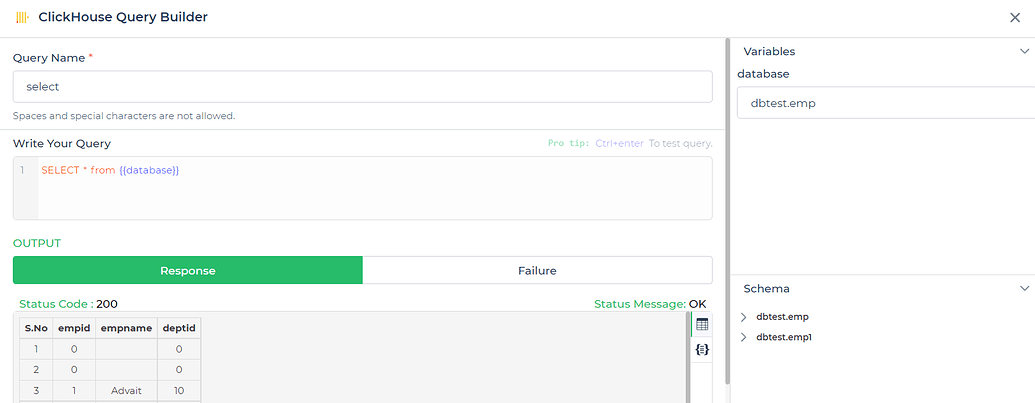
After configuring the connector, access it in your Connector Library. To add queries, click Add query once the
connection is ready. Create simple or complex queries, view tables and fields. Input Query name, run the query, and see
results in Response.

Use double curly brackets for dynamic variables. Test with sample values before saving. Link dynamic variables to controls/actions and more for runtime use.
Saved queries appear under your connector in Connector Library.
Supported Query Operations
| Operations | Description |
|---|---|
| Raw SQL Query | Various select, insert, delete, update, join operations which are supported by PostgresSQL query. e.g. - select * from UserInfo; |
| Stored Procedure Call | You can call store procedure similar to that we call from workbench. e.g. - CALL getUserInfo; |
Using ClickHouse Connector
Data Bind using Data Query
Read/Display Data Query for ClickHouse Connector:
Start by constructing an SQL query to extract data from your ClickHouse database using the ClickHouse Connector. Consider a scenario where you want to retrieve all data from a specified database. The SQL query is:
Query used:
SELECT * FROM {{database}};
Query explanation:
This SQL query retrieves all rows and columns from the specified database within the ClickHouse database.

Integrate the fetched data into your application's interface.
a. Access the Controls section and introduce the Table grid control.
b. Navigate to Data Bind Options -> Quick Select -> Connector Library.
c. Opt for the ClickHouse connector and choose the query that aligns with your data presentation goals.