Chat
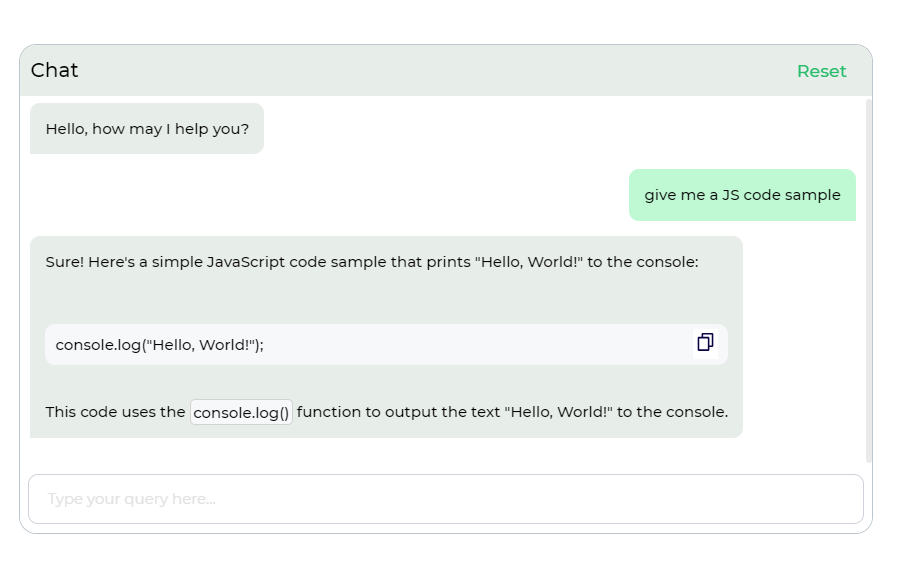
The Chat control is a powerful tool for engaging in real-time conversations with a virtual assistant or other users. This dynamic component offers an intuitive chat interface designed for interactive communication and enables seamless integration with OpenAI, unlocking a world of possibilities for your chat applications.

Binding Data Options
The Chat control allows you to configure the interactions and messages for your chatbot or virtual assistant. You can customize the chat messages and responses through binding data options. This feature is particularly useful for providing chat history to users so they can continue from where they left off.
Static Messages
Static messages are predefined text or content that the chatbot can display during the conversation. Users can use the following example for static data binding:
[
    {
        "role": "system",
        "content": "You are a friendly assistant, answer any question that the user asks in brief words."
    },
    {
        "role": "assistant",
        "content": "Hello, how may I help you?"
    },
    {
        "role": "user",
        "content": "what is the capital of India?"
    },
    {
        "role": "assistant",
        "content": "The capital of India is New Delhi."
    }
]
This example demonstrates a conversation between the user and the assistant.
Properties
| Property | Description |
|---|---|
| Use Inbuilt Integration | Toggle this ON to enable configure the integration settings for inbuilt chat models. |
| Account | Specify the account for the chat model. |
| Model | Choose the chat model for the conversation. |
| Max Tokens | Set the maximum number of tokens for chat responses. |
| Temperature | Control the randomness of chat responses (higher values make responses more random). |
| Welcome Message | Display a welcome message for the chat users. |
| System Instructions | Provide system instructions for the chatbot, specifying its behavior and responses. |
| Custom Button | Add a custom button to the chat interface. |
| Button Image | Specify the image for the custom button. |
Control Outputs
The Chat control offers an output placeholder {{chat}}, which captures the user's chat messages and can be referenced in other controls, data queries, or JavaScript functions.
| Output | Description |
|---|---|
| chat | Represents the user's messages and interactions in the chat control. |
Events
| Event Name | Description |
|---|---|
| on_user_input | Occurs when a user sends a message or input in the chat. |
Using Chat Control
Inbuilt Integration
In the Chat control properties, users can toggle on Use Inbuilt Integration and select from the Account dropdown.
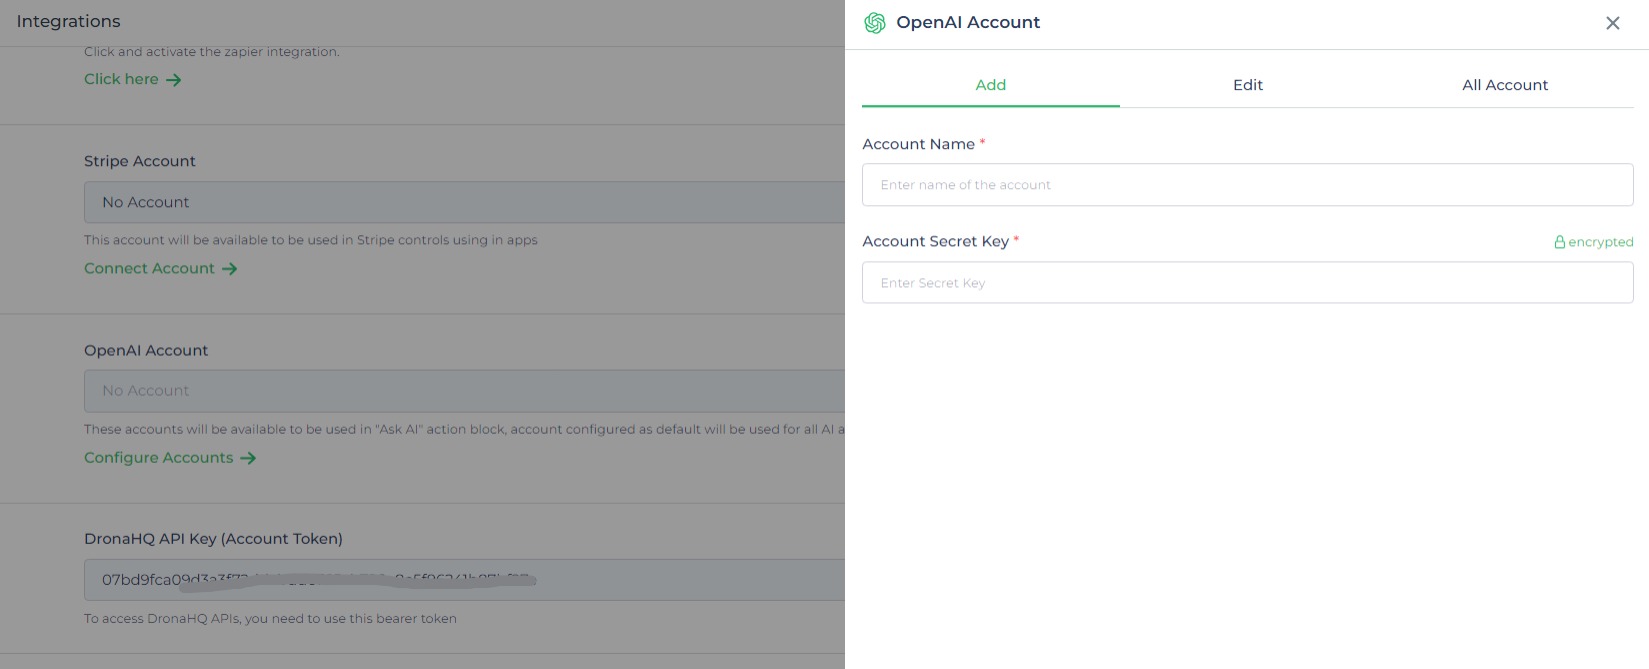
This dropdown contains all the configured OpenAI Account integrated in DronaHQ.
Configuring OpenAi Account on DronaHQ
Go to Account Settings > Integrations > OpenAI account. One can ADD, EDIT and view ALL ACCOUNTS from here.

Using Third-Party Integration
Now, let's explore integrating a third-party solution into our chat control. It's a simple process requiring the creation of a REST API connector for our third-party AI integration.
Once the connector is set up, we'll connect it in the Action flow through server-side actions triggered by the on_user_input event.
Providing Connector Input from Chat Control
The chat control supplies data through the {{chat}} keyword in a JSON Array format containing role and content.
For example:
[
    {
        "role": "user",
        "content": "Where is India?"
    }
]
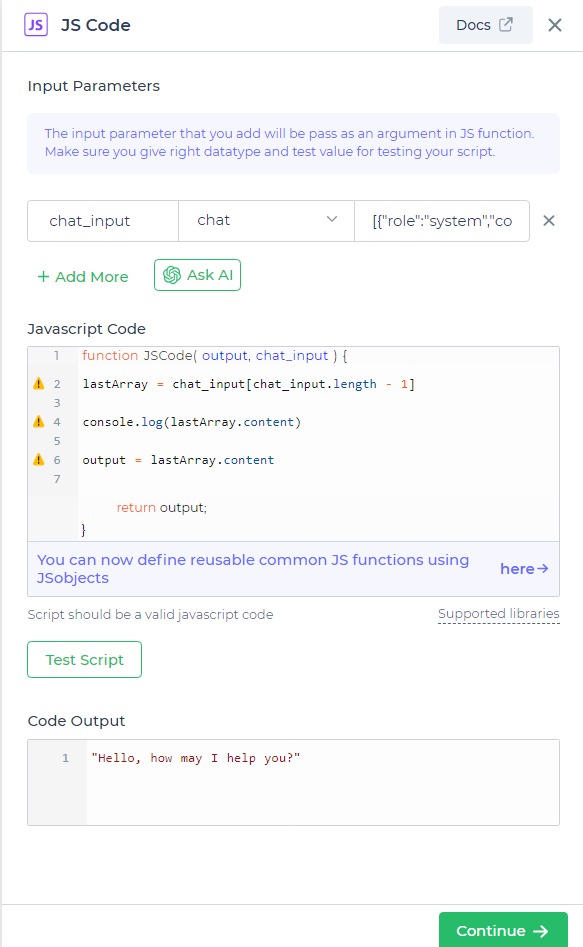
Ensure that we carefully pass the content carefully in the connector, for that we can use JS Code block action to do a transformation.
  function JSCode( output, chat_input){
    lastArray = chat_input[chat_input.length - 1]
    output  = lastArray.content
    return output
  }

Maintaining chat history
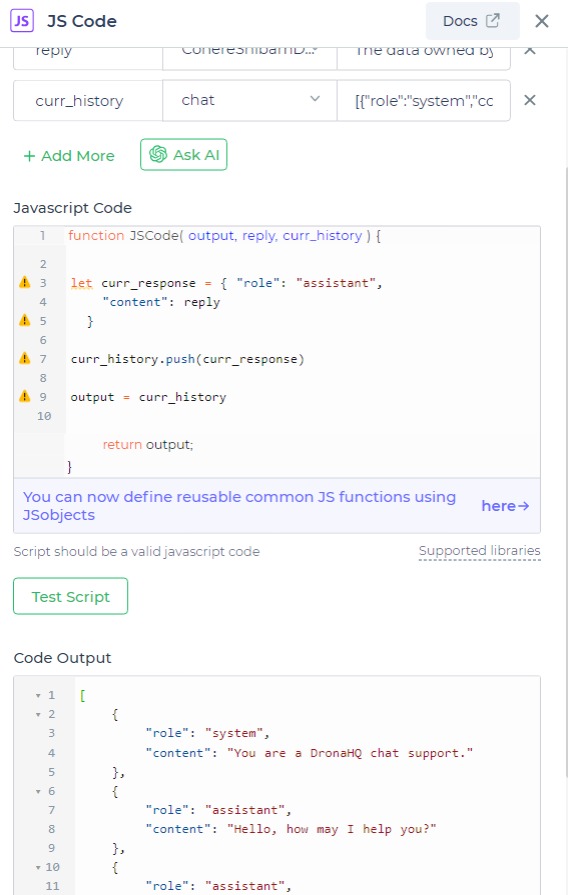
There's a possibility that the connector might not return the chat history, which could disrupt the chat display. To counter this, we can maintain chat history using a JS Code block action to append a new JSON Array into the previous one. Here's an example code snippet:
let curr_response = {
    "role": "assistant",
    "content": reply
}
curr_history.push(curr_response)
output = curr_history

Now, the third-party integration is set up for use in the chat control. Simply display the new history with the updated response from the connector.